Weathering Adventures
Weathering for Model Railroads/Railways is a developing artform. I have been experimenting with techniques off-and-on for a year or so with a range of results…
My Weathering Recipe
There was quite a psychological barrier to overcome when I first decided to attempt weathering my rolling stock. After some early endeavours which I was less than satisfied with, I took time to research what others were doing and recommending as viable weathering techniques. From that I developed an approach – consistent with others to a large degree – that I’m happy with. I’m now starting to add my own variations too.
Preparation
- Locate Photographs – they don’t have to be the same car although that’s the ideal scenario. Note the build/maintenance date on the model relative to the period you’re modelling. The newer the car, typically, the lesser the extent of weathering. See my Pinterest page ‘Weathering’ for a range of ideal photographs for my period and region.
- Disassemble the model – the extent of disassembly is dependant on the detail parts included with the model and the overall effect you might be trying to create. Minimum, remove trucks and the body shell from the freight car underbody/chassis. I do not tend to remove roof walks. Keep all the parts in a parts box in a place that will avoid it getting knocked over. I know!!
- Clean up moulding lines, etc. – Take the opportunity to remove any moulding lines, burrs etc from any moulded pieces.
- Burr decals if needed – If you’re going to create a particularly weathered effect, now’s the time to “distress” any decals on the model. This can be achieved using fine sandpaper and/or a sharp blade. Take particular care not to scrape too deep as it is very easy to also remove the paint base-coat beneath the decal.
- Consider adding/replacing details – Now’s a great time to improve your model. An old Athearn blue-box model can be improved significantly by replacing the roof walk, brake wheel, stirrups and adding air hoses.
- Clean in warm soapy water – If you intend to use acrylics as I do for basic fading, it is important to delicately wash the model in warm water including a dash of mild detergent. Use a soft-bristled brush to remove grease and dust. Dry off by patting down with a lint free cloth and let stand in a dry place for 24 hours. The process can be accelerated using a hair dryer on a moderate heat setting – not too hot!
- Masking – I mask couplings and the openings of coupler draft boxes to minimise the risk of paint fouling the precise coupler action. I have found Tamiya masking tape works well but I’m sure any modeller’s masking tape will be effective.
Basic Body Shell Fading
- Apply matt varnish to the freight car body shell: It is important to apply an initial flat finish to the body shell. The best product I have used so far is Testors Dullcote Matt Finish. That product is no longer available in my region. I have started to experiment with other matt finishes but without the same effect as the Testors product including: Ammo Mig Lucky Varnish and Krystal Kote Matt Varnish.
- Fading: The amount of fading will be different for each piece of rolling stock. The age of the freight car relative to your modelling period is a key factor – but not the only factor. This is where having photos of actual freight cars is a great help.
- The Basic Fade: The fading technique I apply uses an airbrush and Tamiya XF-2 (flat white) mixed with Isopropyl alcohol, preferably 99% but not essential. The mixing ratio is the key: 5-10% white to 90-95% isopropyl alcohol plus one drop of the matching freight car finish colour. You may need to experiment but perfection is not always necessary – see below for some variations.
- Masking: For multi-tone rolling stock i.e. boxcar red sides and black roof, it may be necessary to mask some areas unless you’re skilled with an airbrush.
- Fading various base colours – variations: there are some recommended variations depending on the base colour: Boxcar Red use Terracotta; Grey use lighter grey; Black use darker grey.
- Applying the Fade: I use an airbrush, nothing fancy. I also have a Micro-Mark ‘Hold it Easy‘ to hold the body shell throughout the weathering process. A very good tool. Fading is best built up in multiple – thin – layers over a period of hours or even days. I’m never that patient and have achieved good results with a single fade application. I have seen recommended and tried to apply the fade at a 60 degree downward angle to simulate less fading closer to the ground. I’ve not noticed the benefit myself.
- Reapply Matt Varnish: When dry reapply another coat of matt varnish to the body shell.
- Be patient: Allow at least 24 hours for the fade and matt varnish to cure.
Trucks and Wheelsets
- Remove and paint Wheelsets: The sides of each wheel should be painted – avoiding paint on the exterior face of the flange and wheel tread. I have found using a Minuteman Scale Models (possibly closed?) wheel mask and airbrush very effective. DO NOT paint the axle pinpoint bearings. I use a tiny ball of Bostik blu-tack to mask each wheelset axle pinpoint.
- Wheel colour: Again, photographs are an advantage to gain insight into an effective colour choice. I have found for older freight cars, darker colours are better and I like the effect of using Tamiya XF-69 Nato Black – similar to Floquil Grimy Black.
- Weathering Powders: When using the Nato Black base, I have found I can get the necessary colour variation using various shades of weathering powders applied with a stiff brush.
- Side frames: I paint by hand the exterior faces of truck side frames – avoiding Kadee springs if fitted, again typically using Tamiya Nato Black and weathering powders.
- Solid Bearing Boxes: depending on how much grease has been thrown around, each draft box may benefit from an application of Ammo Mig Engine Grime or similar.
- Reassemble: When dry reassemble the truck and put aside.
Chassis/Underframe
- Mask the truck pivots: Apply a small piece of masking tape to the truck pivot to avoid paint interfering with the smooth operation of the freight car tucks.
- Chassis/Underframe colour: Again, I’ve had great success simply applying Tamiya XF-69 Nato Black – similar to Floquil Grimy Black – with an airbrush.
- Doing a bit more: I do not apply any more finish/weathering than the Nato Black. I you desire various shades of additional weathering, powders of washes could be applied.
Effects
- Shadowing: Apply a dark wash to all seams, joints and rivet lines. I use Tamiya Panel Line Accent Color (Black) and a very fine brush. Practice makes better. Straight lines are important and it will probably be necessary to practice applying the shadowing in straight lines. Similar effects can be created using thinned oil paint which is rubbed off before drying leaving a residue in crevices and joints.
- Broad effects: I mostly use Ammo Mig Enamel Washes and Streaking effects (also enamel). These are effective for larger areas and should be applied from the top of the model down. I use a flat brush to apply.
- Streaking effect: I mostly use Ammo Mig Oilbrushers for the base oil paint from which I create streaking effects. The technique takes practice and requires a flat brush loaded with thinners and then unloaded on a paper towel before applying to the model. Streaks are created by running the unloaded brush down one side of the oil drop THEN the other and cleaning the brush with thinners between each use.
- Brushwork Tips: Always start at the top and work downwards (except in rare circumstances where splashes may have occurred from below). I use mostly flat brushes for my streaking and other effects. Also, always work the brush all the way to the bottom of the model.
- Logo Fade/Streaking: One weathering effect that occurs reasonably regulalry is logo streaking. I’ve had reasonable results using Ammo Mig Neutral Wash beneath the logo.
- Scratches: These are quite common on older boxcars where doors open. Again, study photographs and use a very fine brush.
Finishing
- One Last Matt Varnish: Apply one last coat of matt varnish to the body shell.
- Reassemble: Reassemble the model.
- Air hose tips: I apply a dab of Aluminium colour to the tip of the air hose.
- Couplings: There is guidance on weathering couplers in Model Railroader magazine. I currently avoid painting couplings.
- Dusting: One last process that seems to work very well for blending all the pieces together is dusting. This is a very light application of matt paint using an airbrush across about the bottom quarter of the model, sprayed from about 250-300mm (10-12″) from the model in a straight line, single pass. The colour of the dust should be that of the predominant geology/soil colour the freight car roams in. I’ve had good results using Tamiya XF-55 (Deck Tan).
Some of my Weathering Adventures
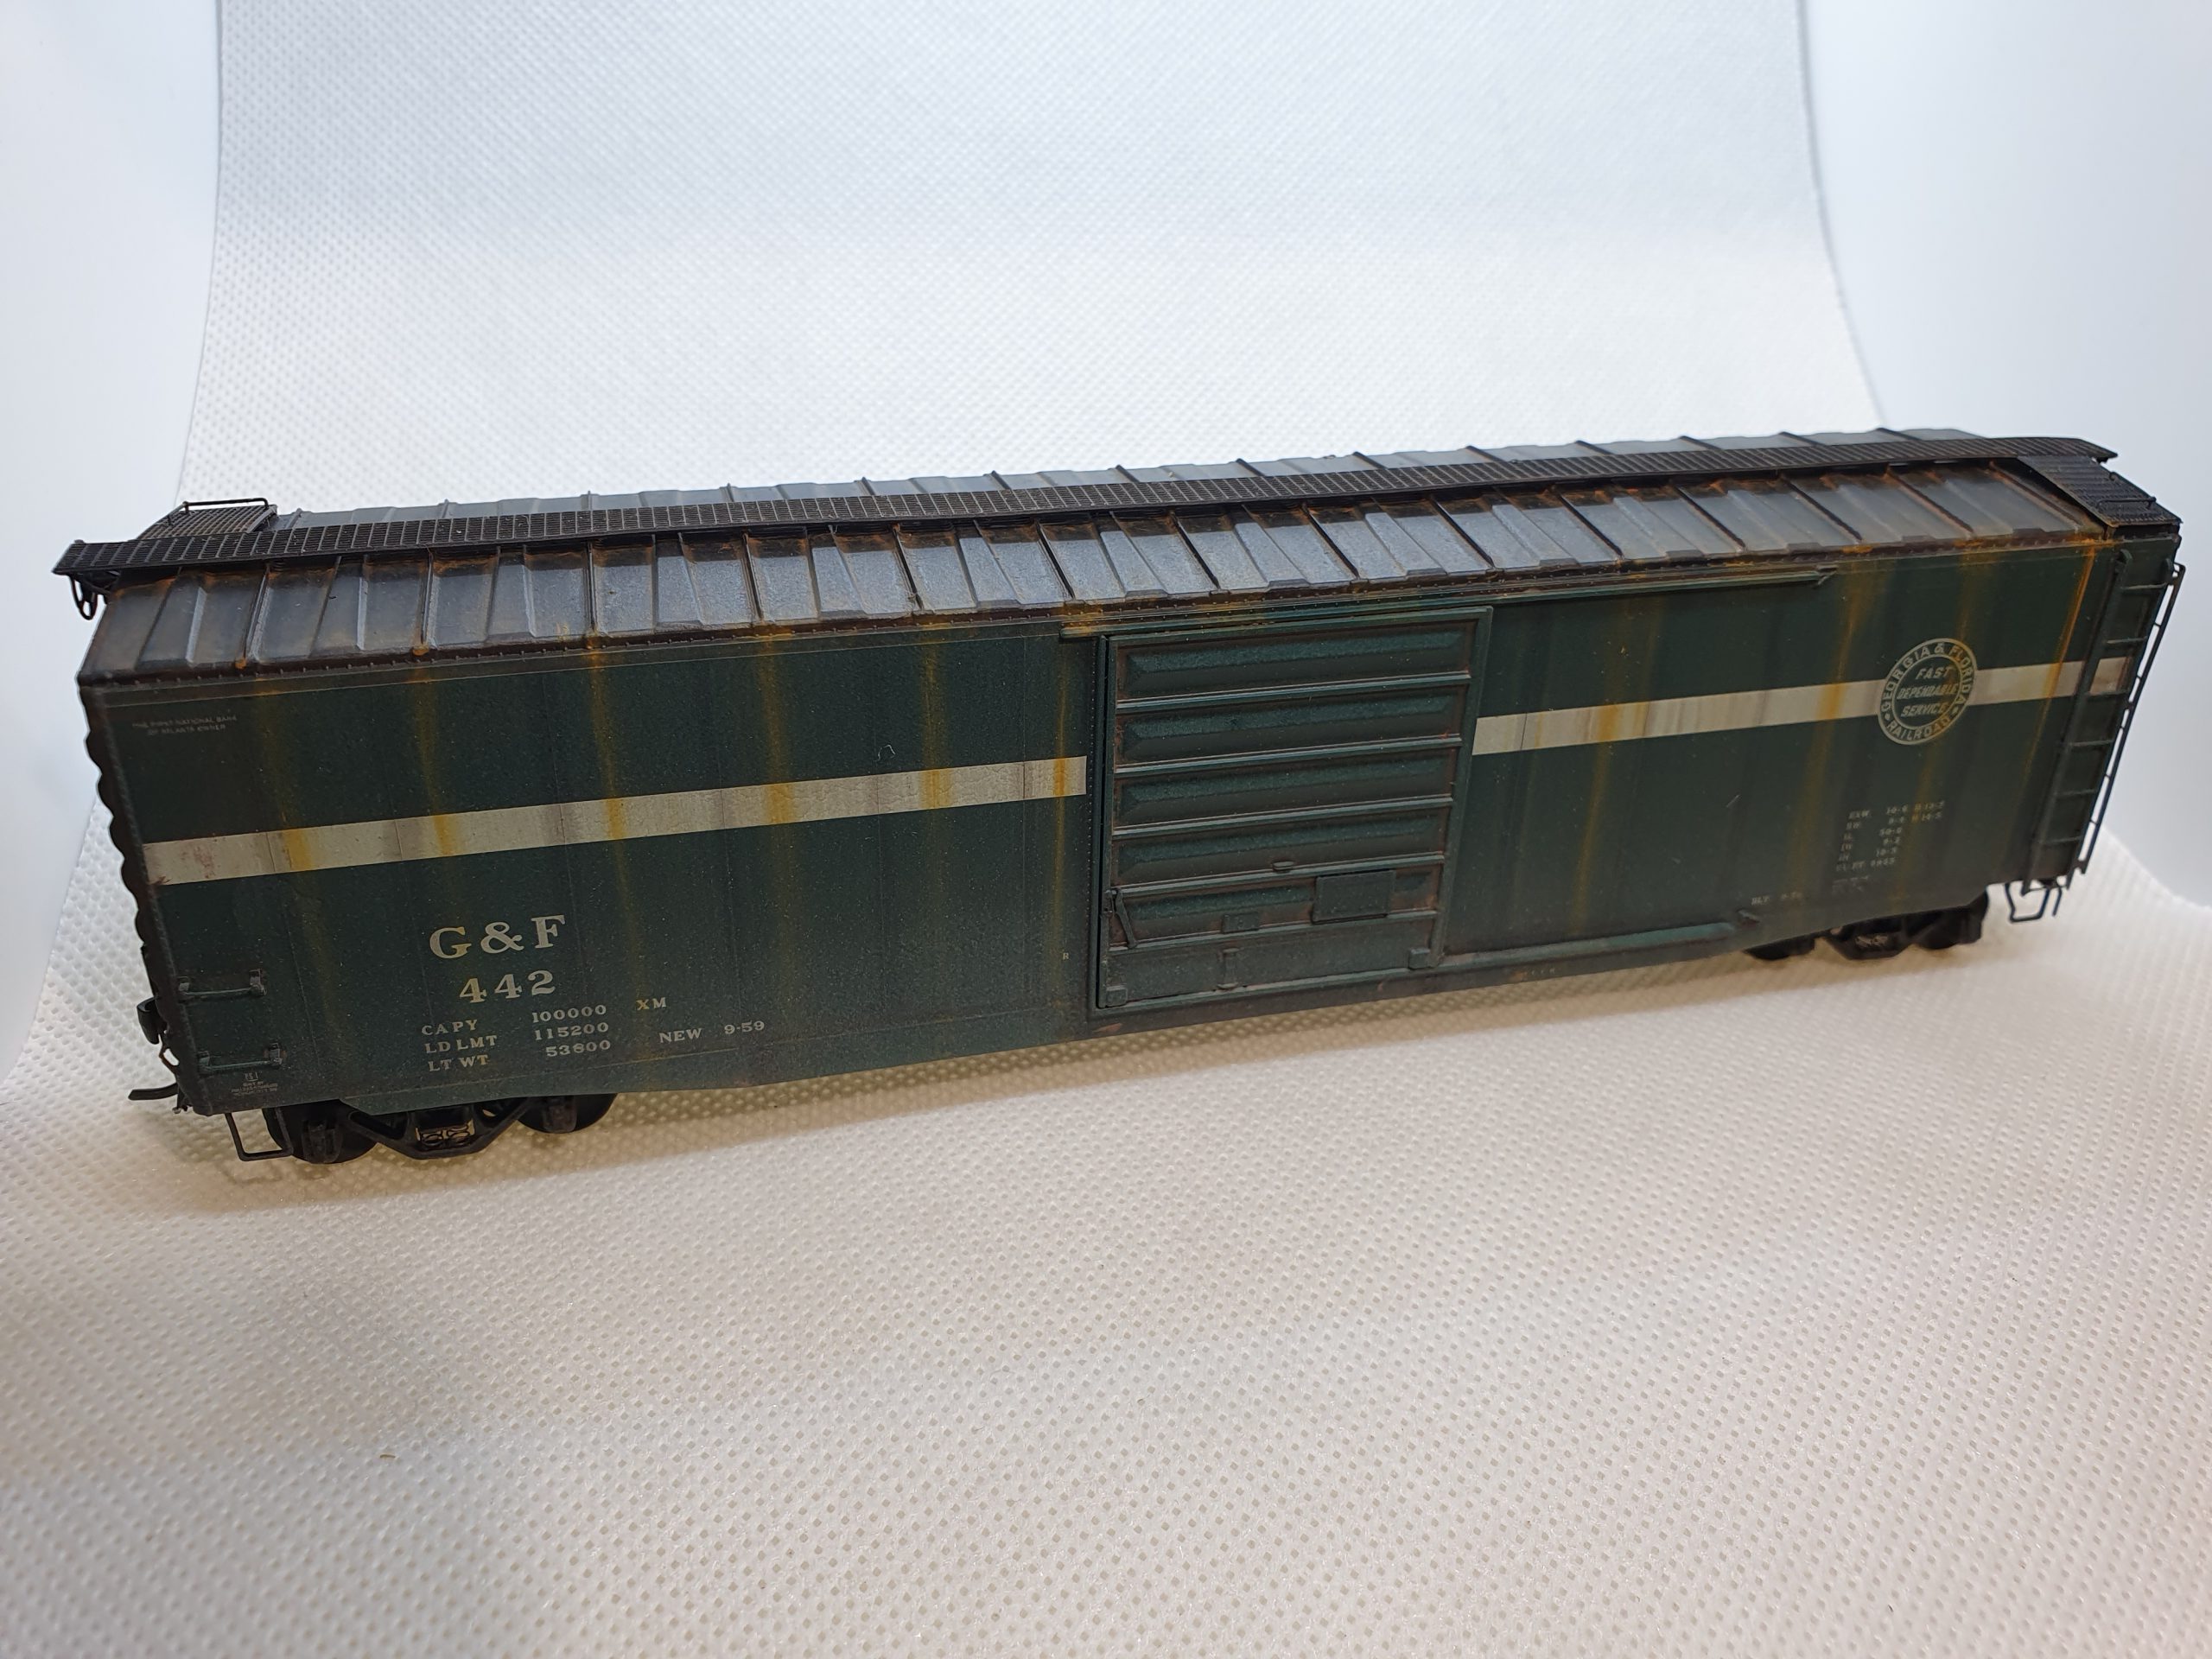
Weathering – G&F442
Kadee 50′ PS-1 car. I bought this second had and poorly weathered. I’m very pleased with what I was able to recover.
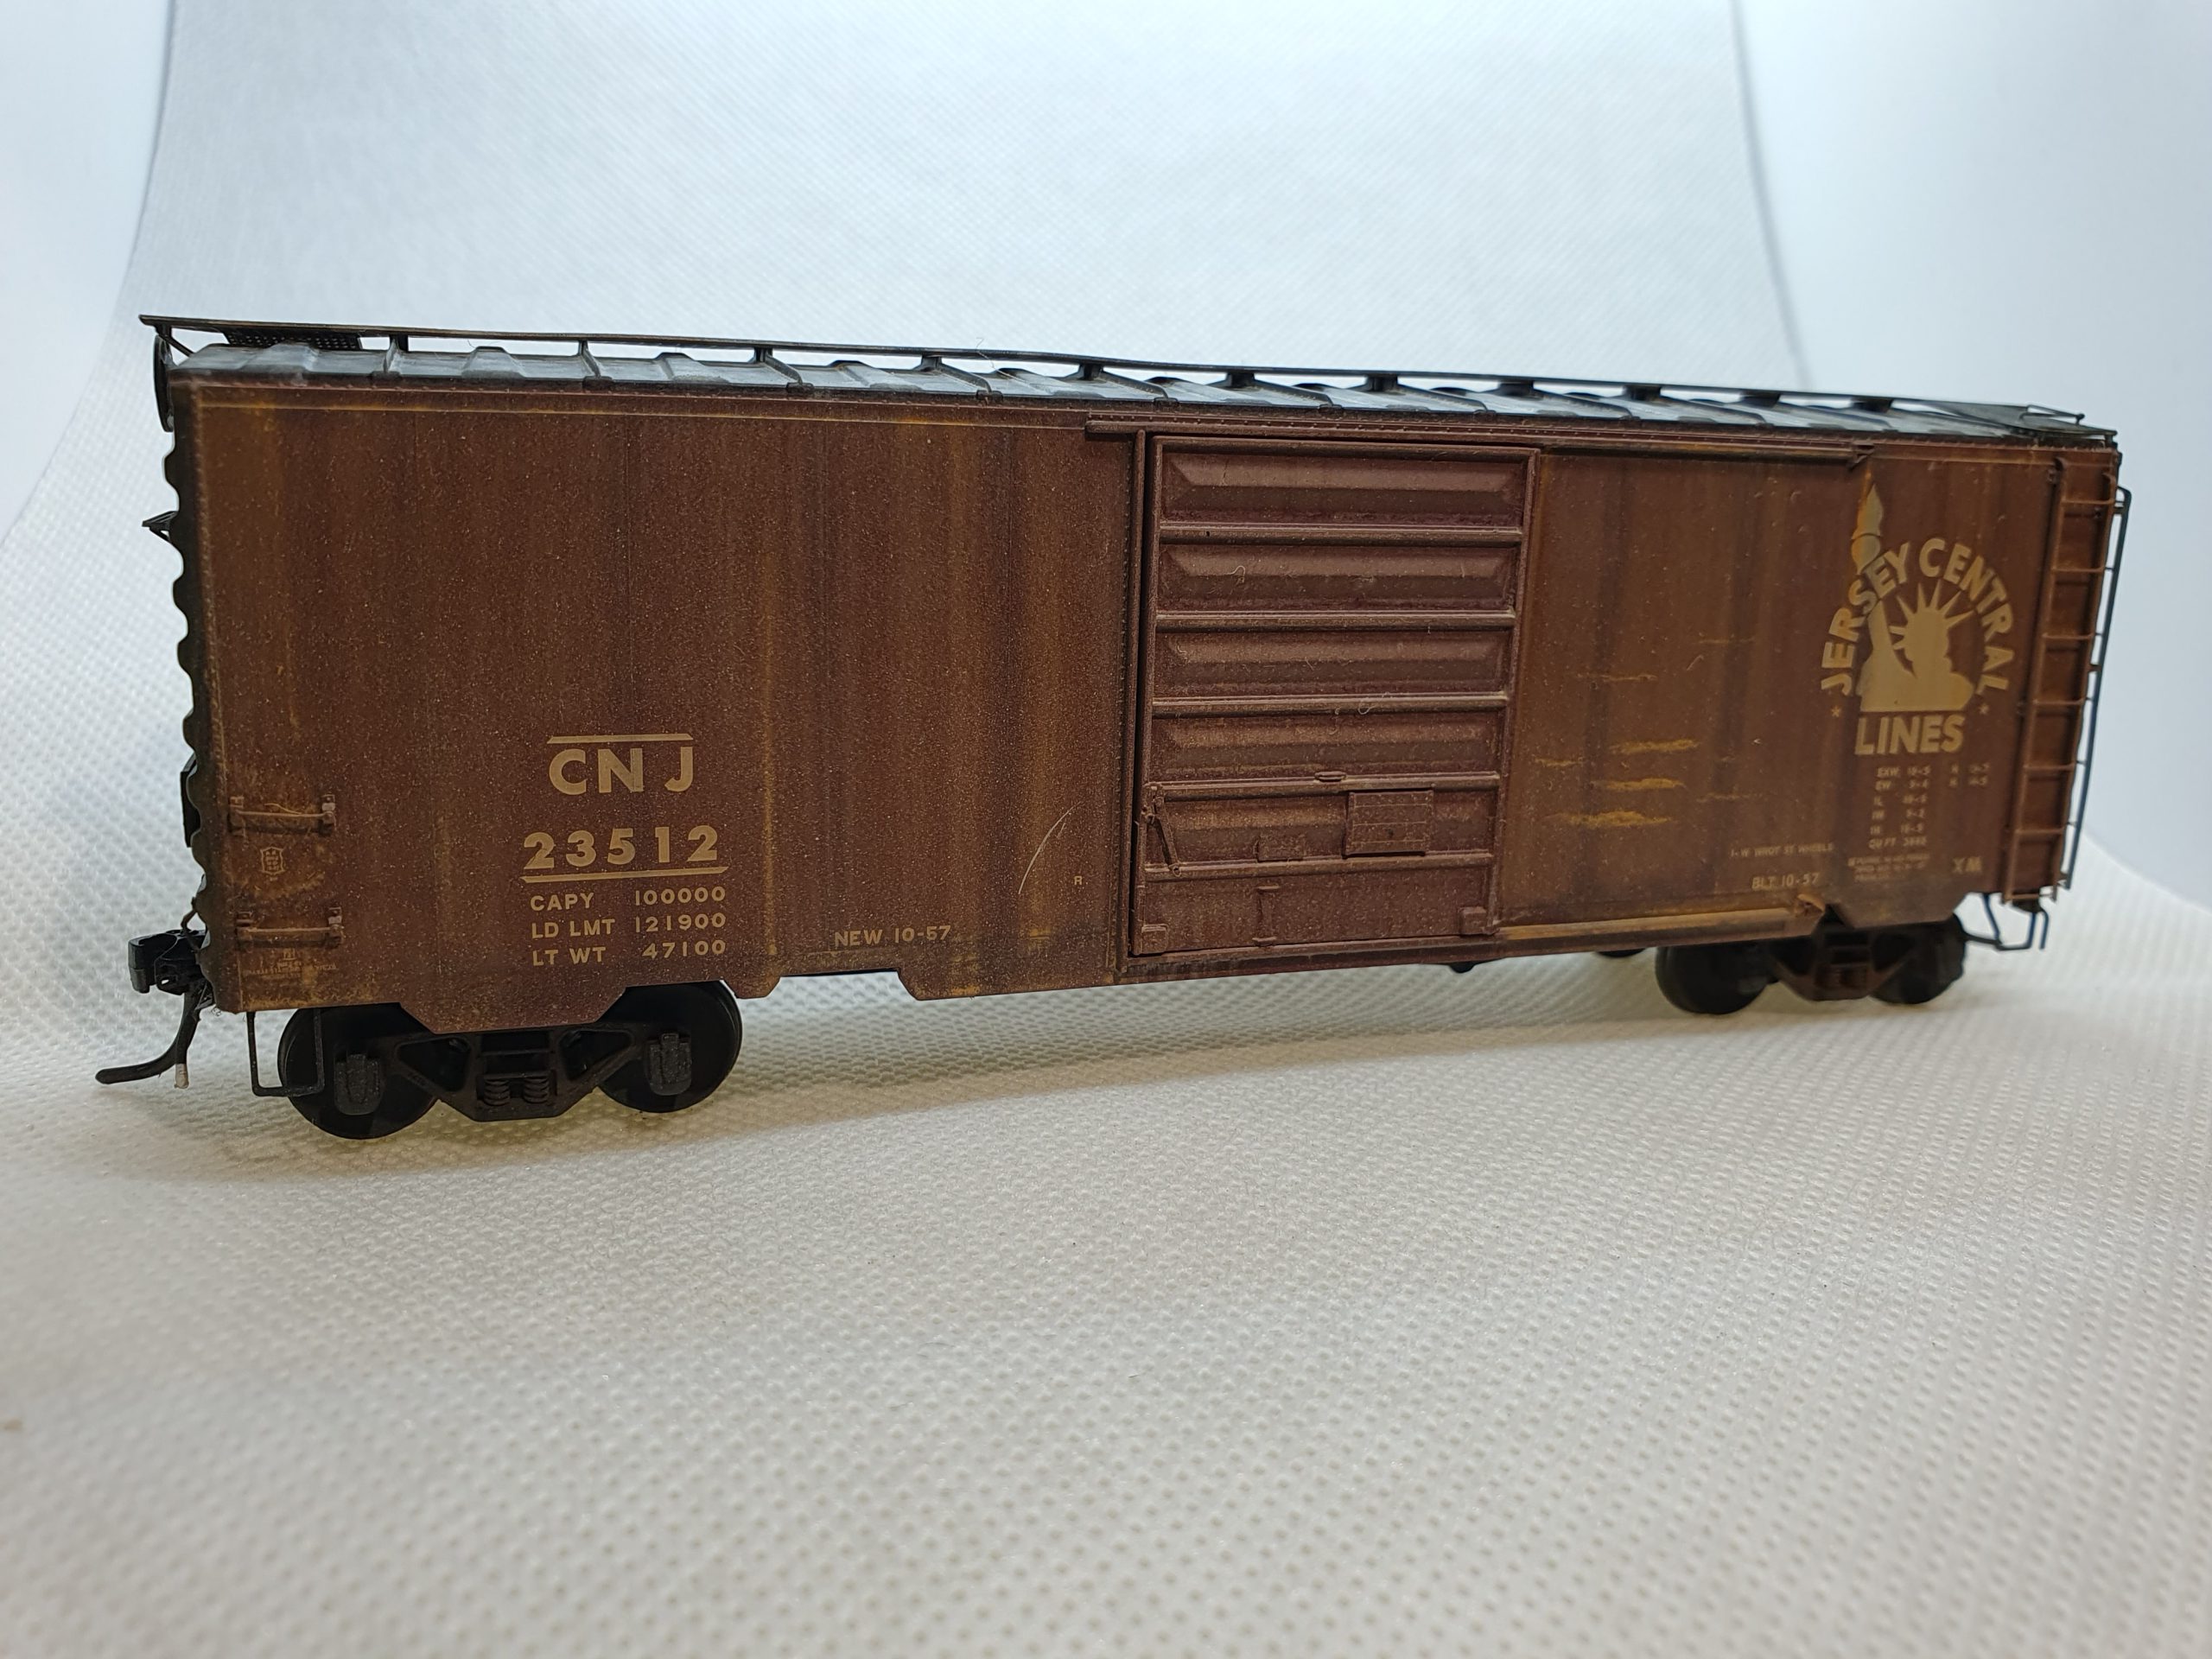
Weathering – CNJ23512
Kadee PS-1 Car

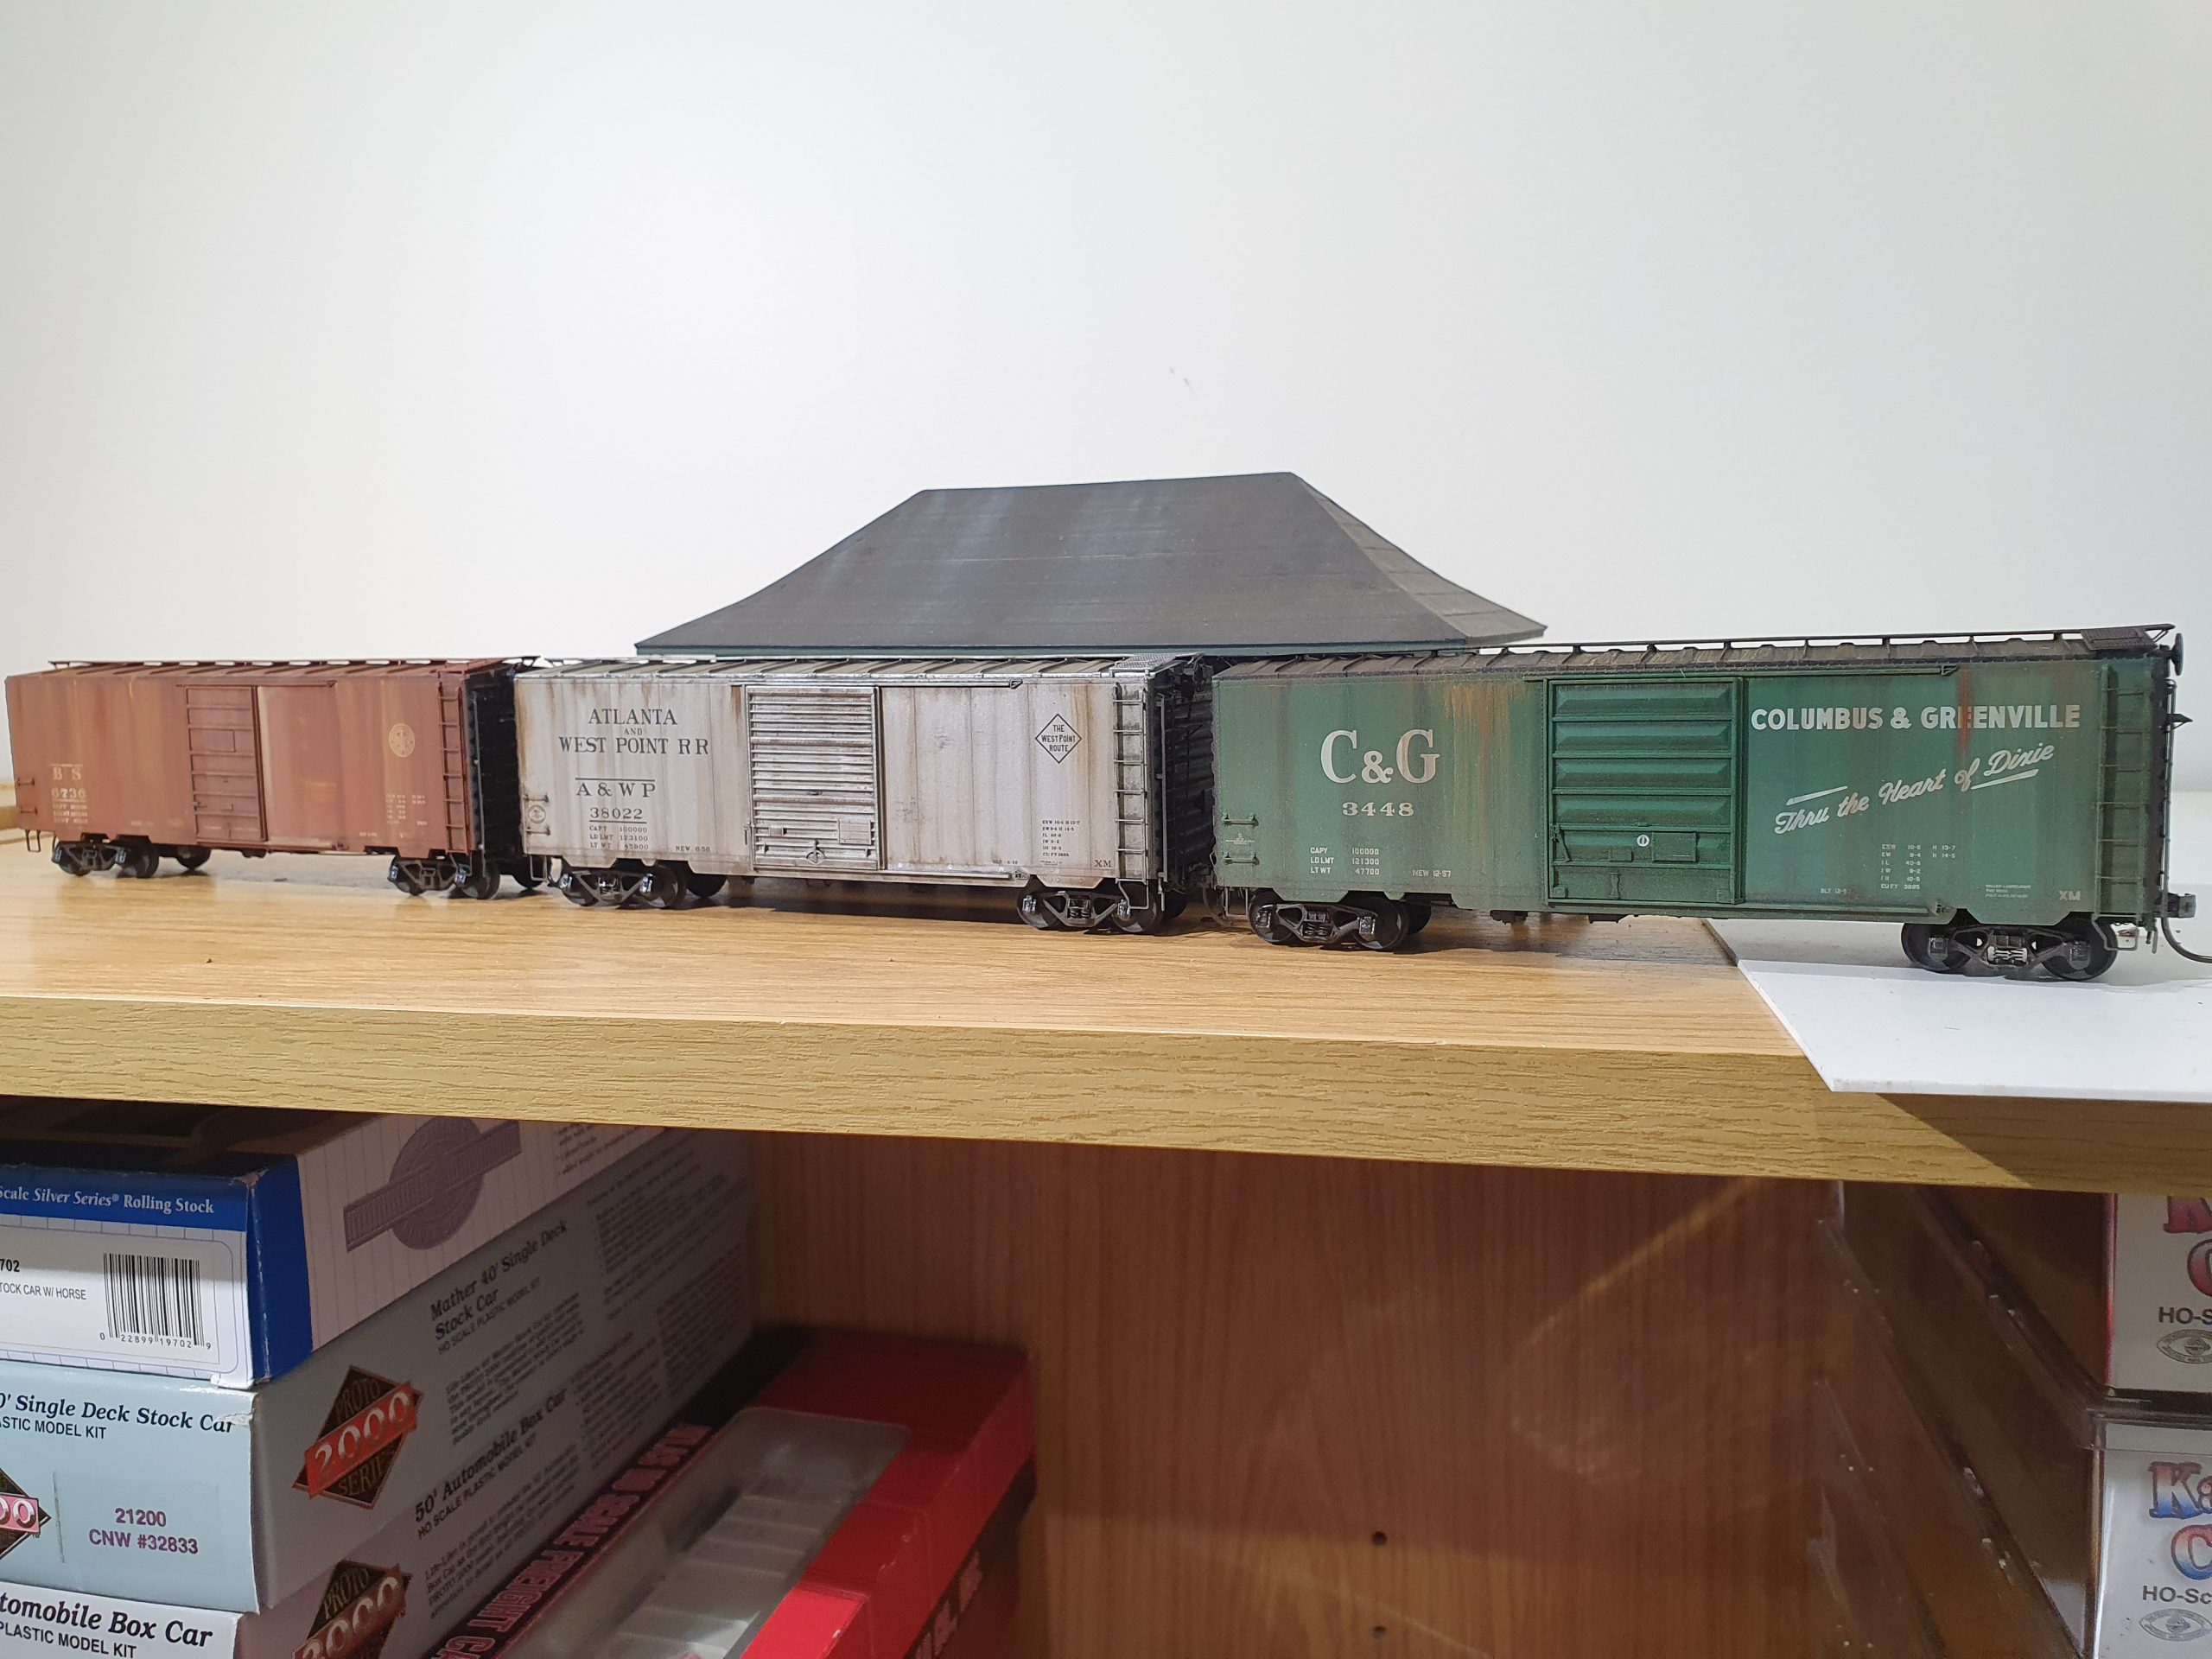
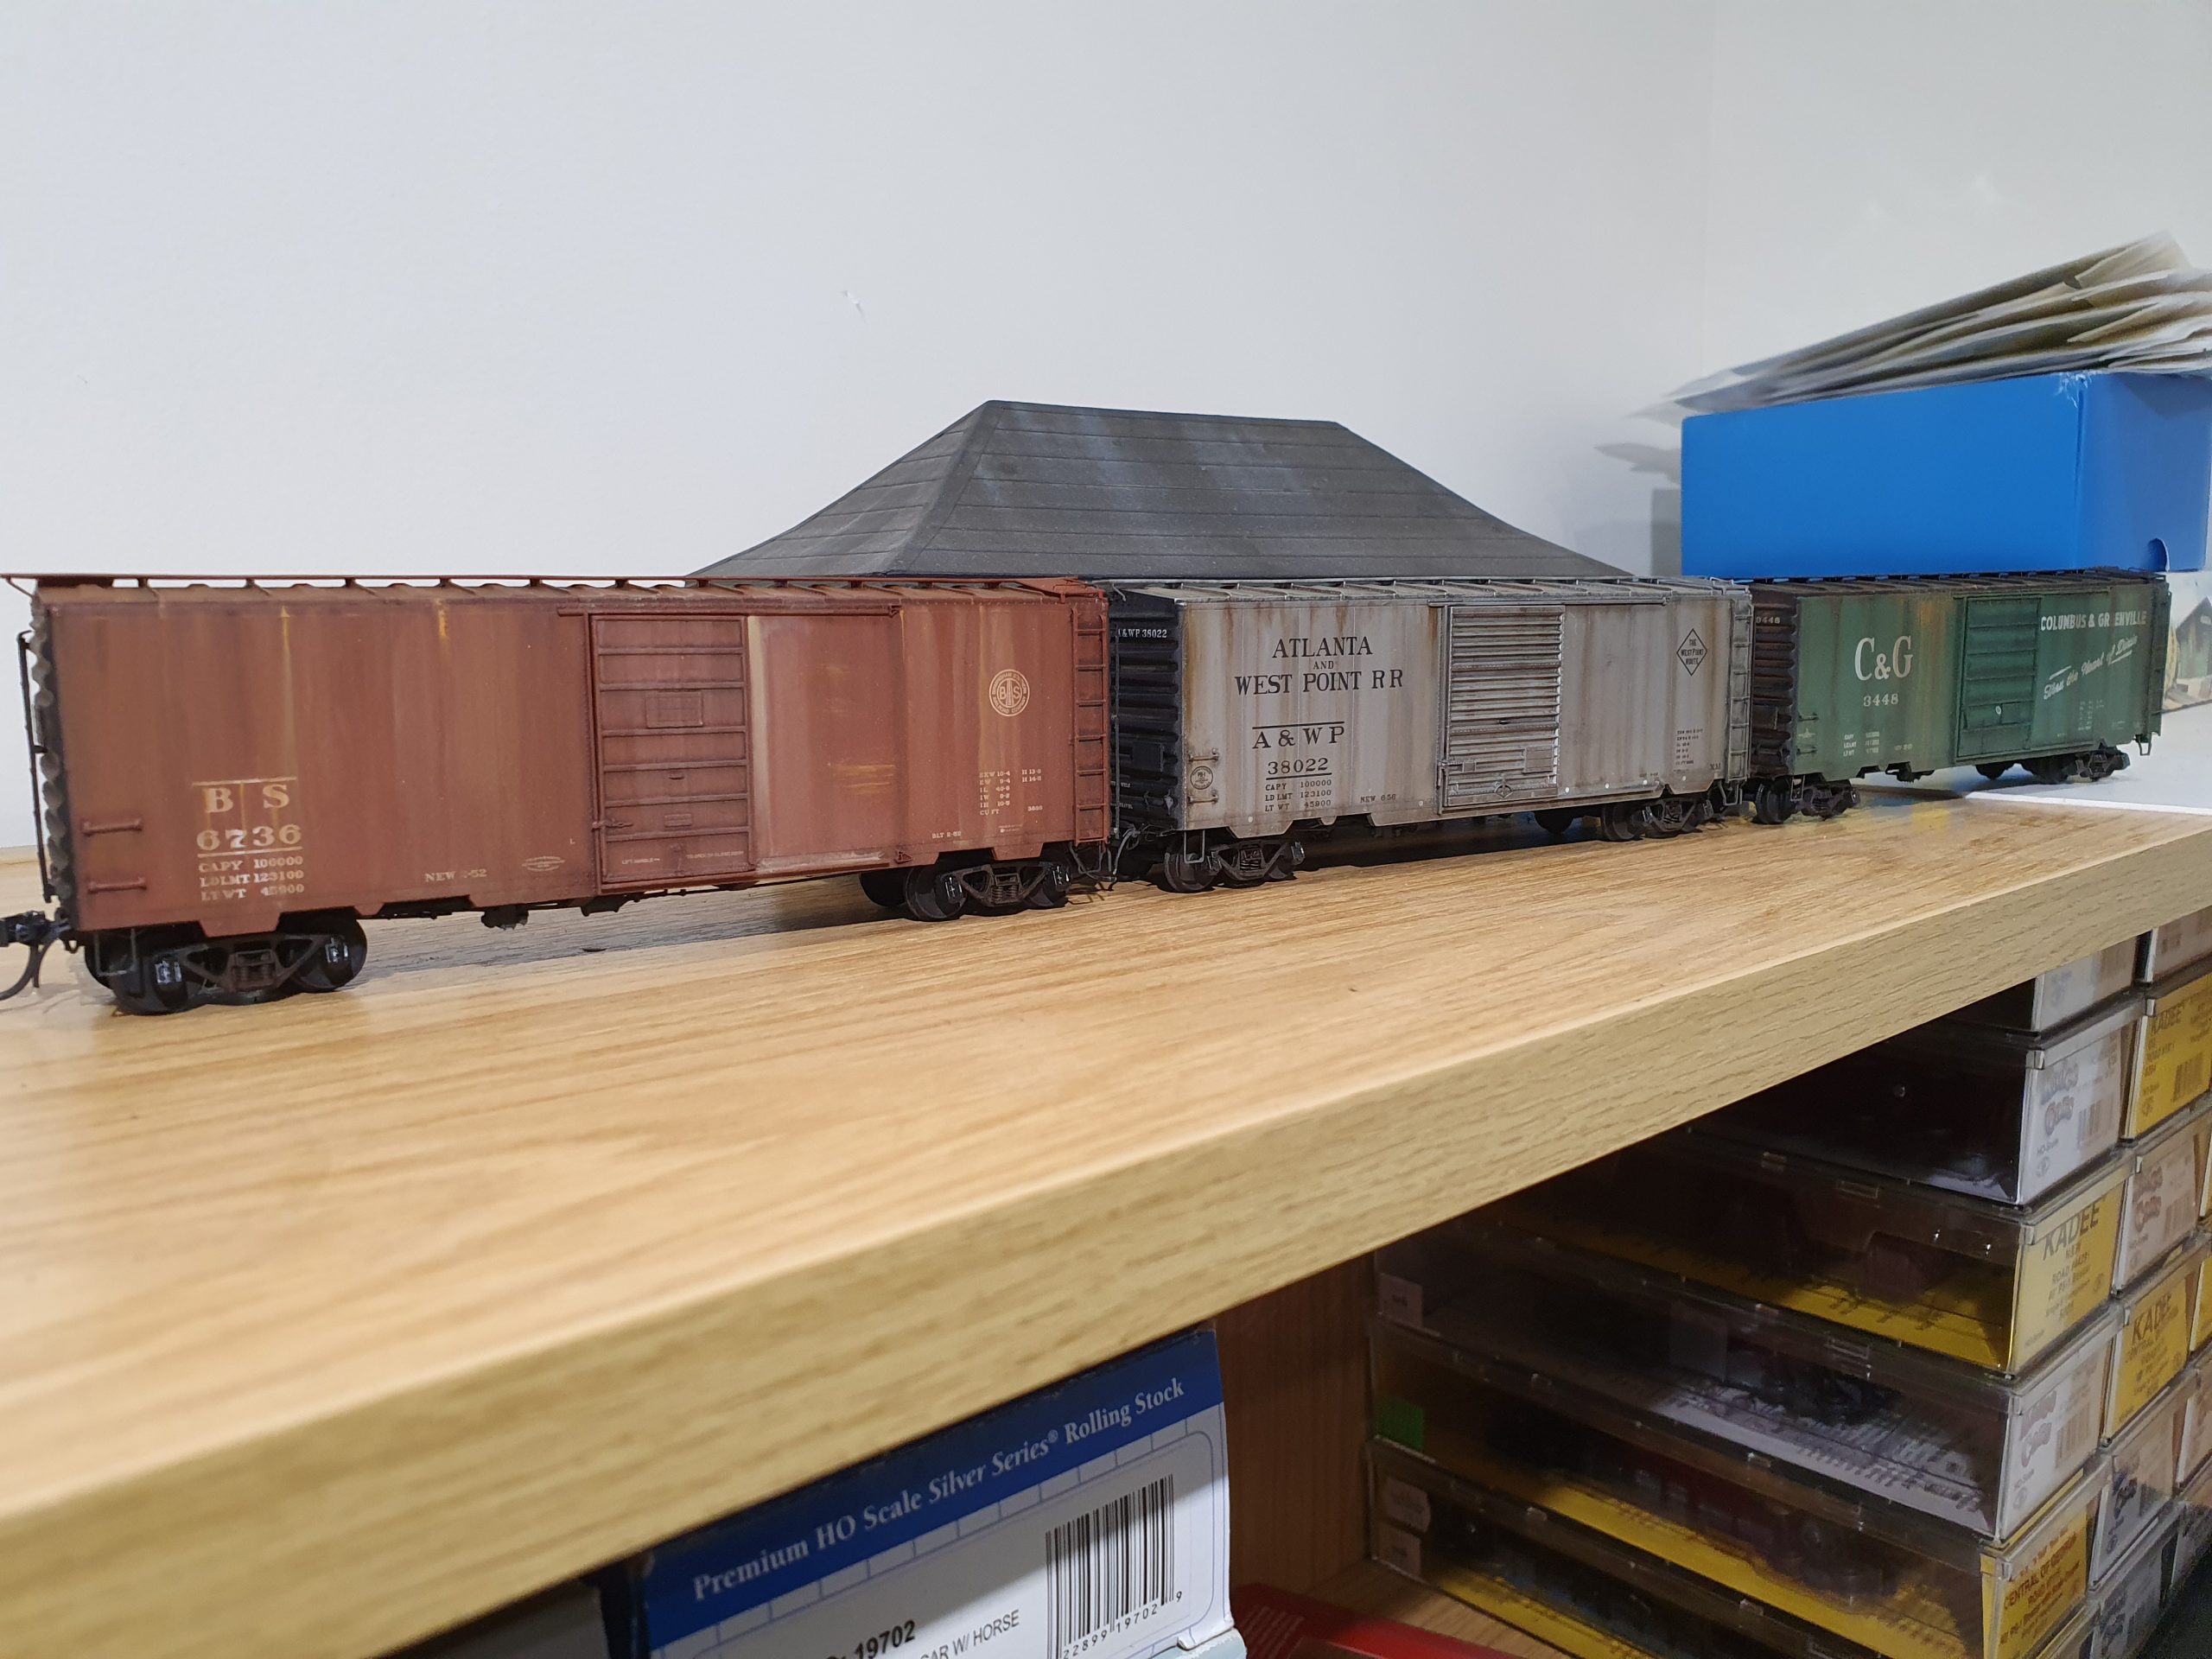
Weathering – C&G3448
Kadee PS-1 freight car
Weathering
Kadee PS-1 freight cars

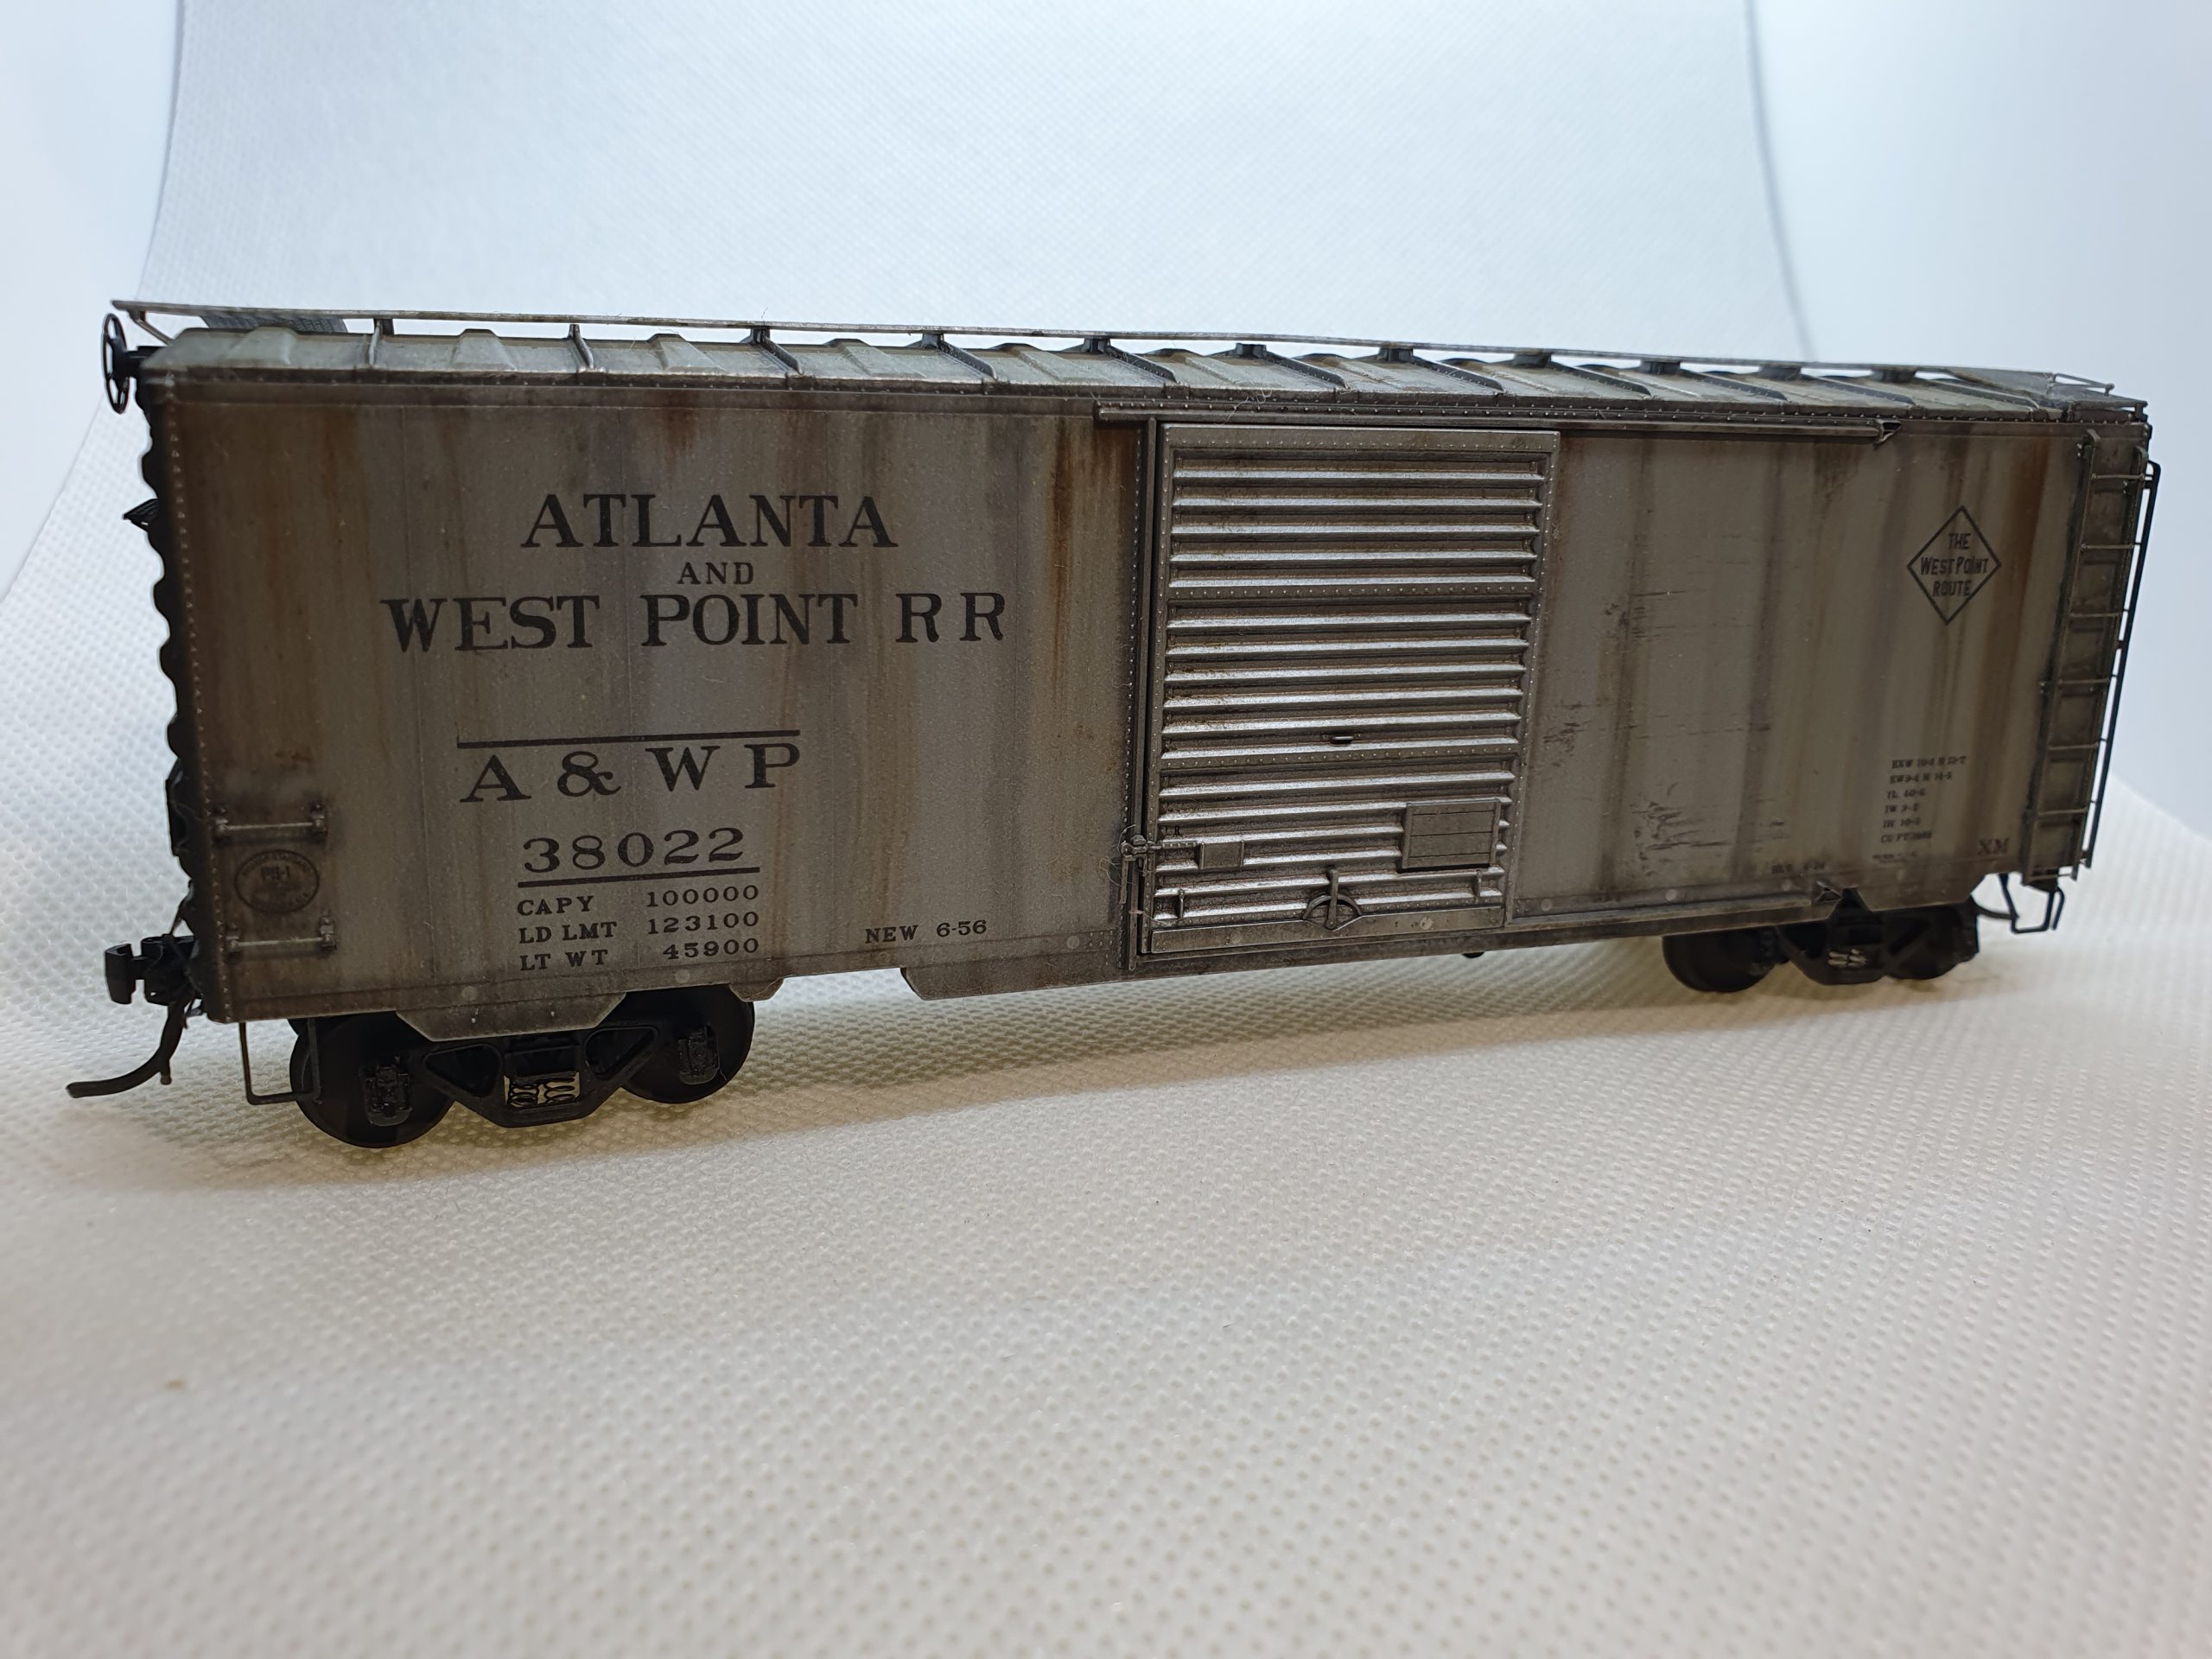
Weathering – A&WP38022
Kadee PS-1 freight car

Weathering
Very early examples
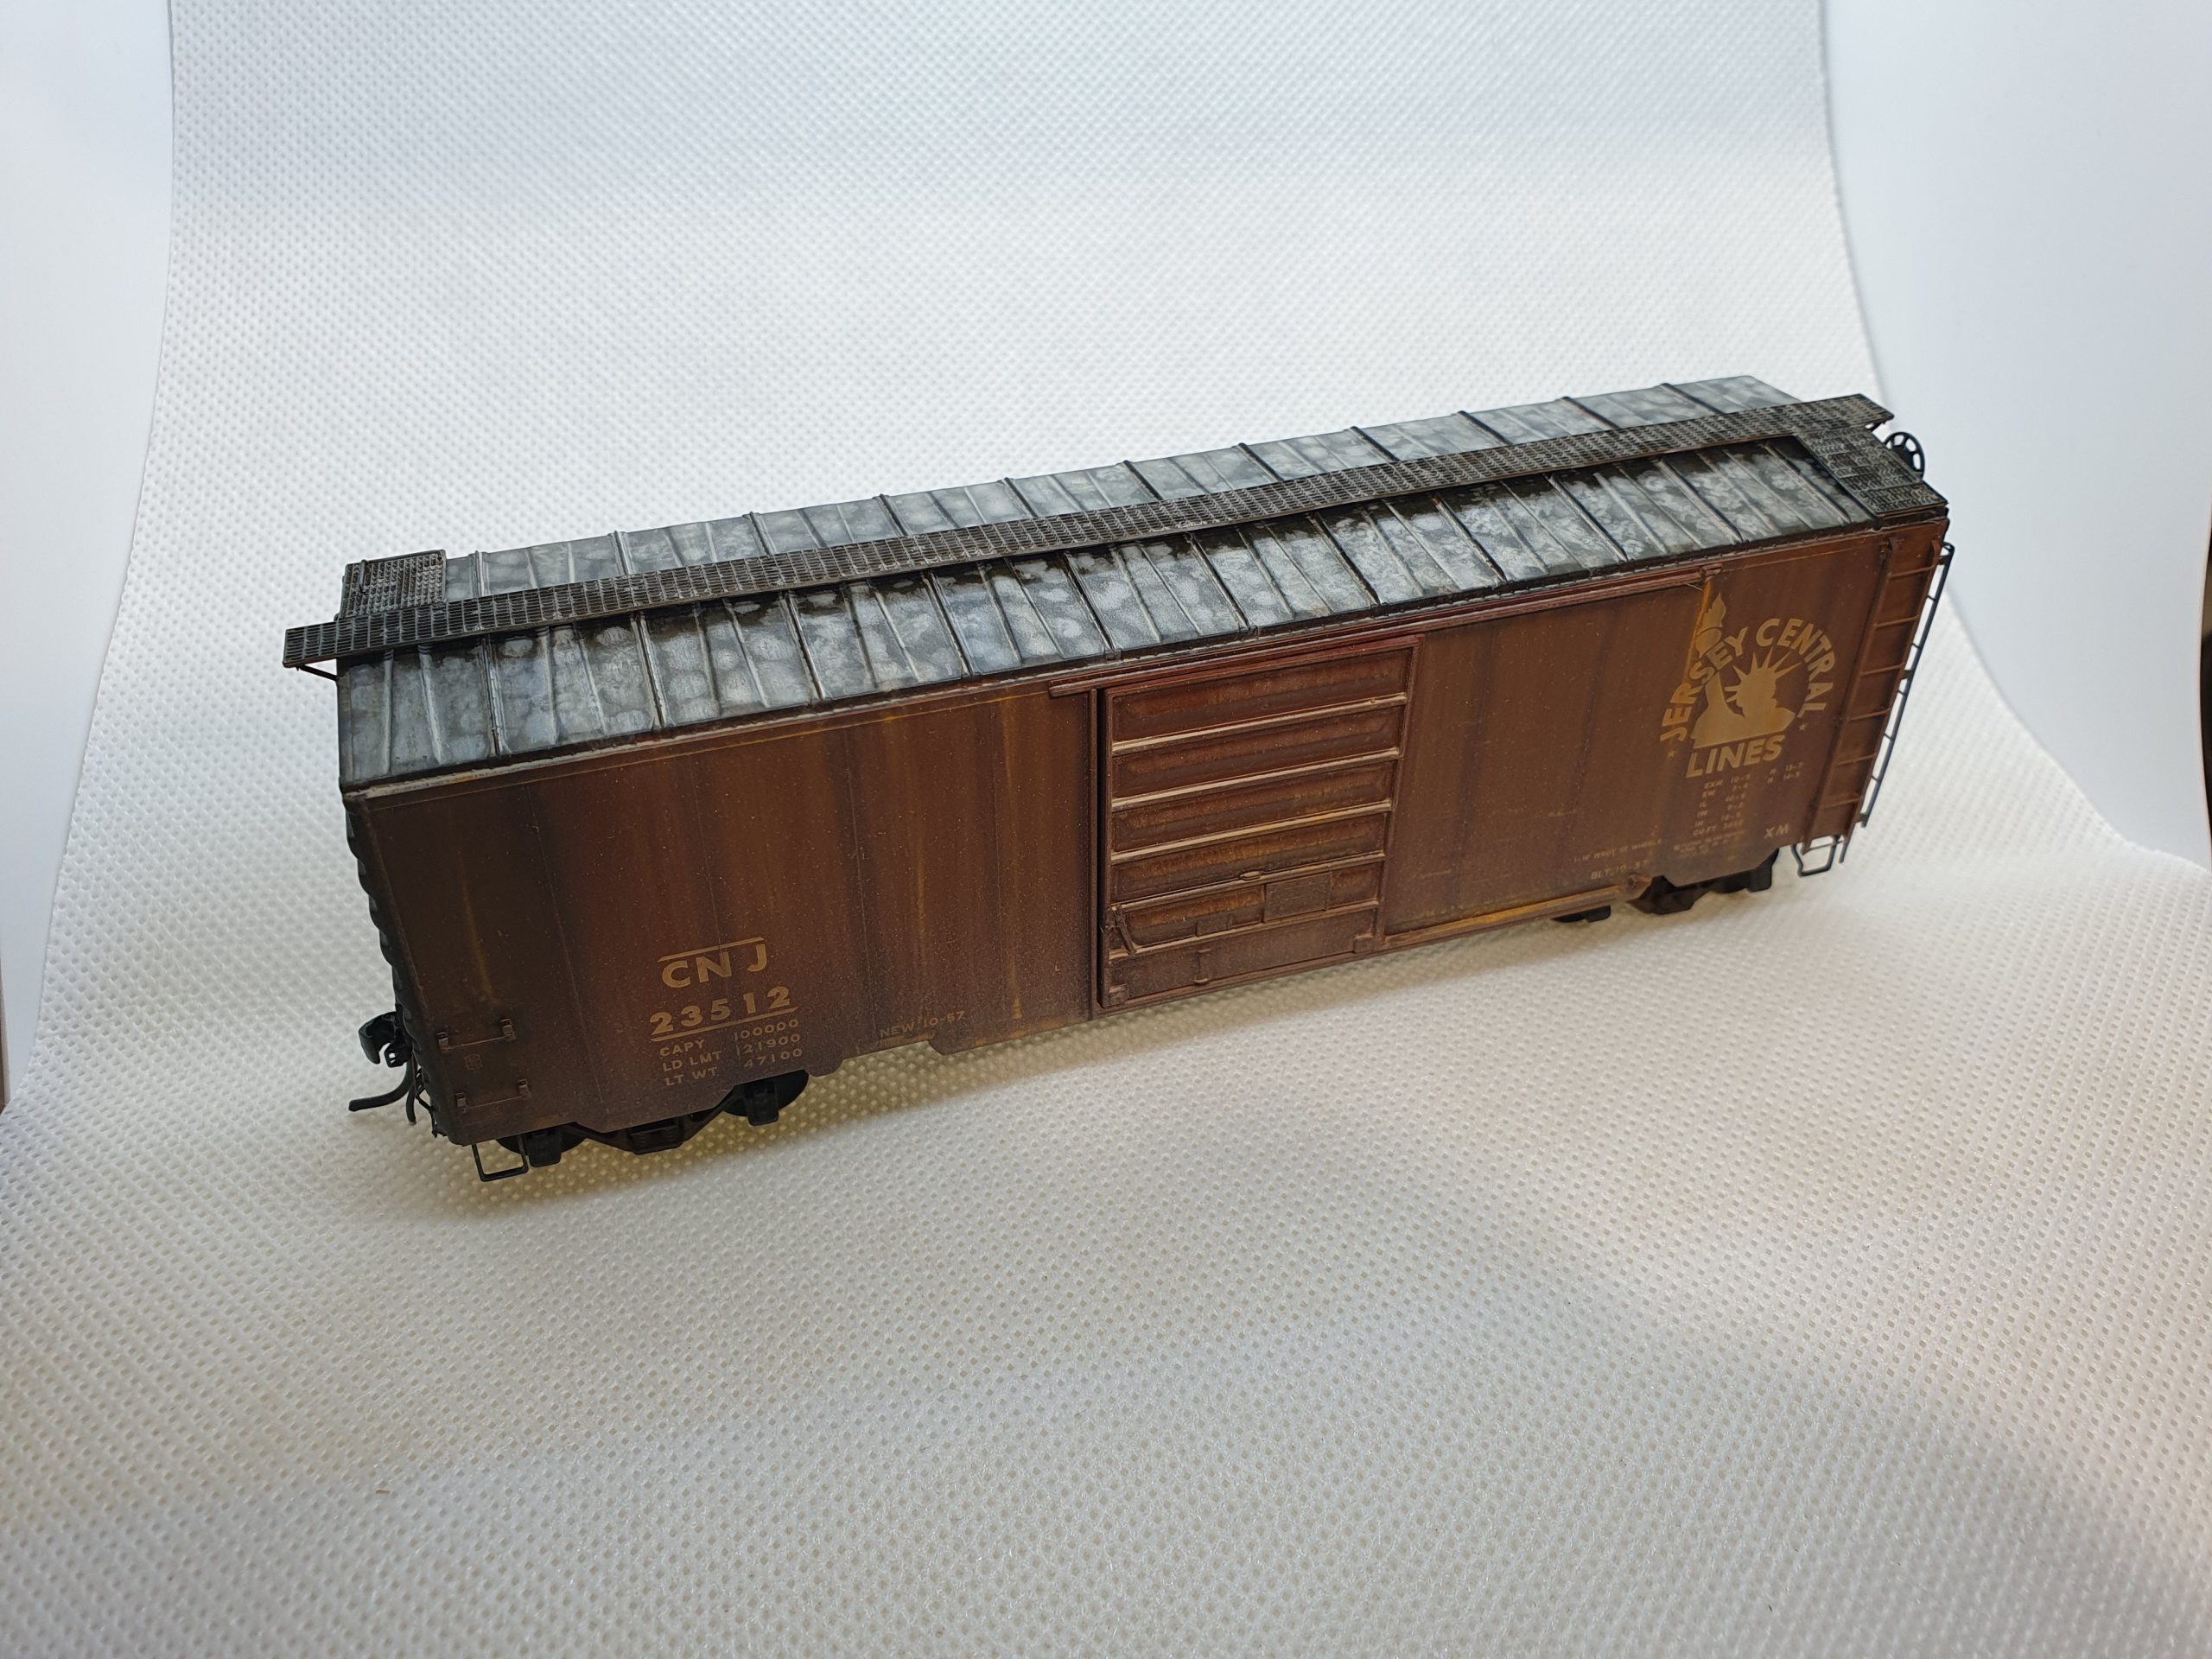
Weathering – CNJ23512
Kadee PS-1 Roof weathering
Weathering – A&WP38022
Kadee PS-1 car. This was not faded as it’s an aluminium-clad car

Weathering – A&WP38022
Kadee PS-1 car. This was not faded as it’s an aluminium-clad car
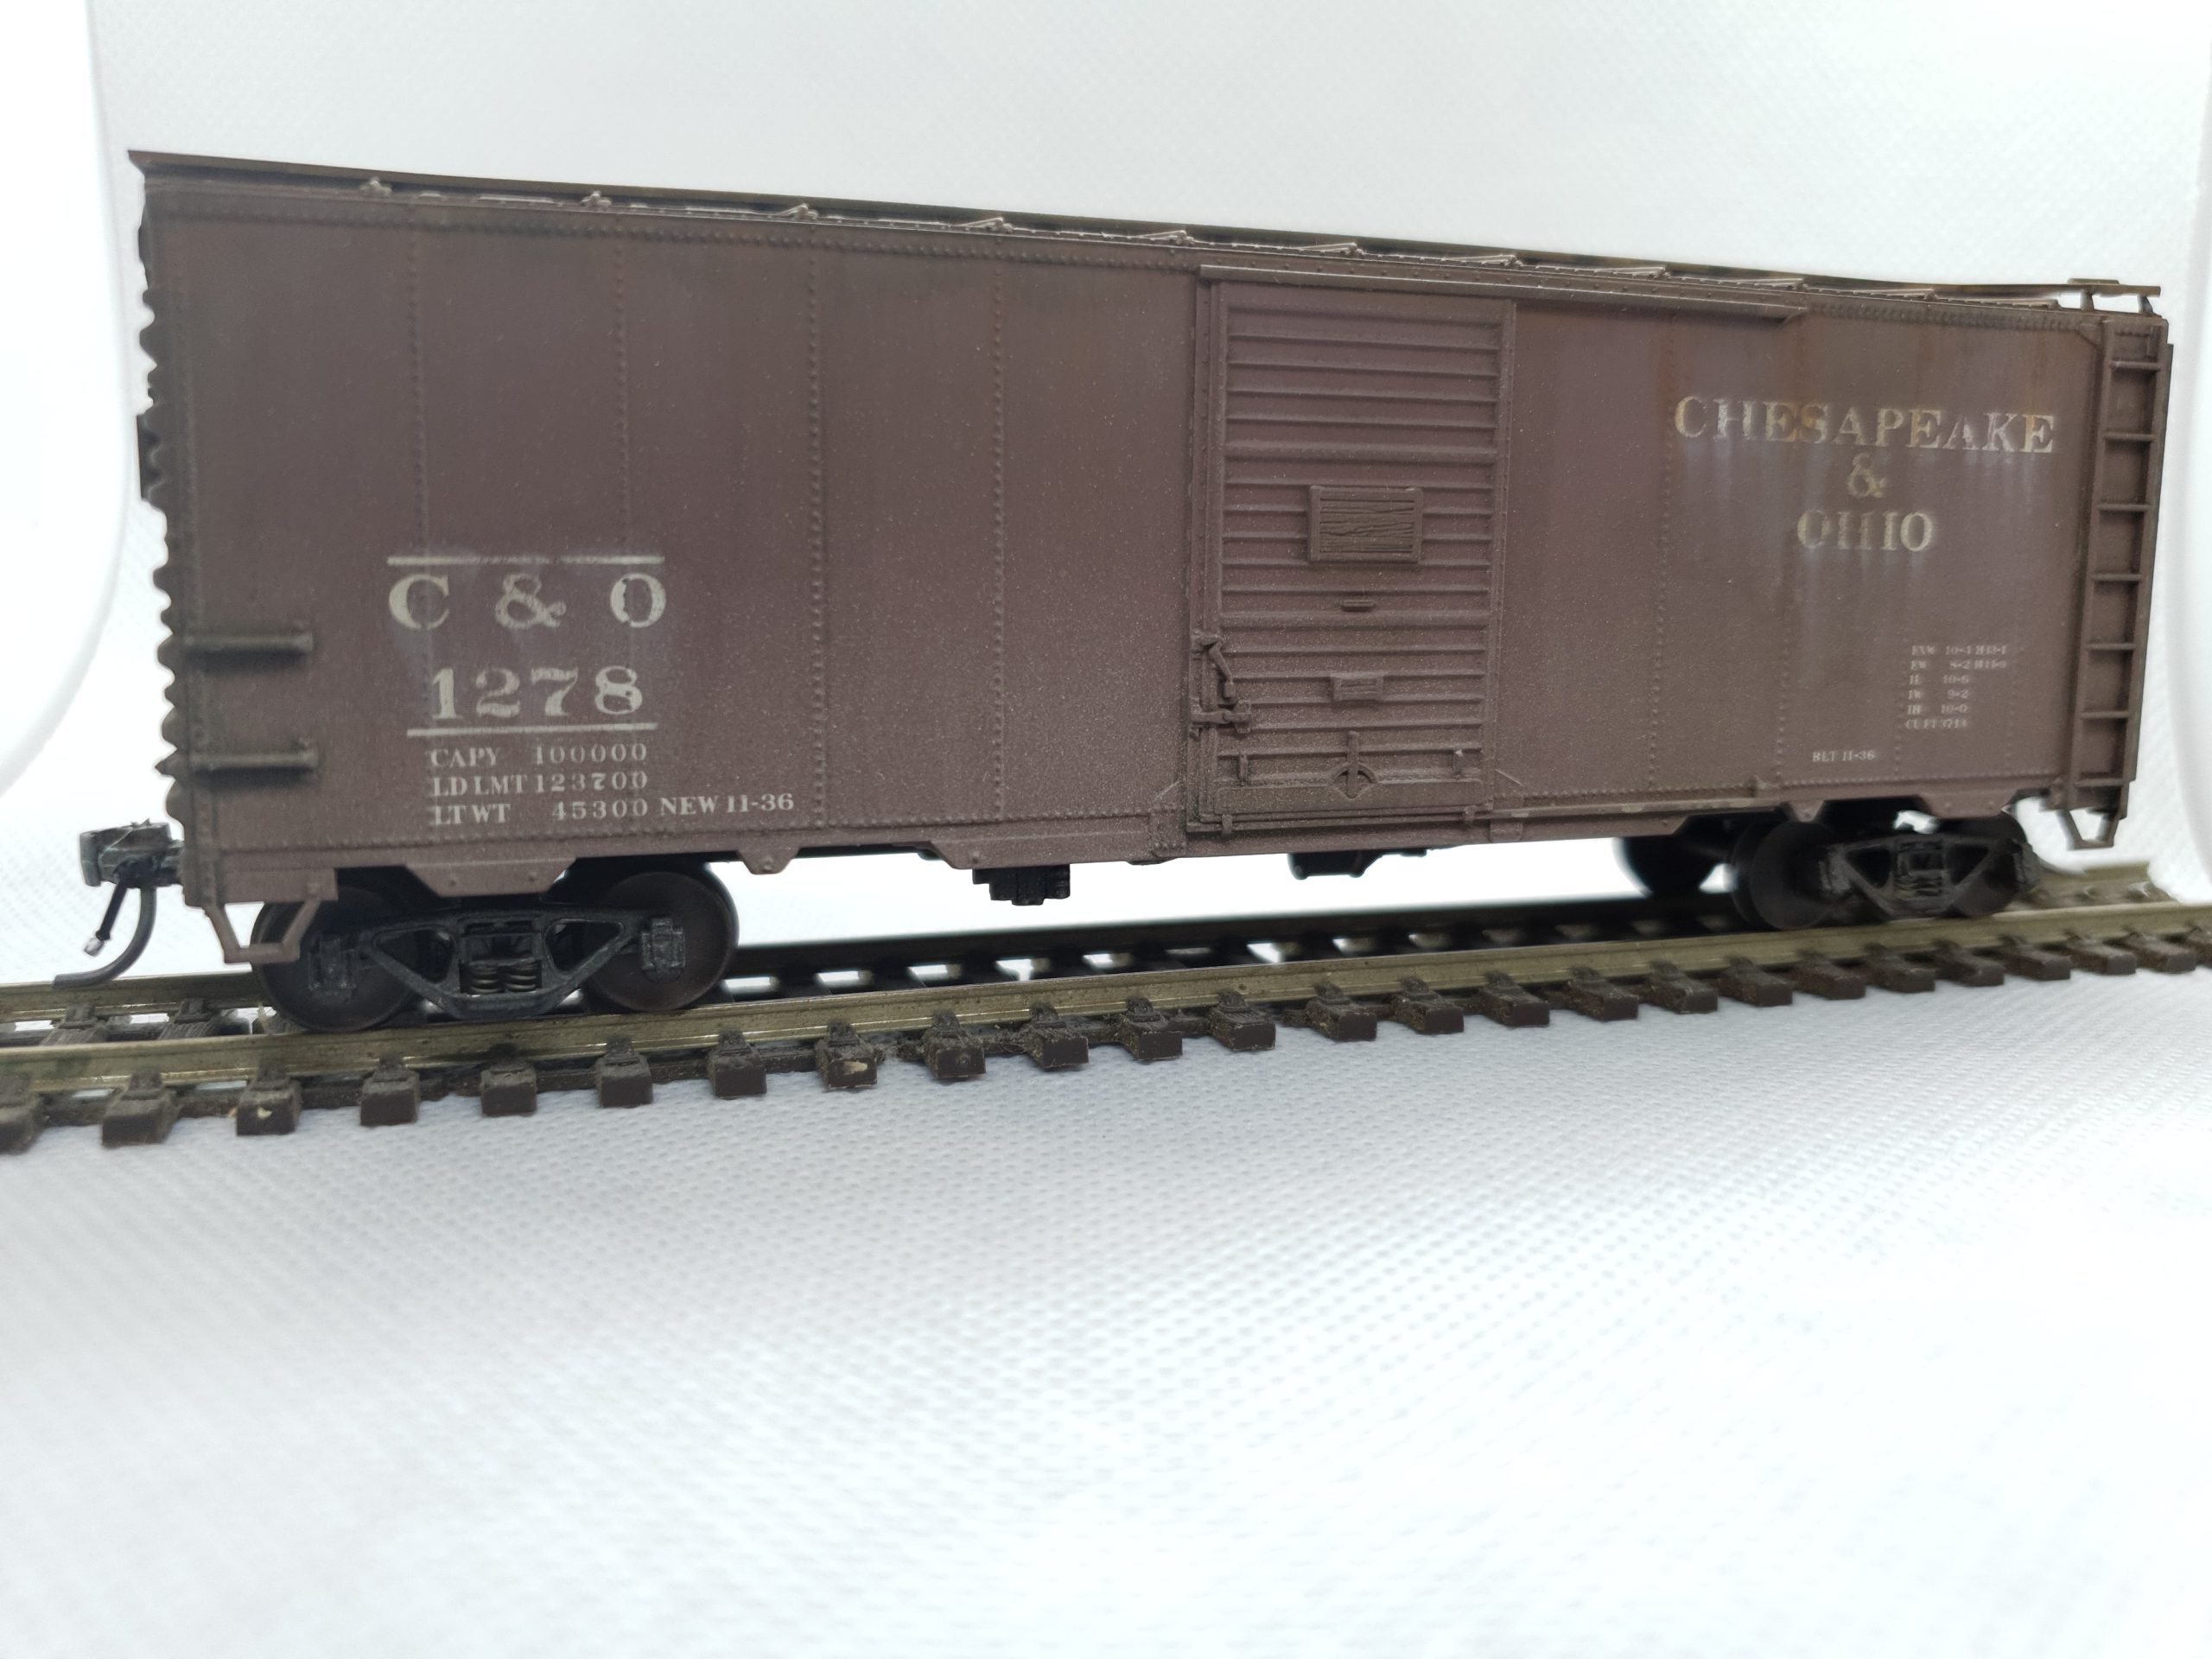
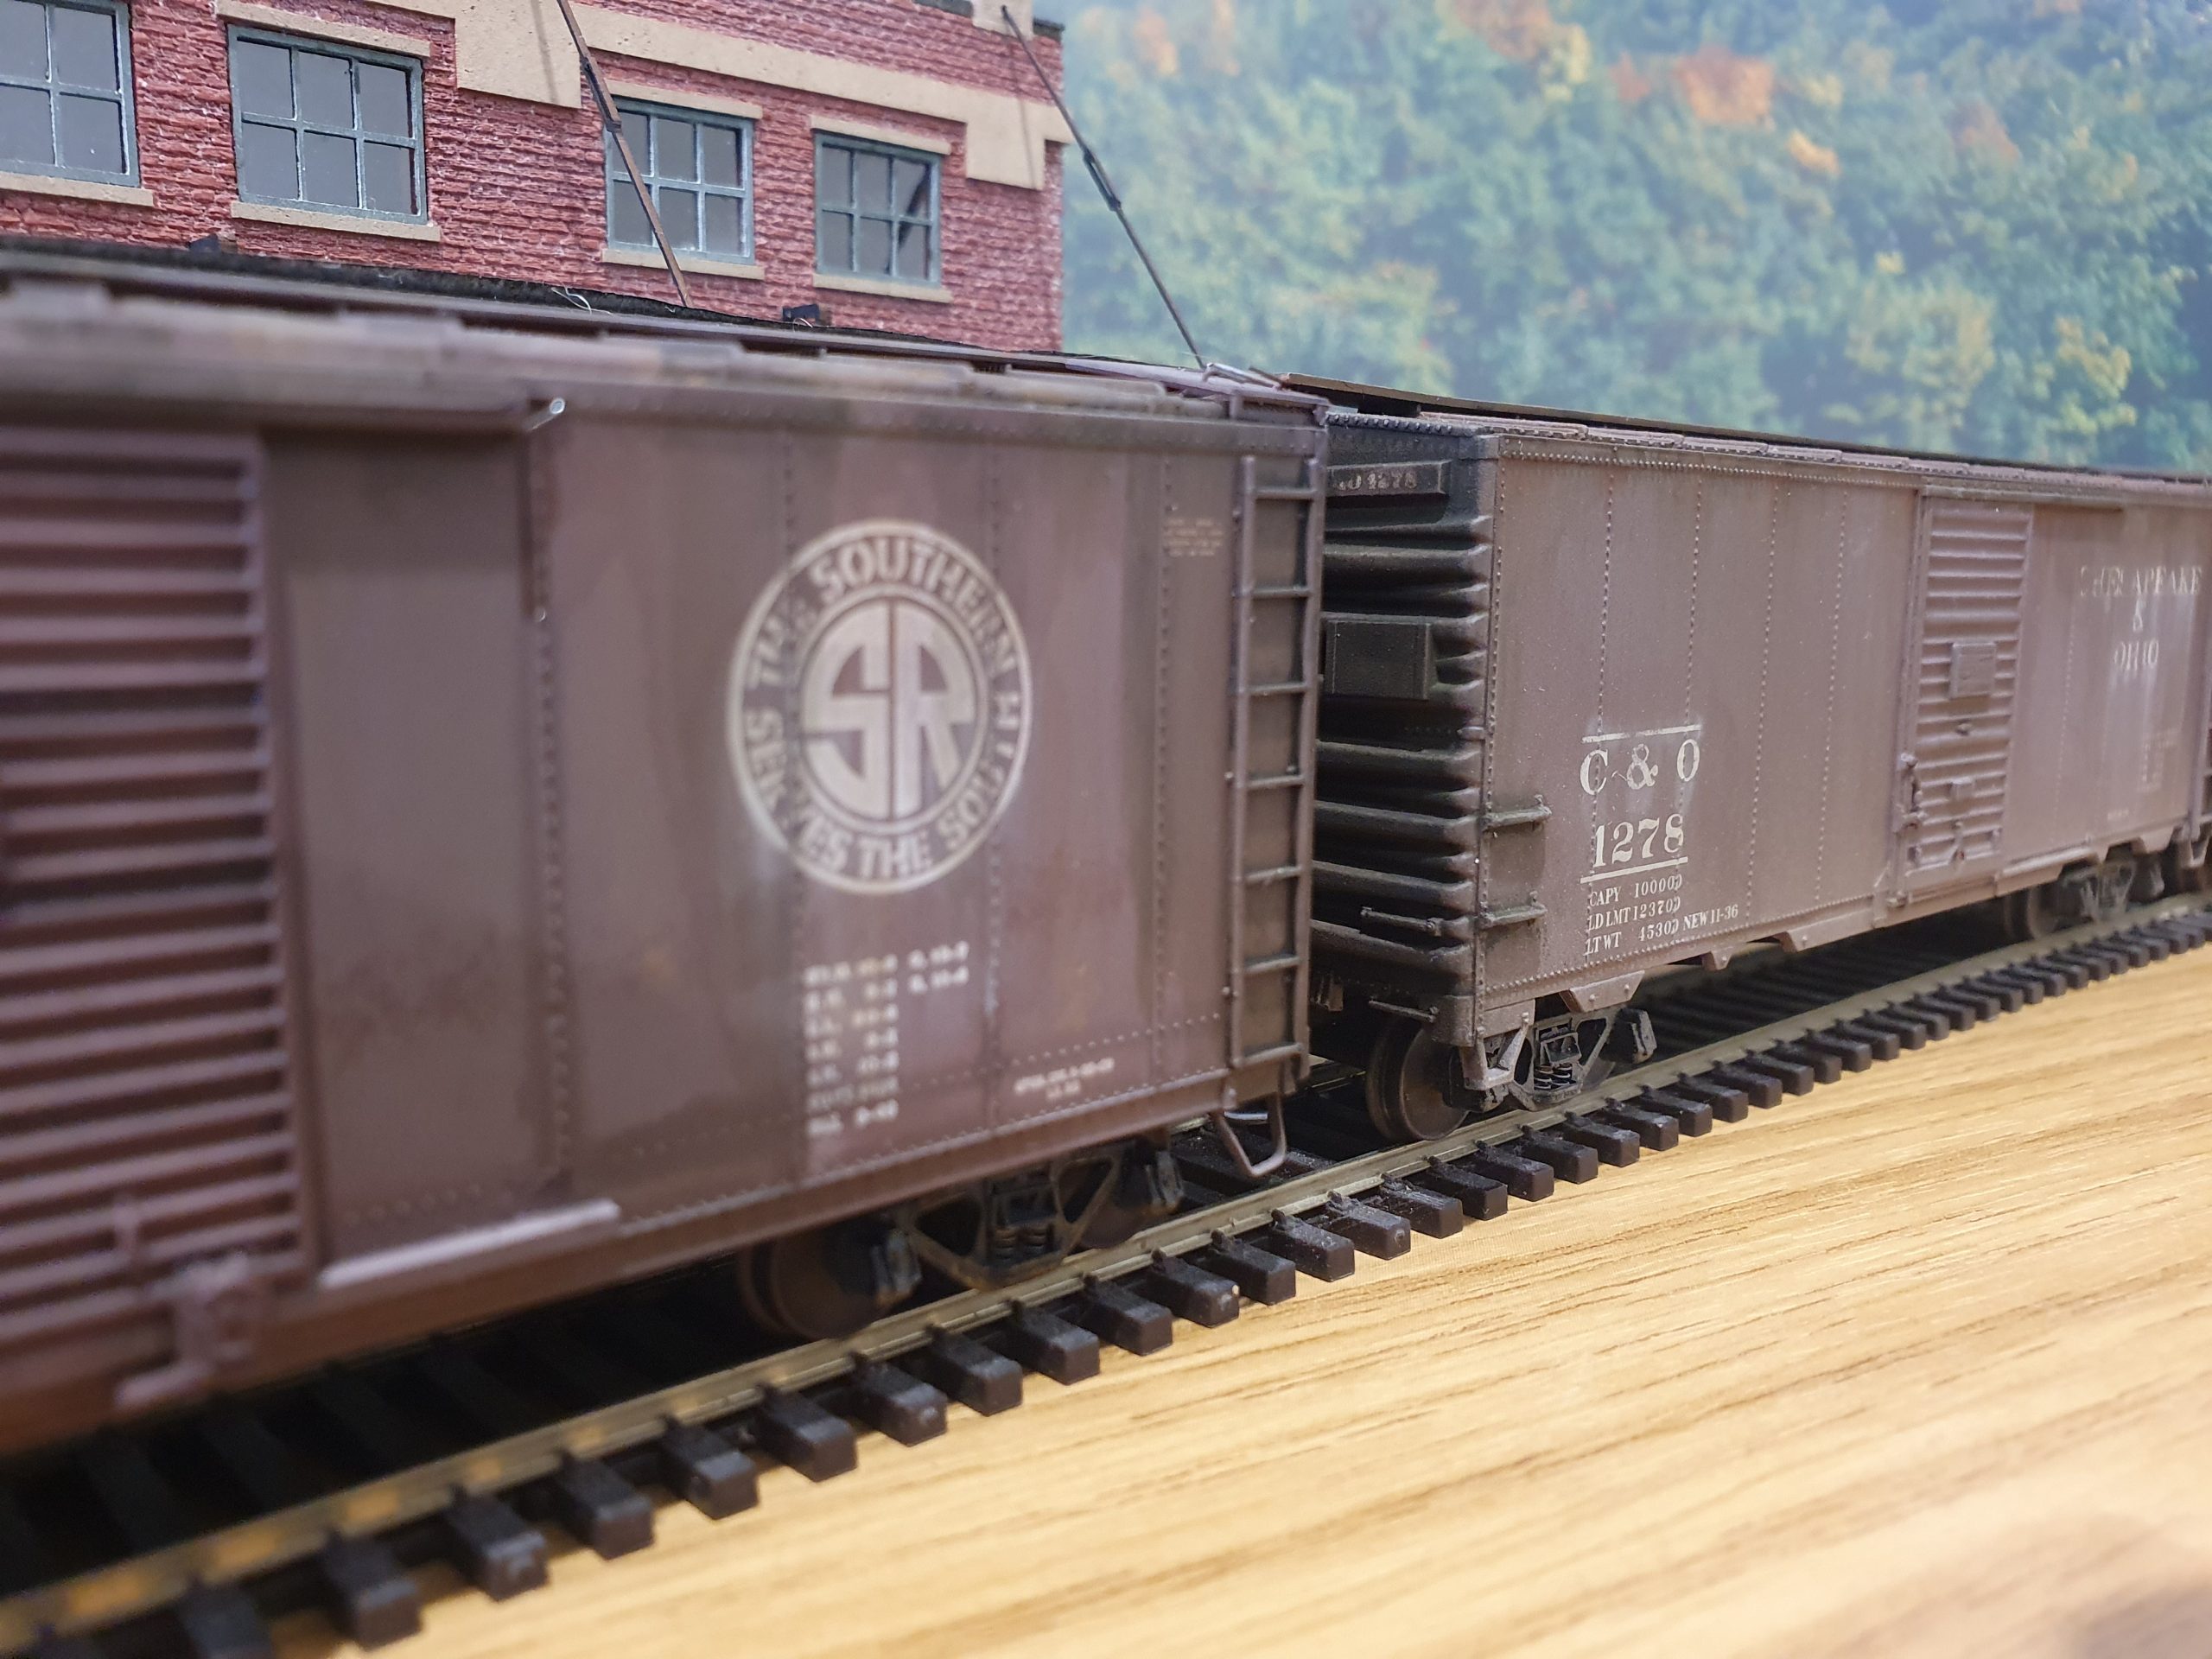
Weathering – C&O1278
Accurail – modified running number
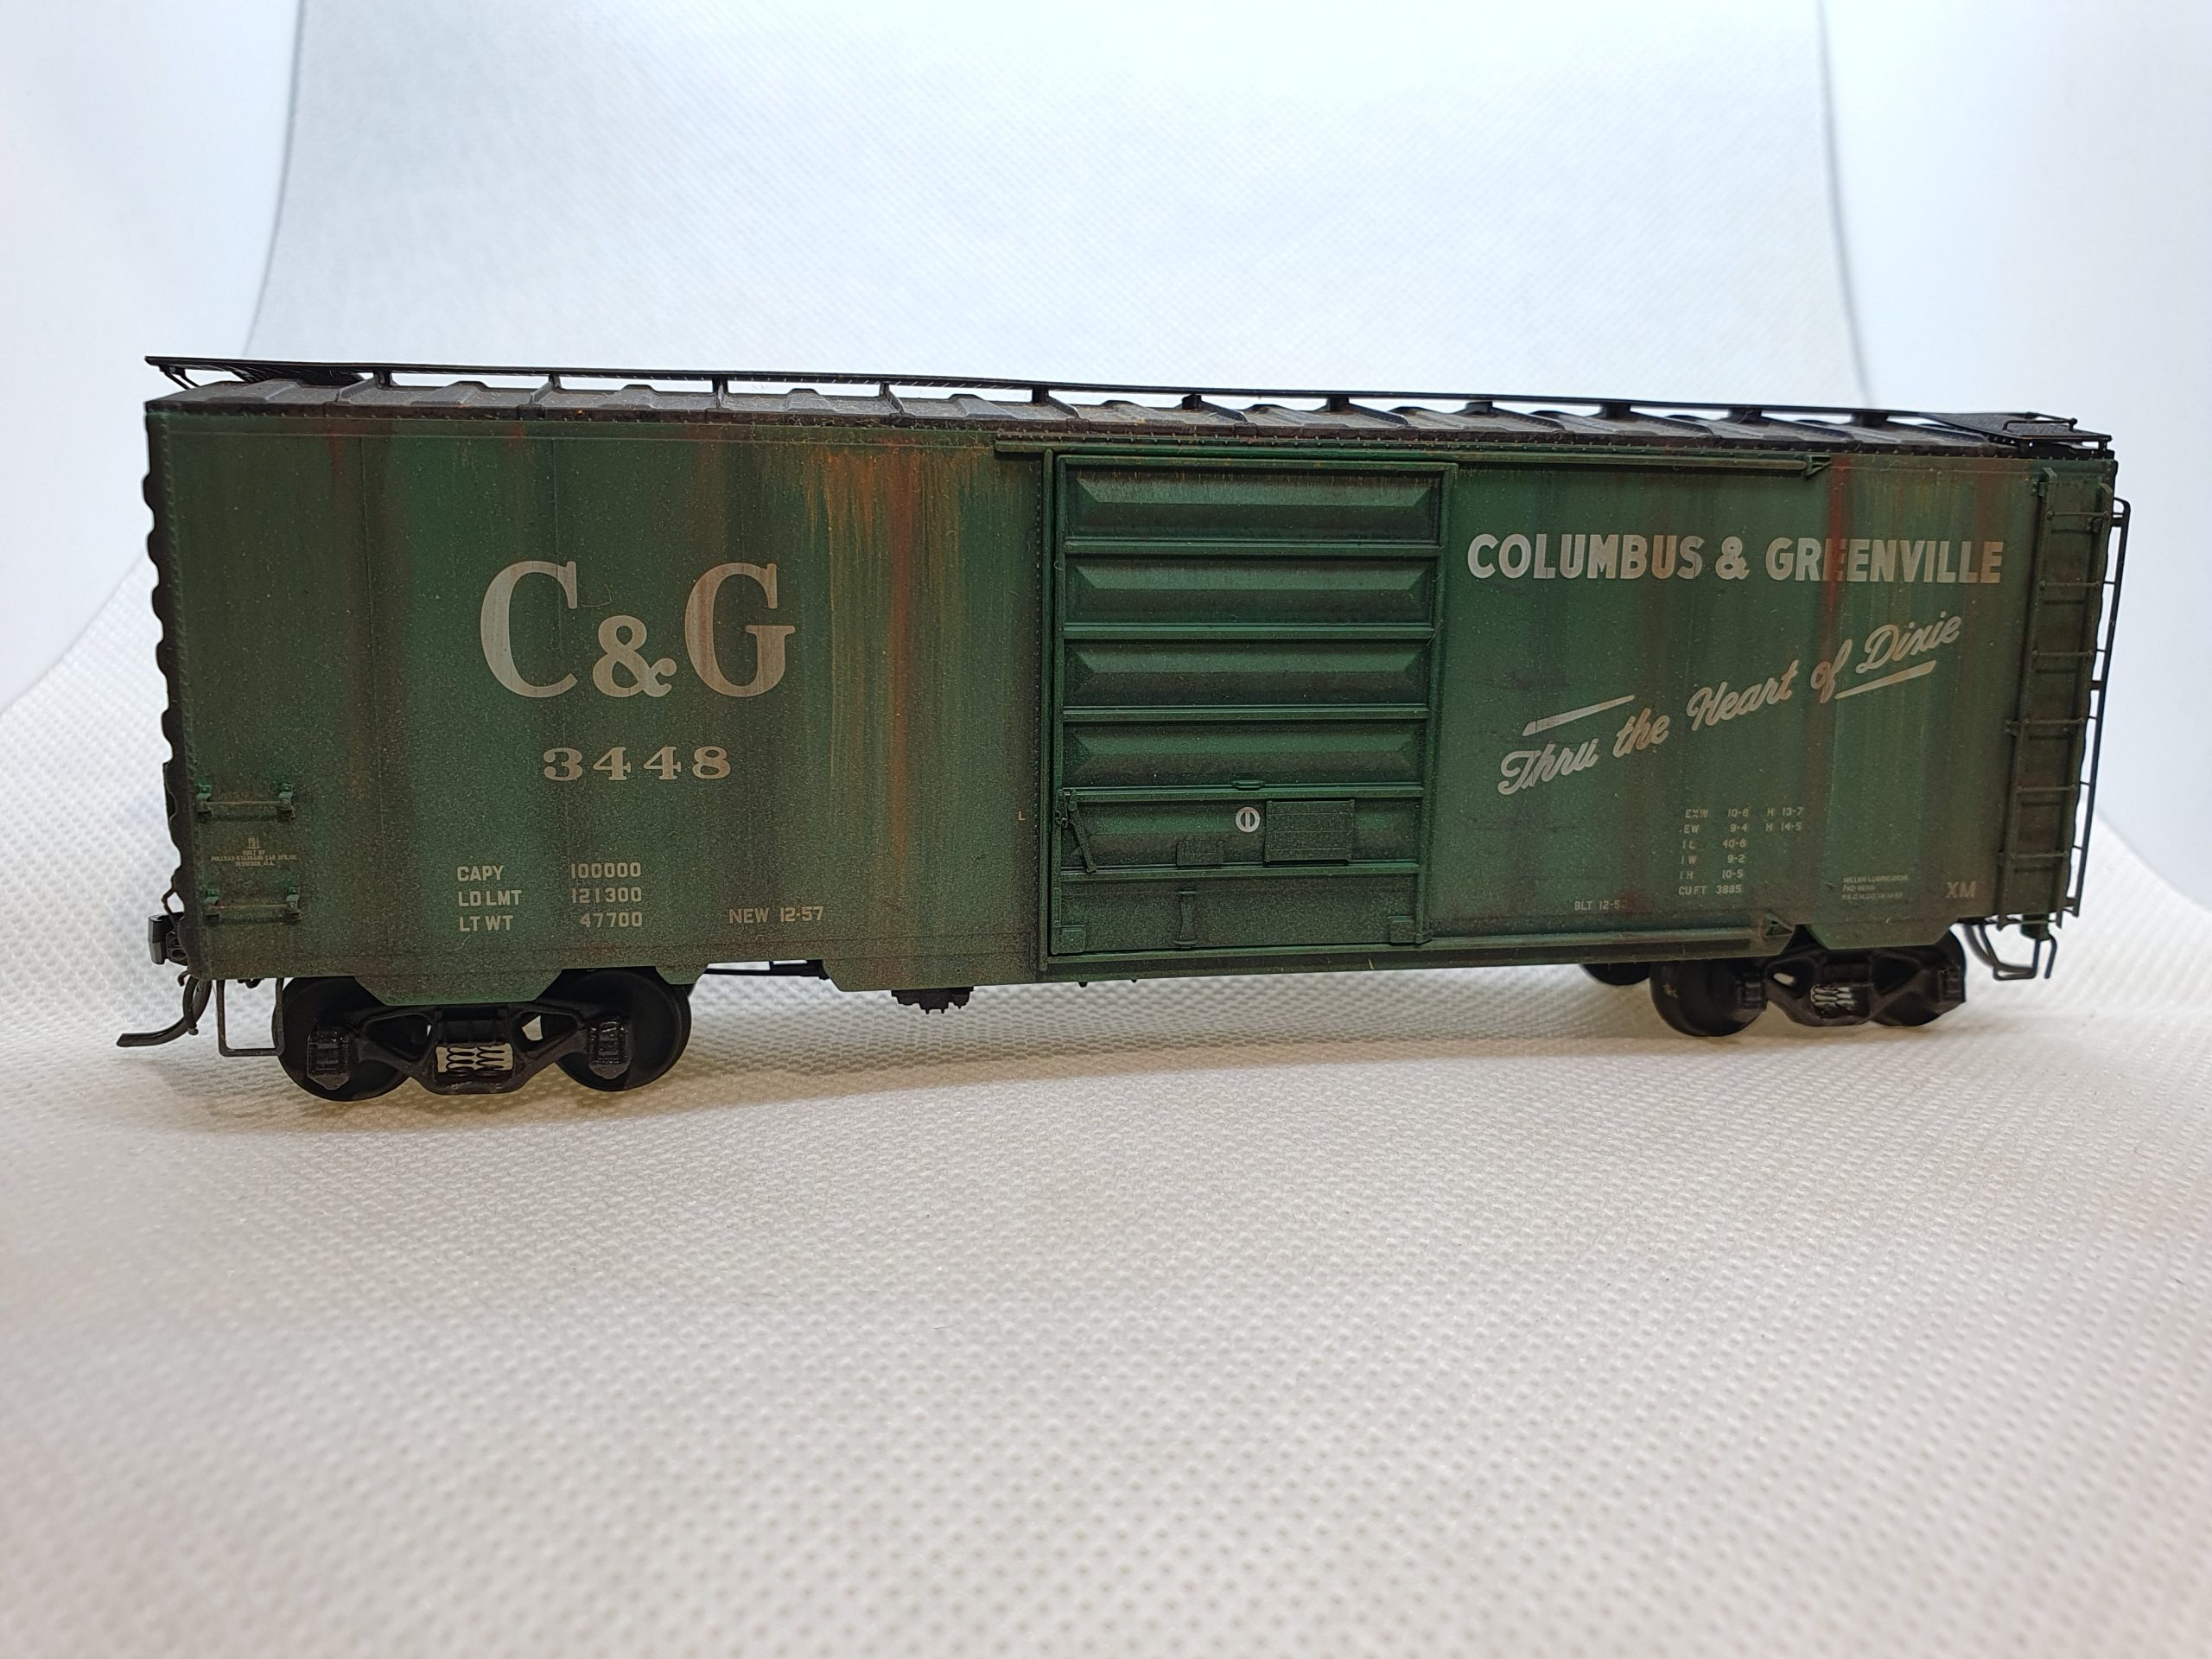
Weathering – C&G3448
Kadee PS-1 Car
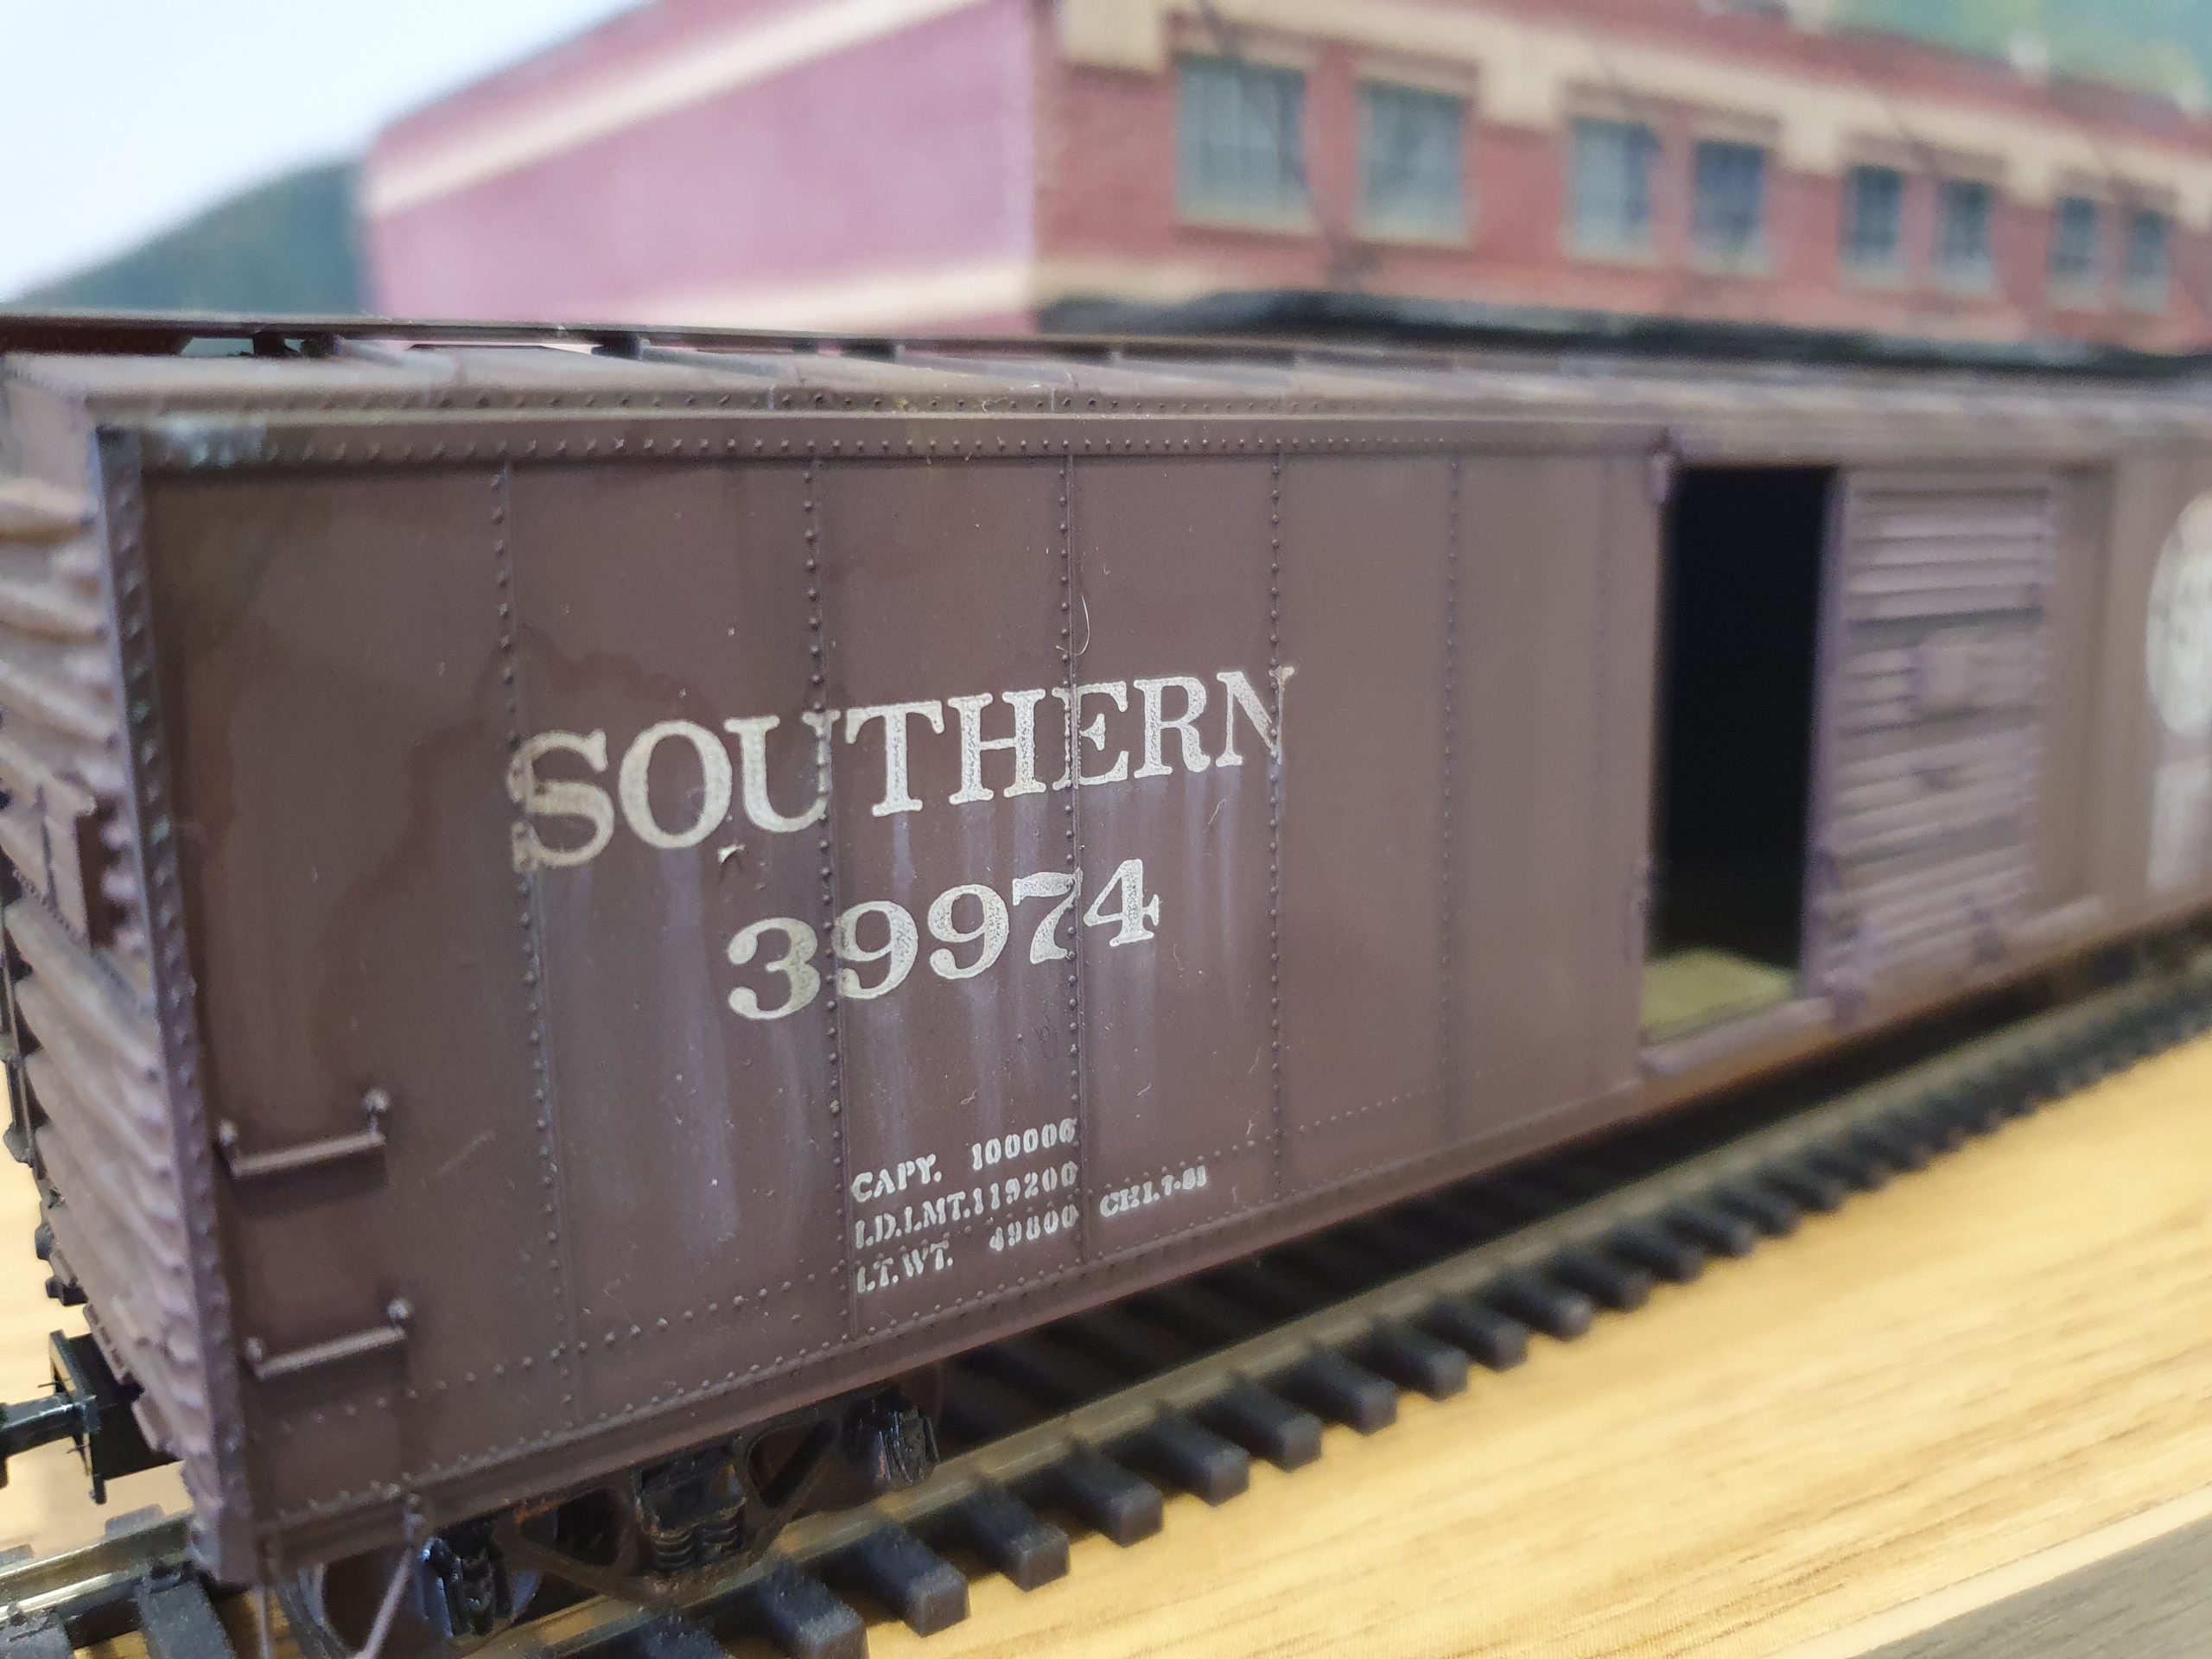
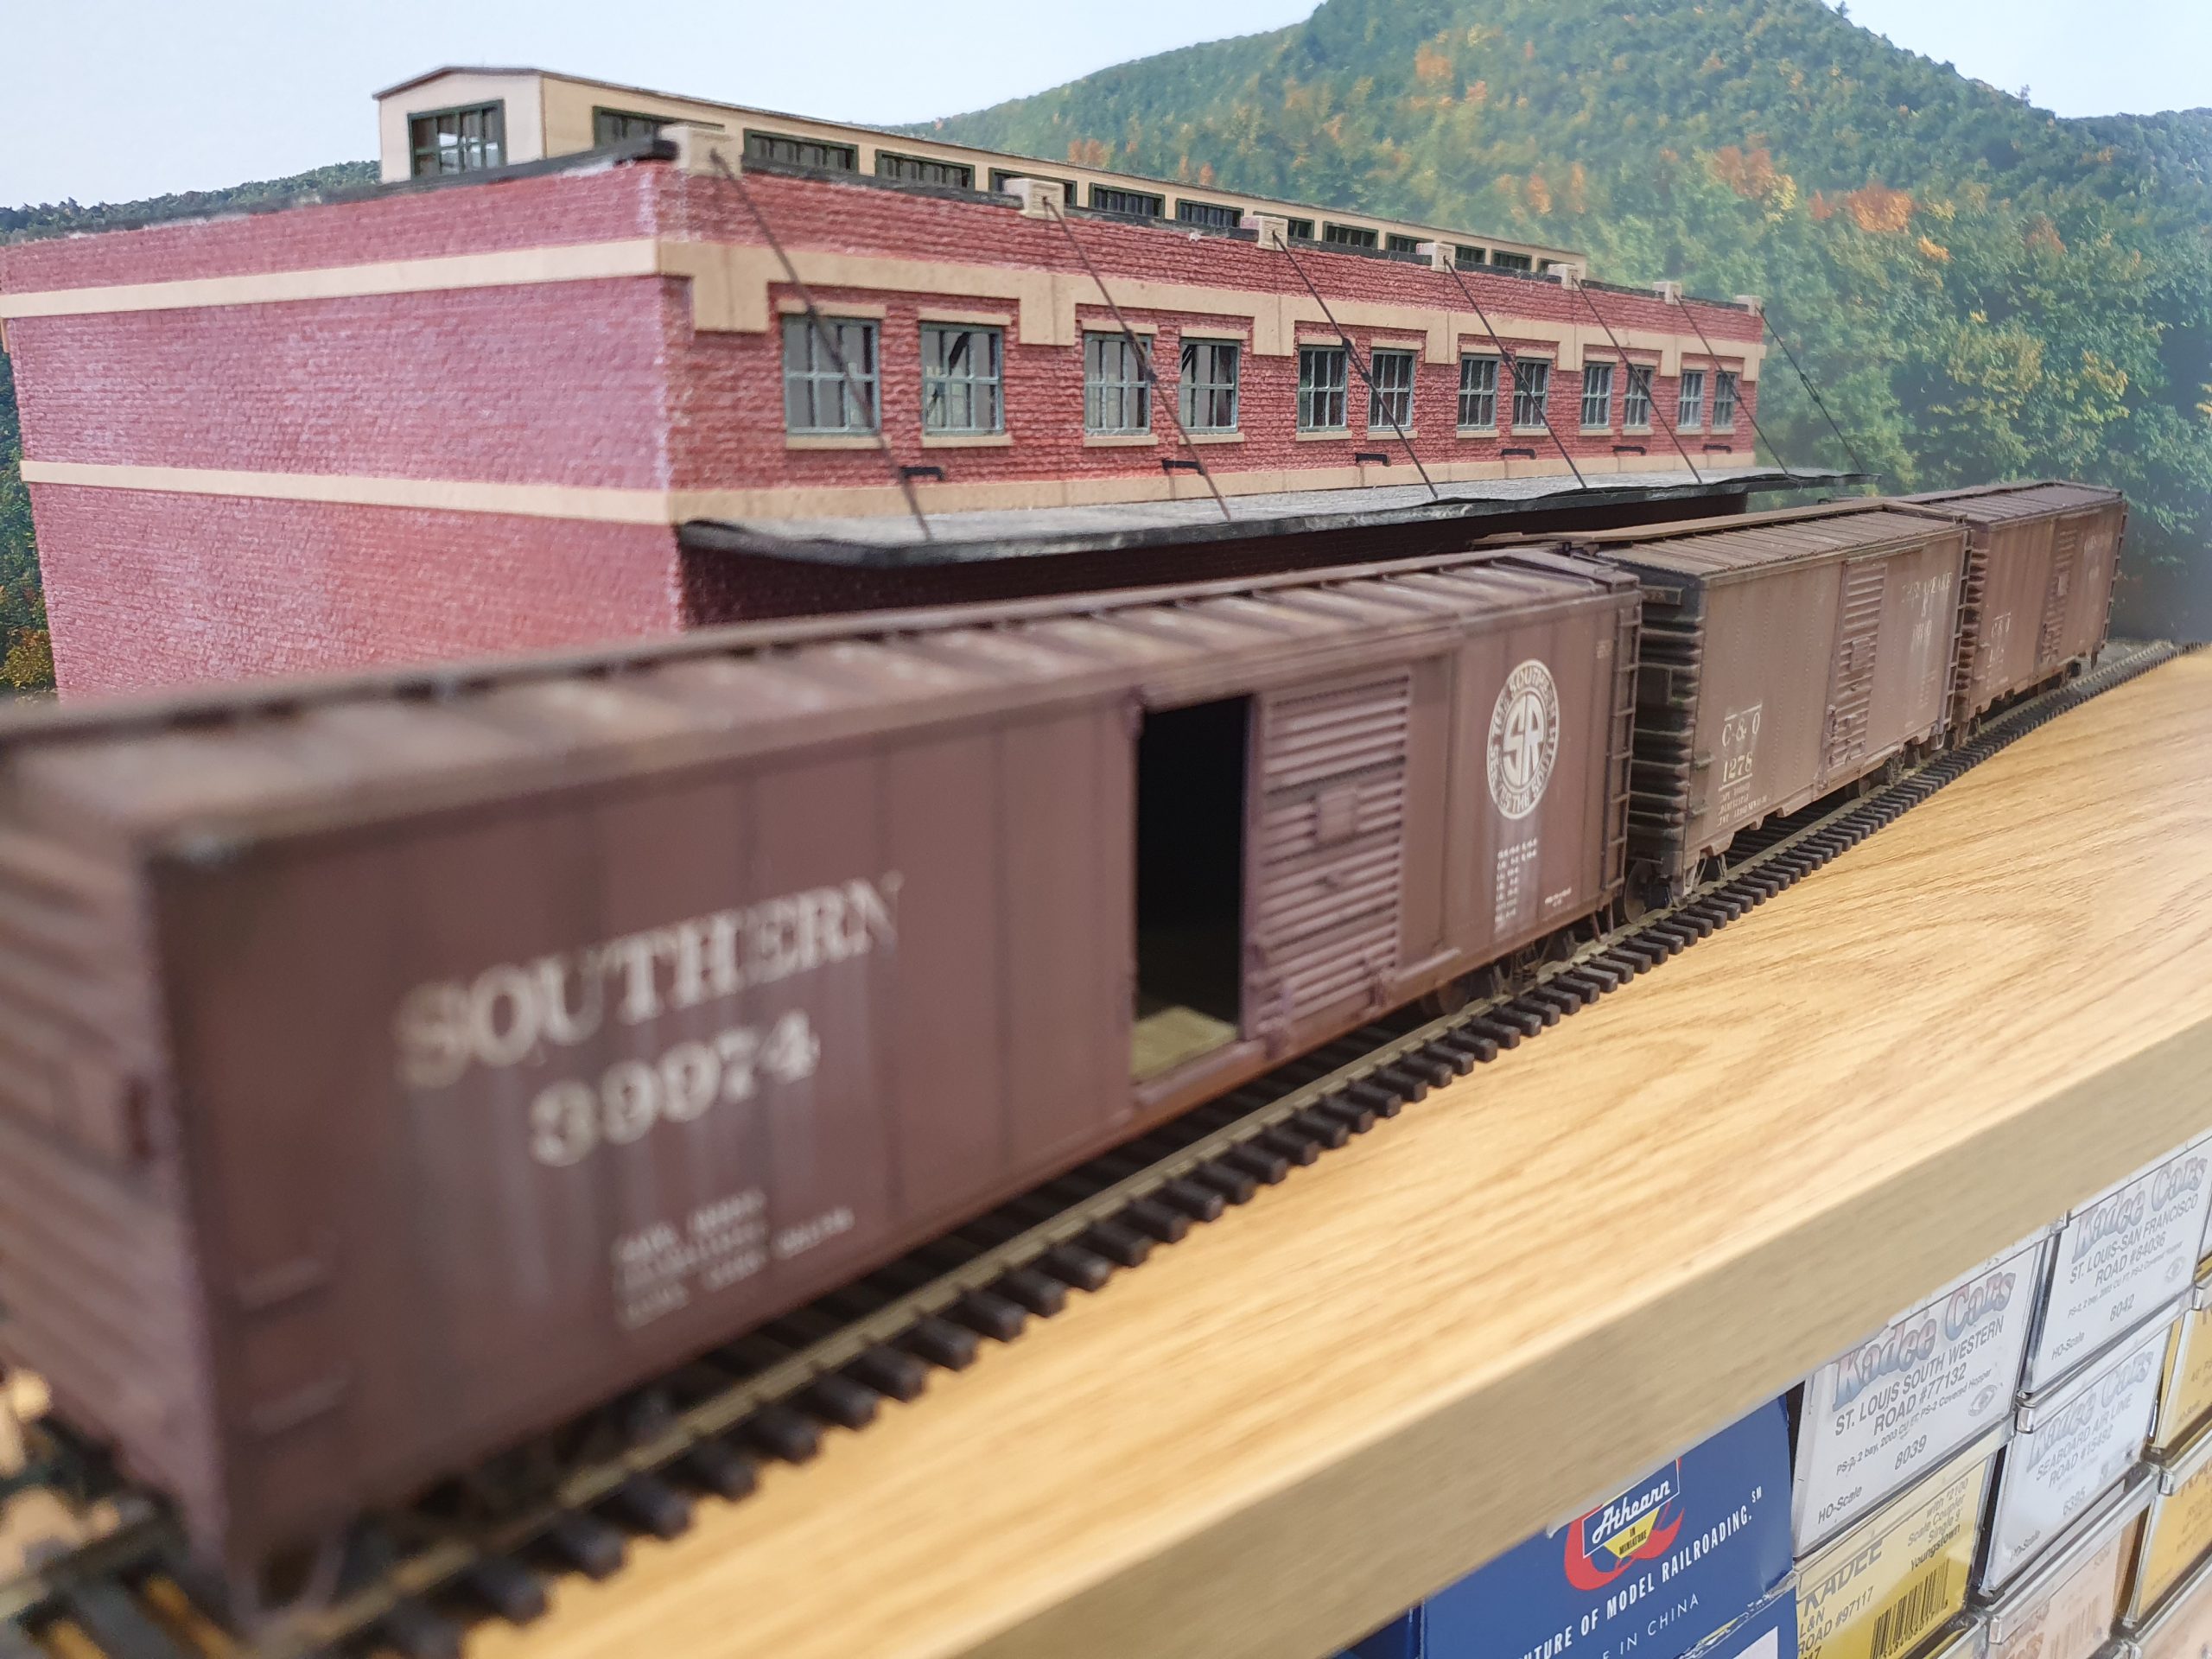
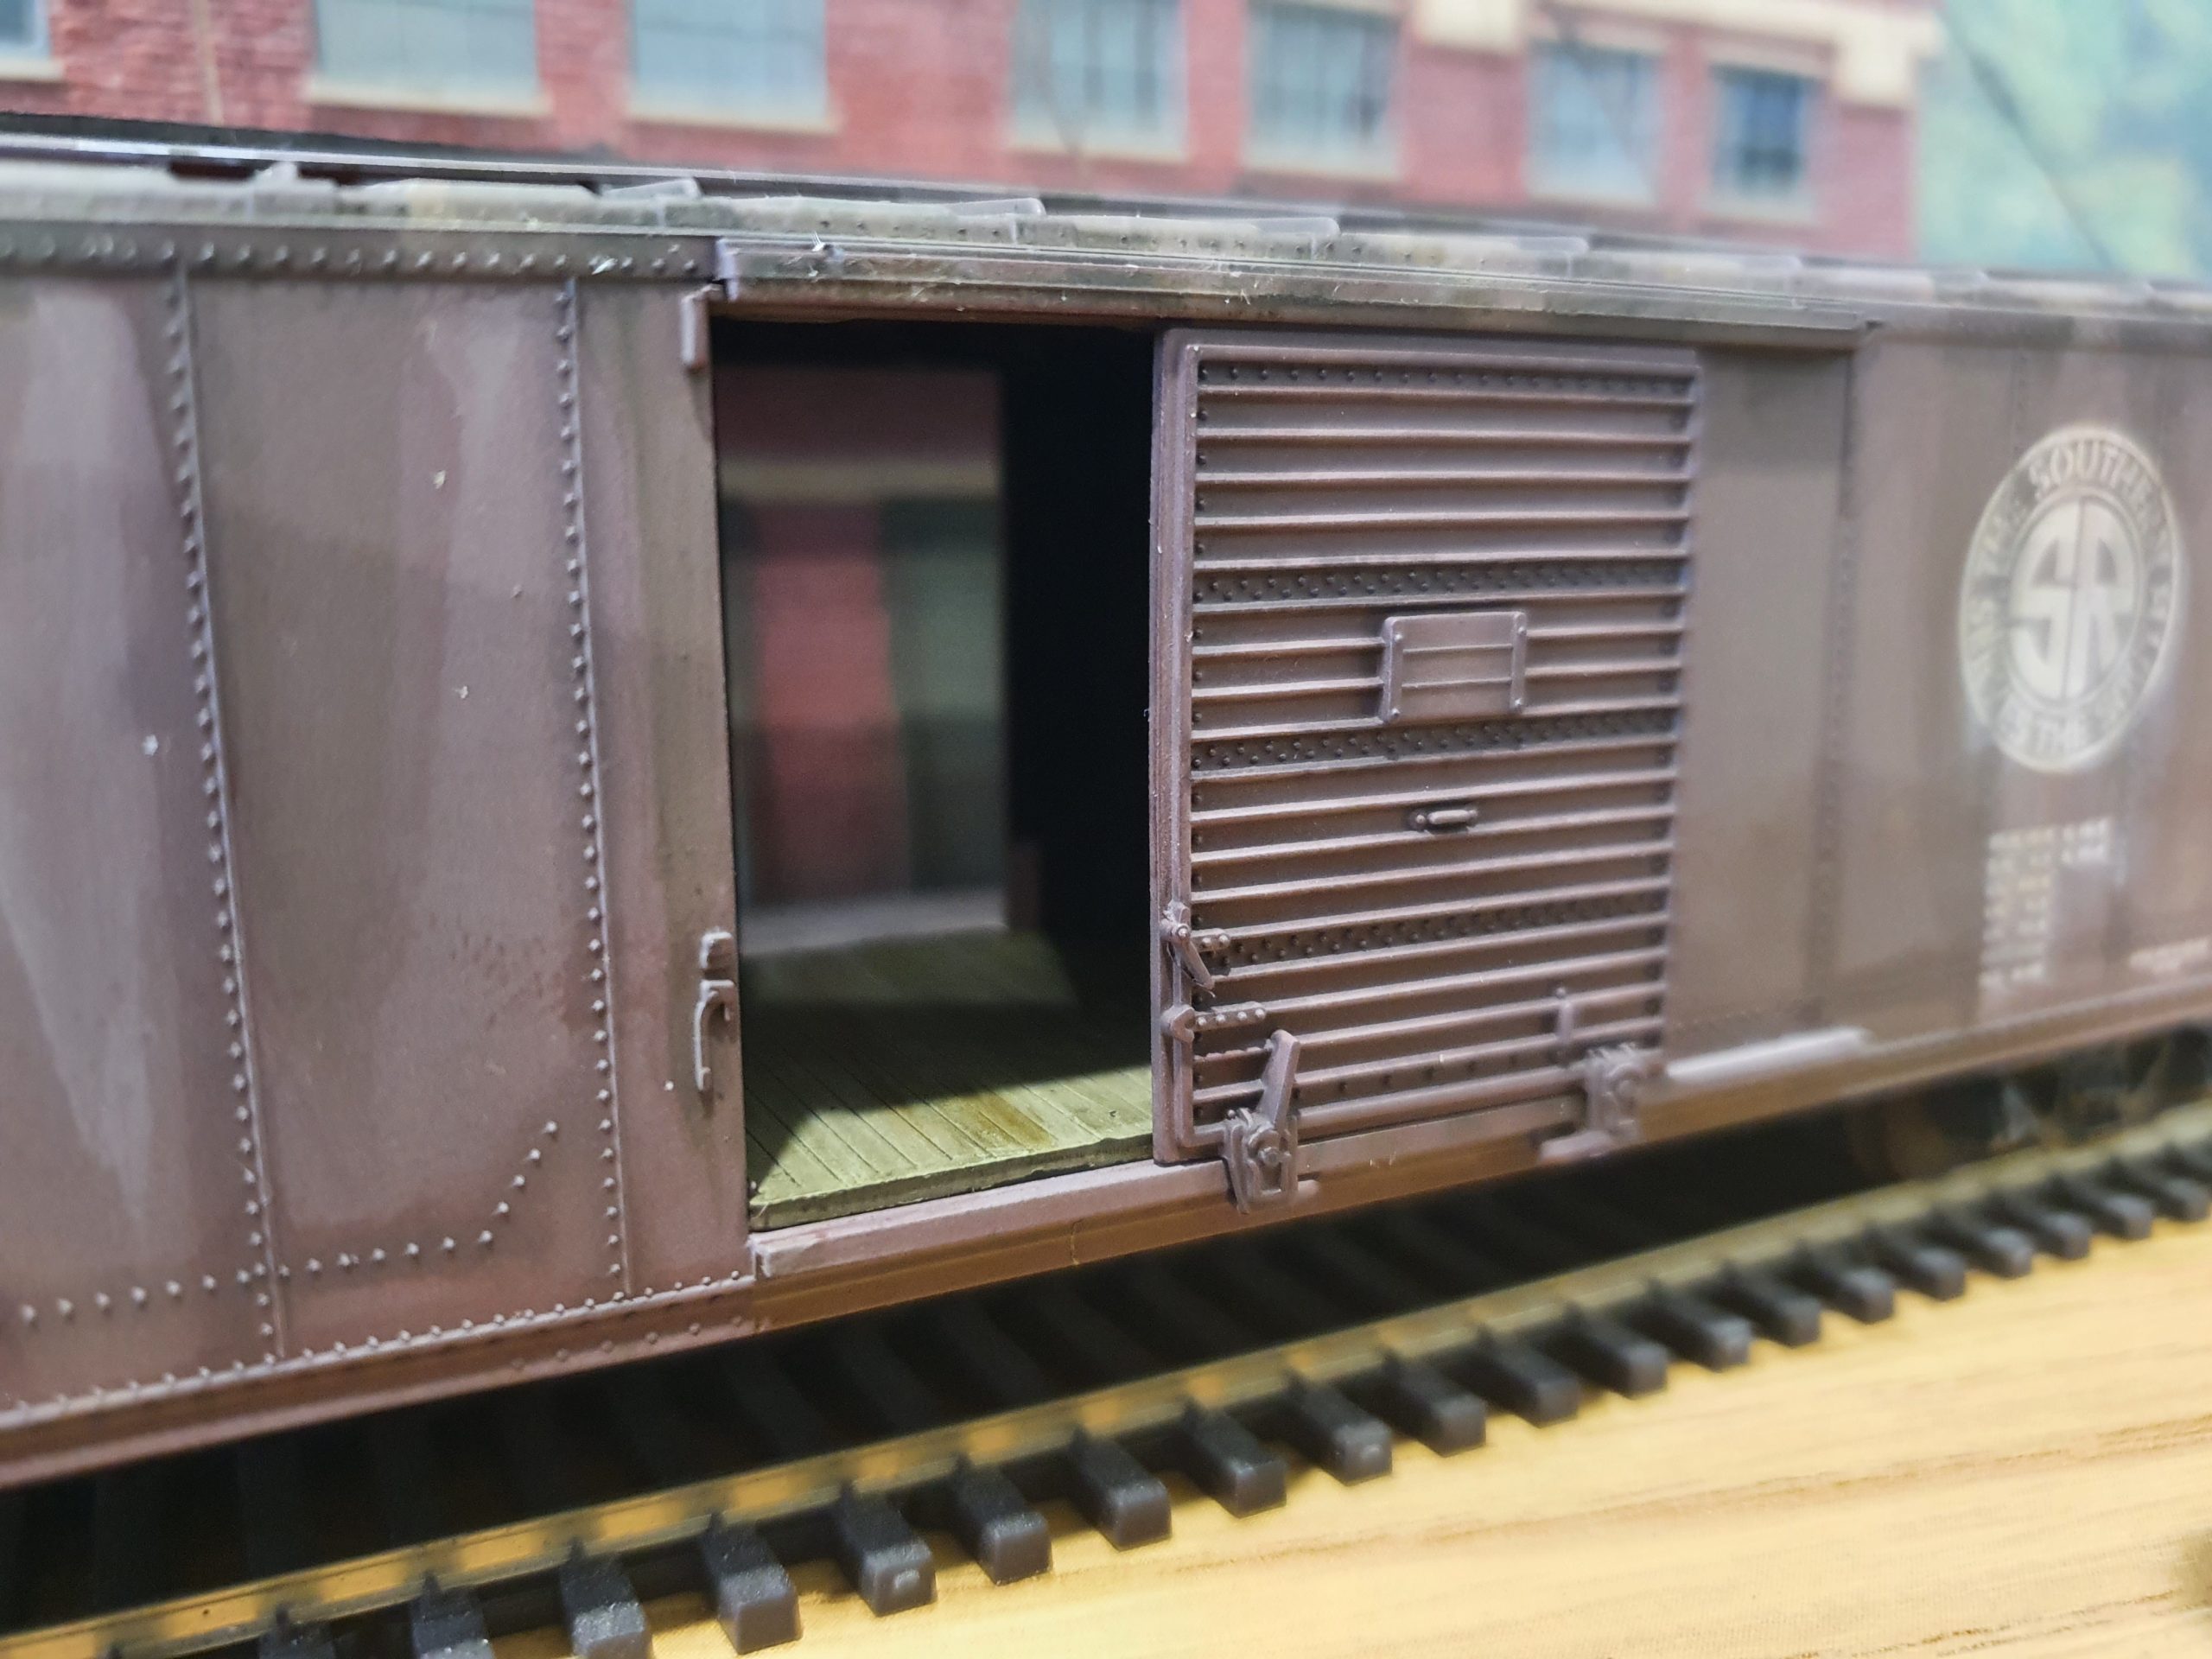
Weathering – SOU39974
Athearn BlueBox SOU39974 – Very early example. Also, what can go wrong when not thinking…

Weathering – SOU39974
Athearn blue-box SOU39974 – very early example. Replaced: Stirrups, roof walk, brake wheel and added air hoses
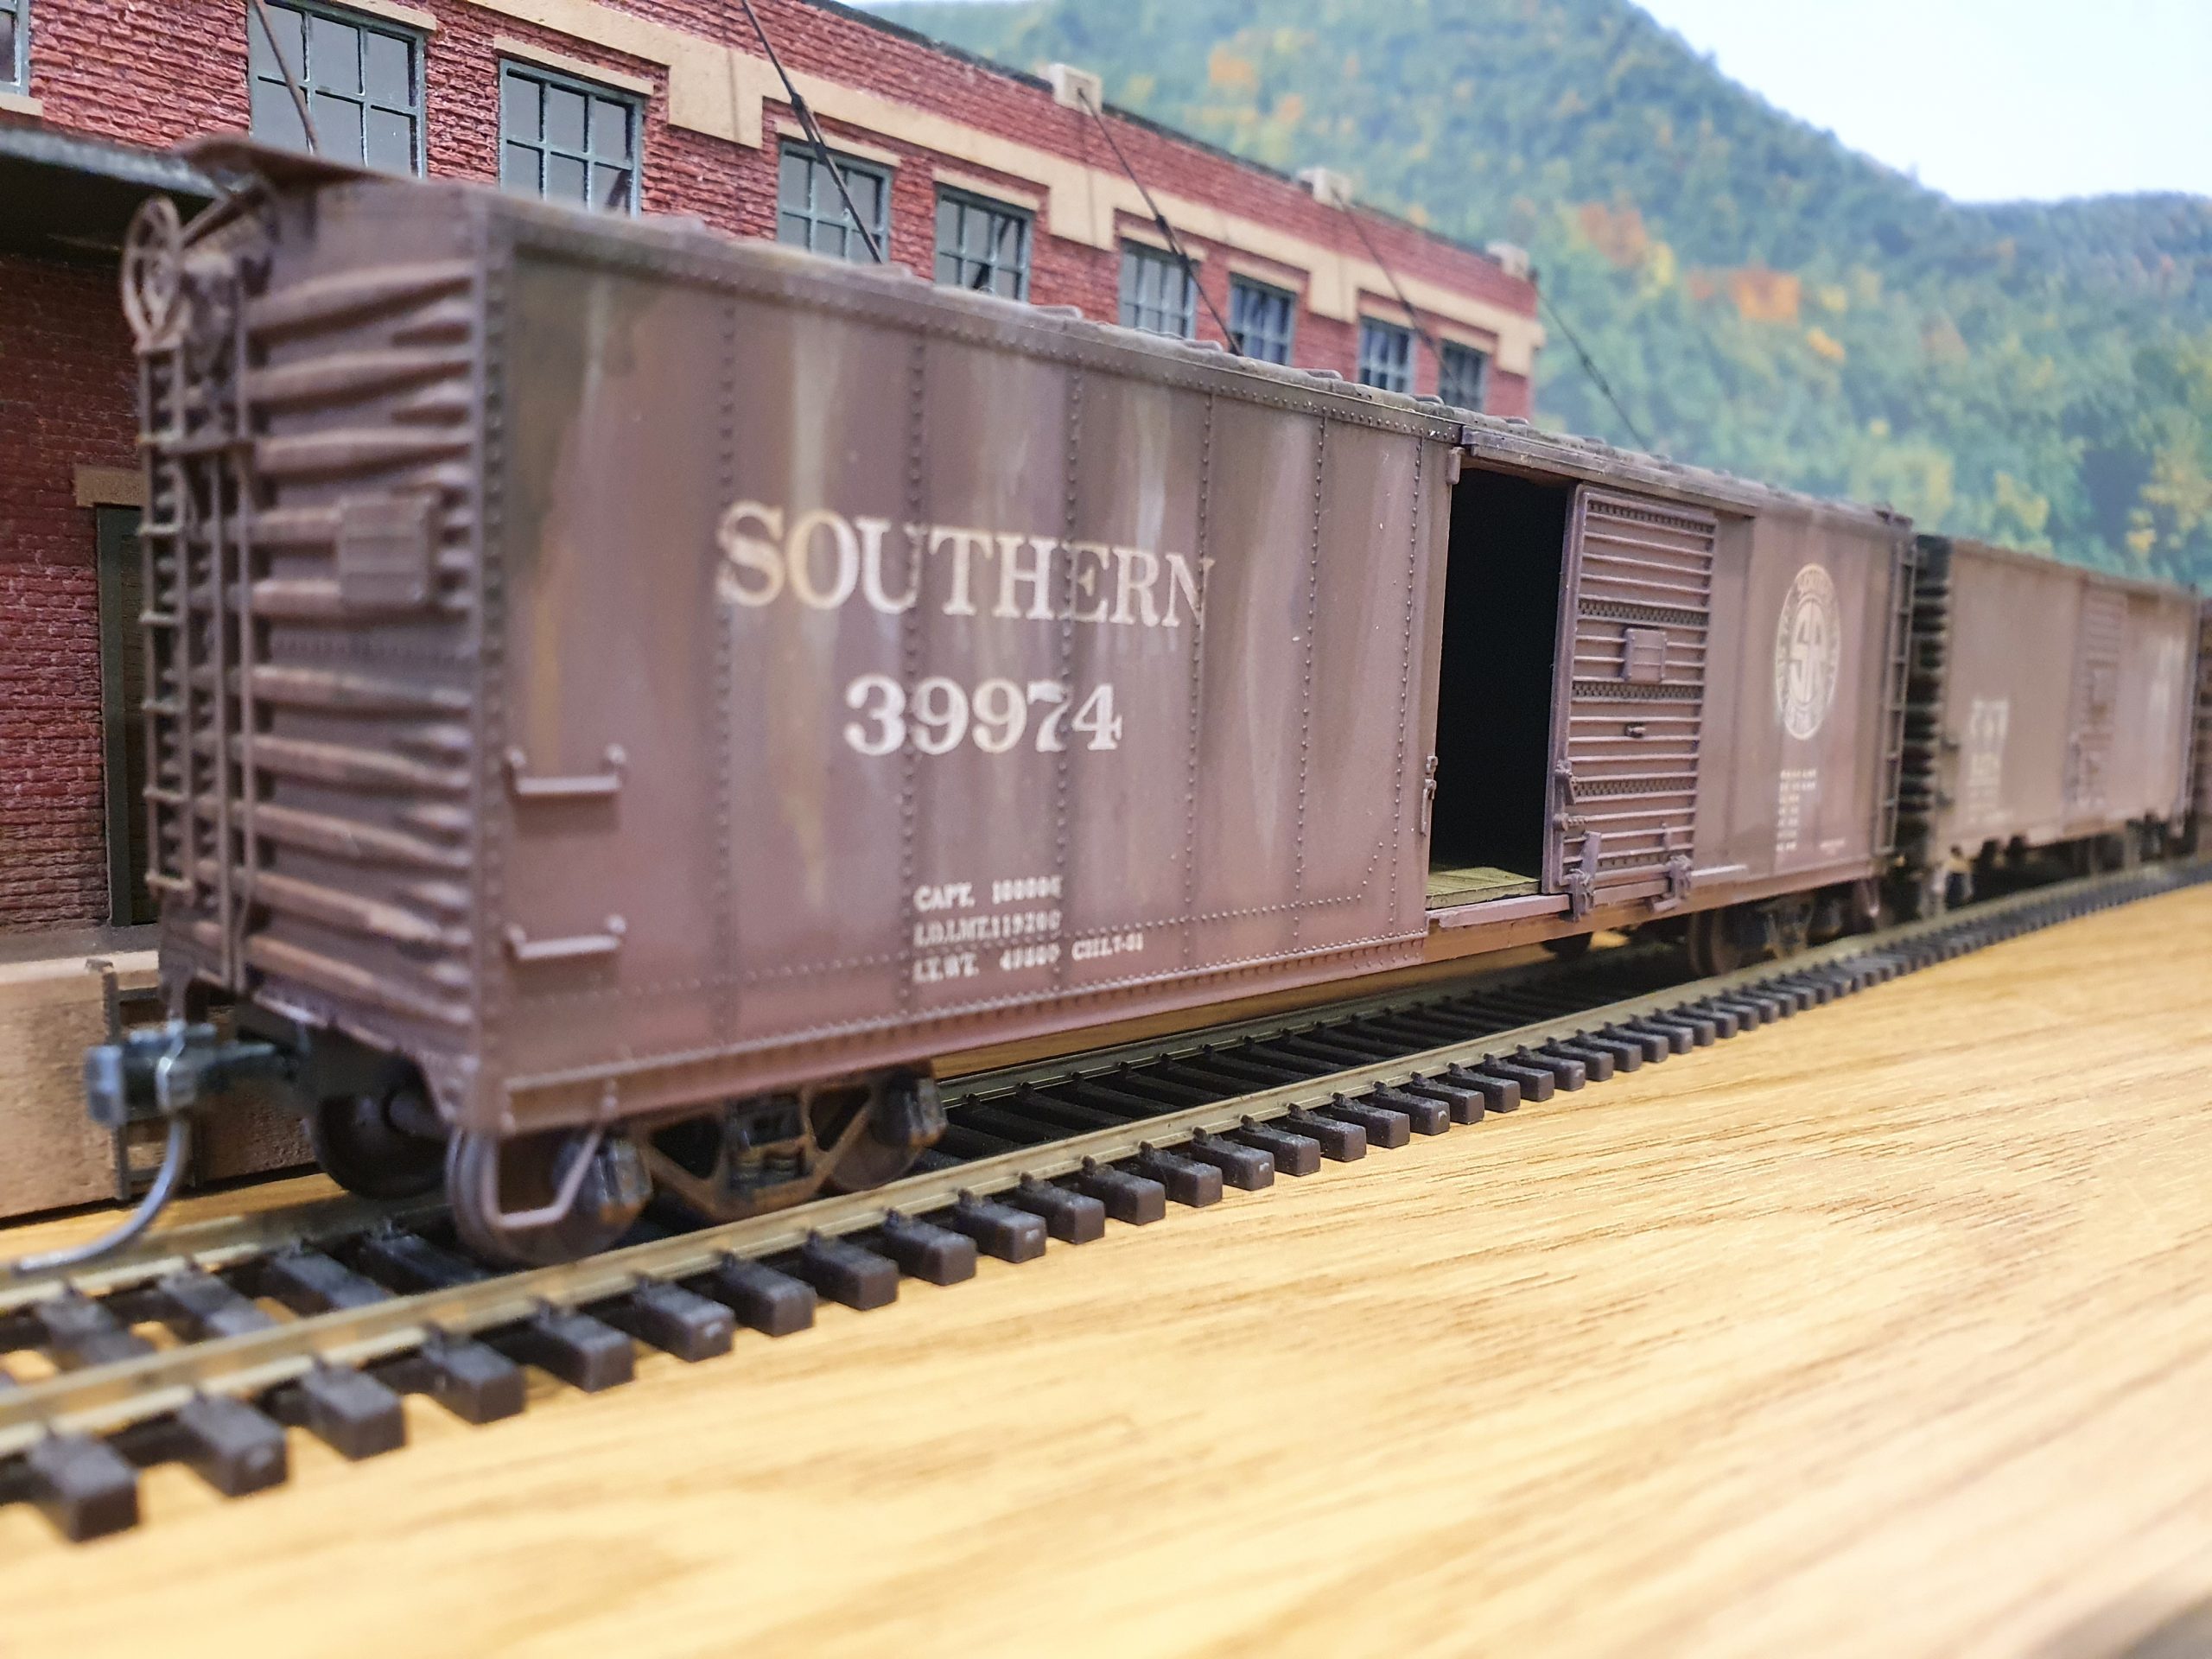
Weathering – SOU39974
Athearn BlueBox SOU39974 – Very early example

Weathering – SOU39974
Wetahering of floor…

Weathering – BS6736
Kadee PS-1 car
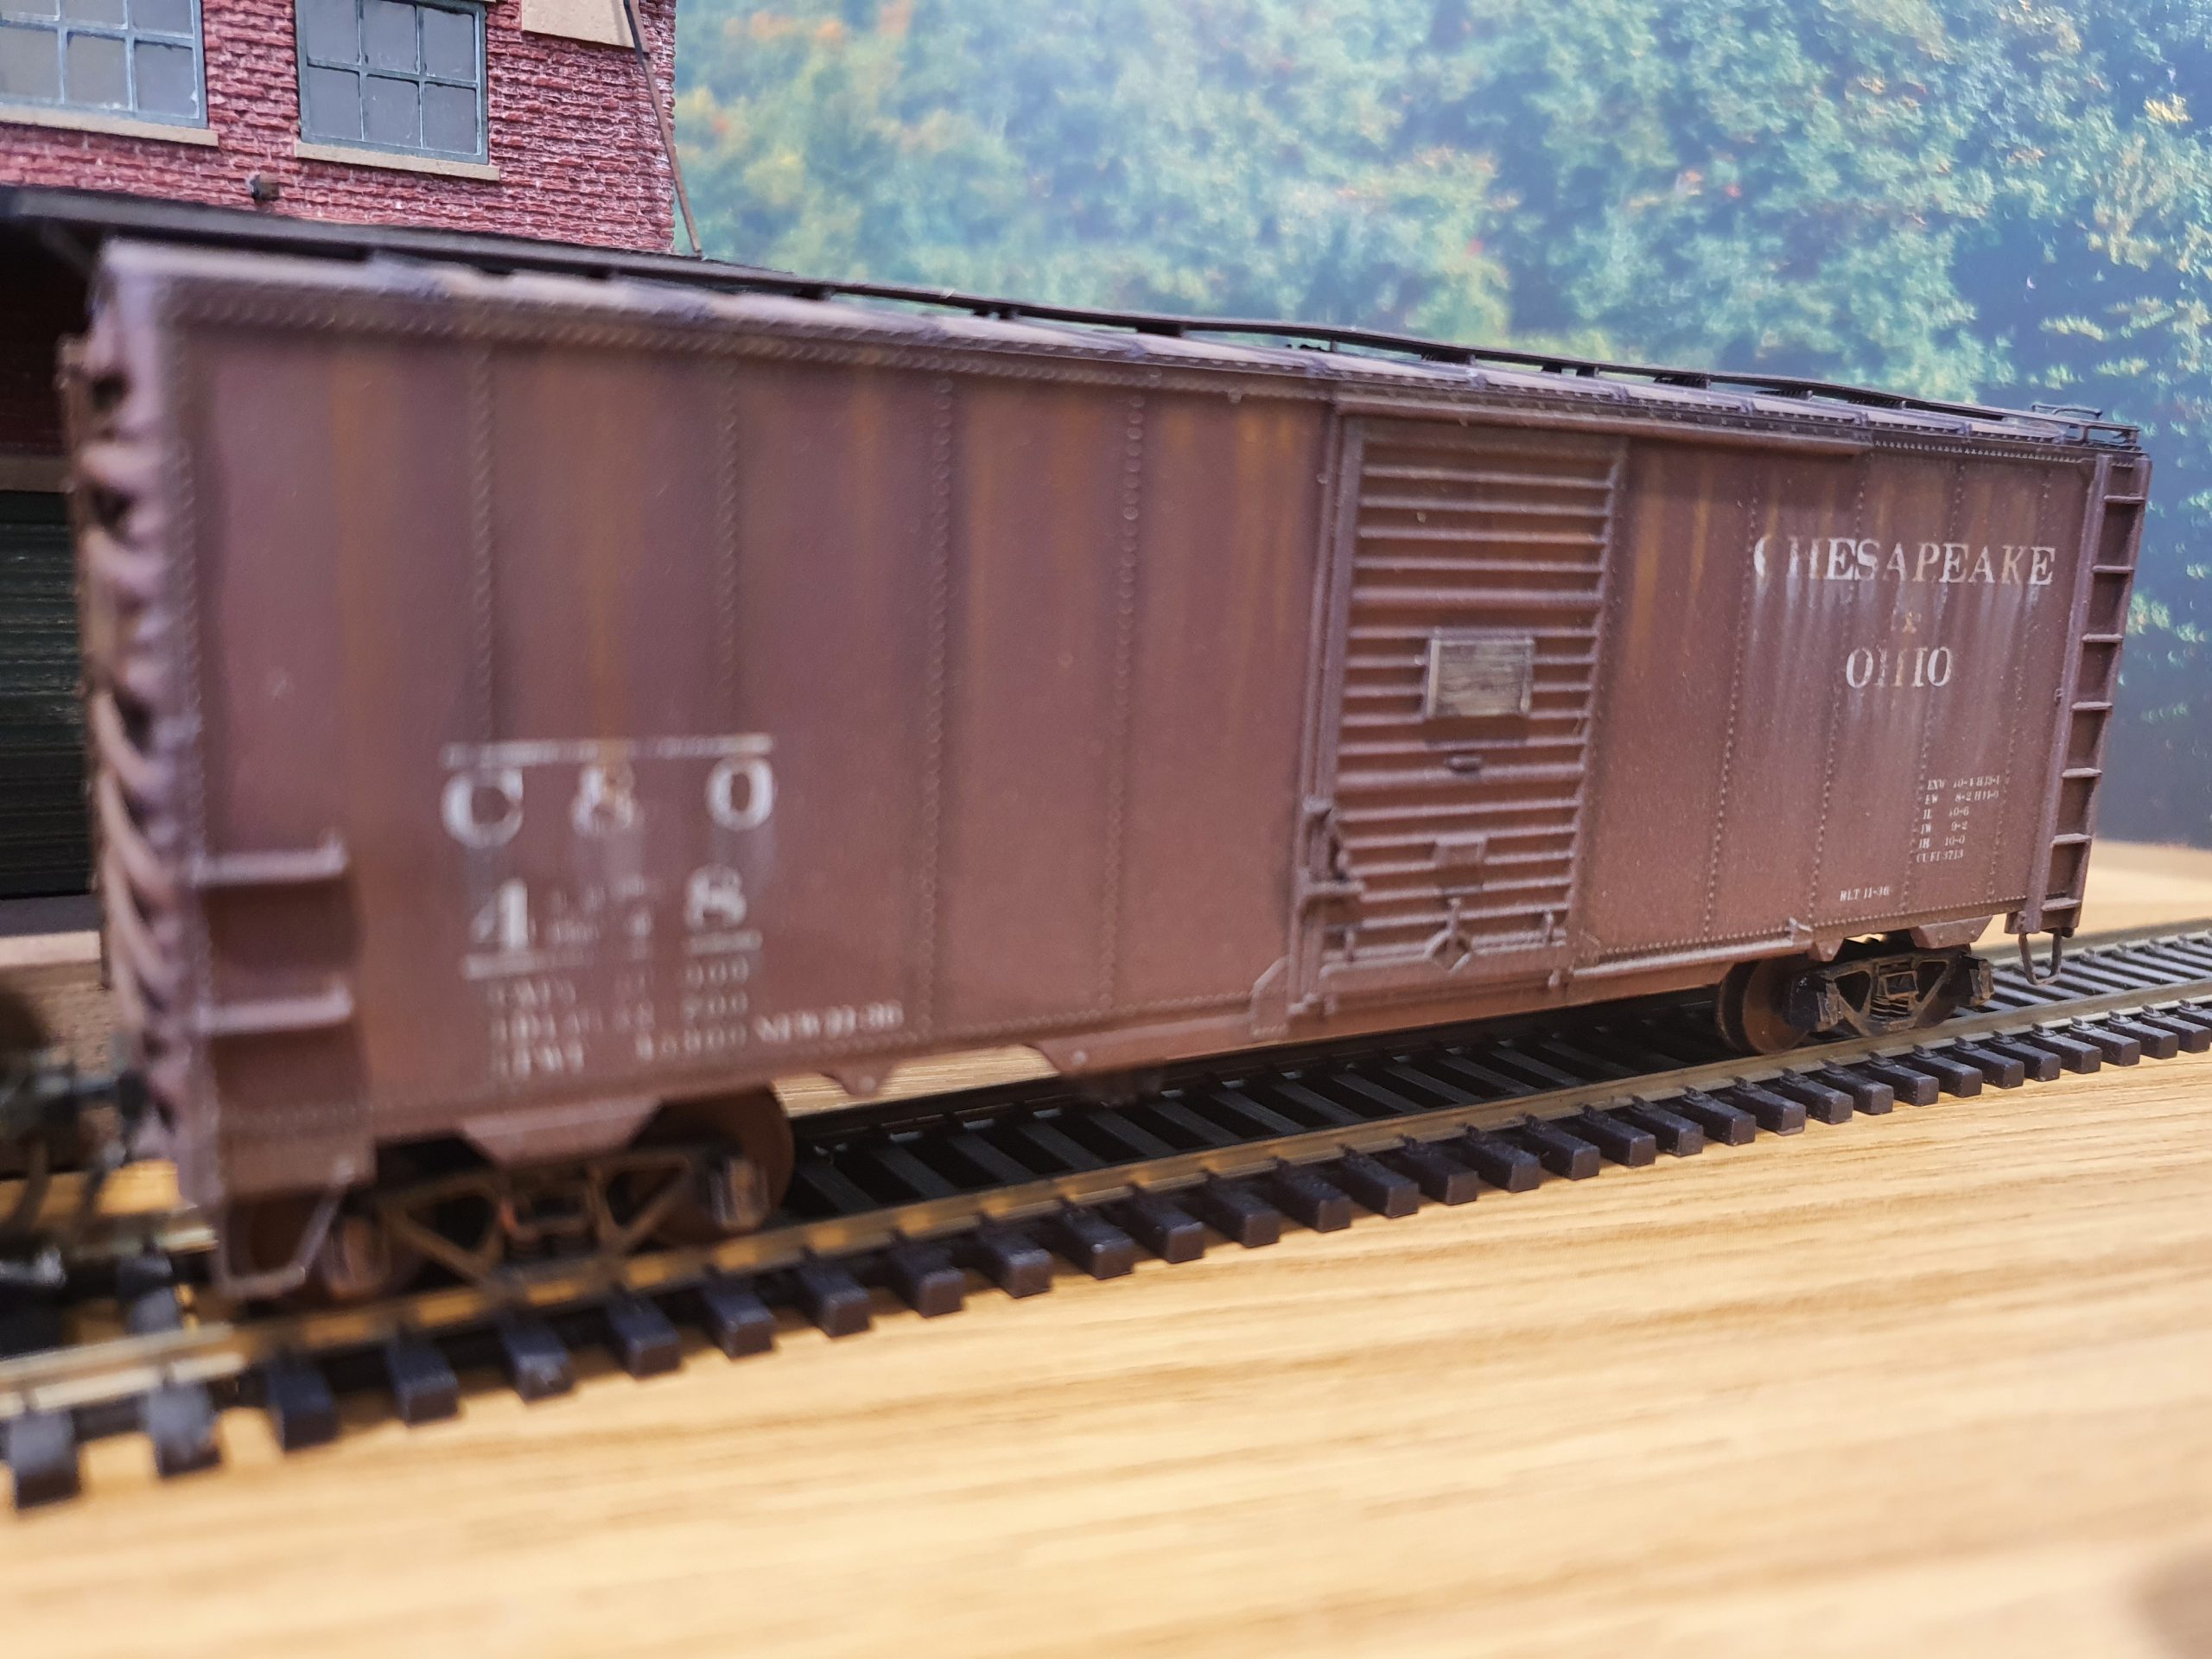
Weathering – C&O4278
Accurail C&O4278 – Very early example

Weathering – BS6736
Kadee PS-1 freight car
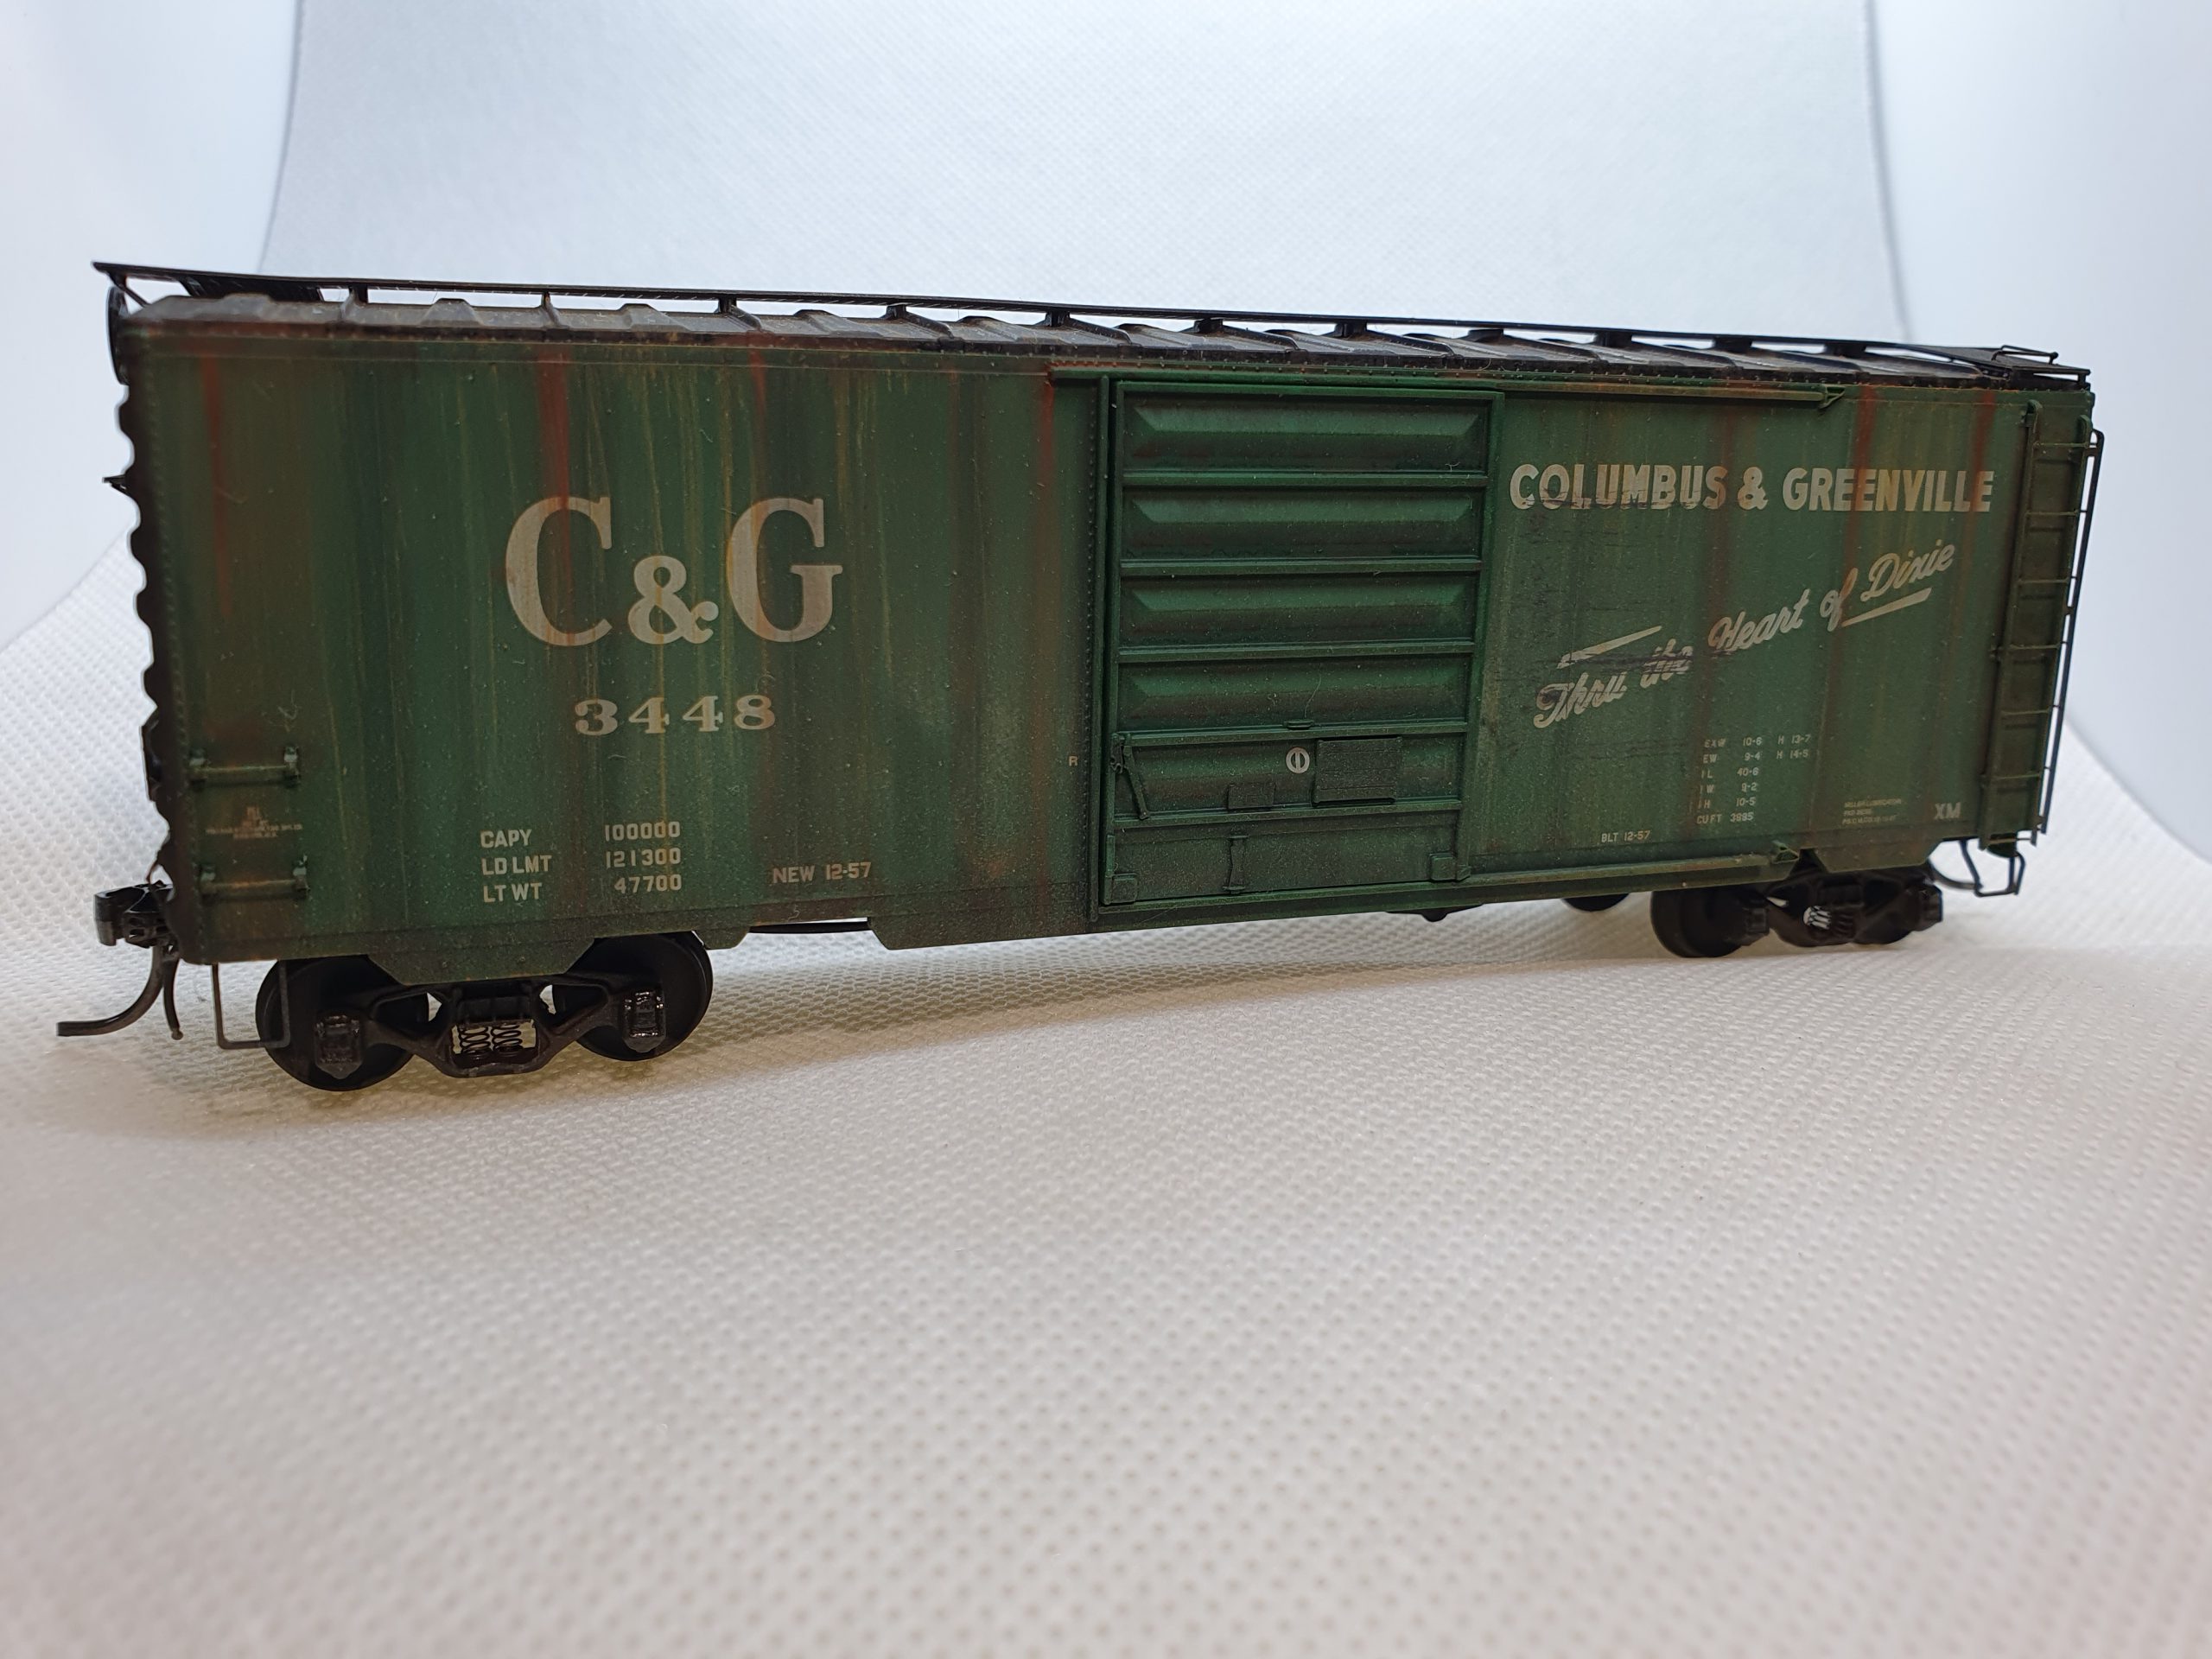
Weathering – C&G3448
Kadee PS-1 car

Weathering SOU39974
Athearn BlueBox SOU39974 – Very early example
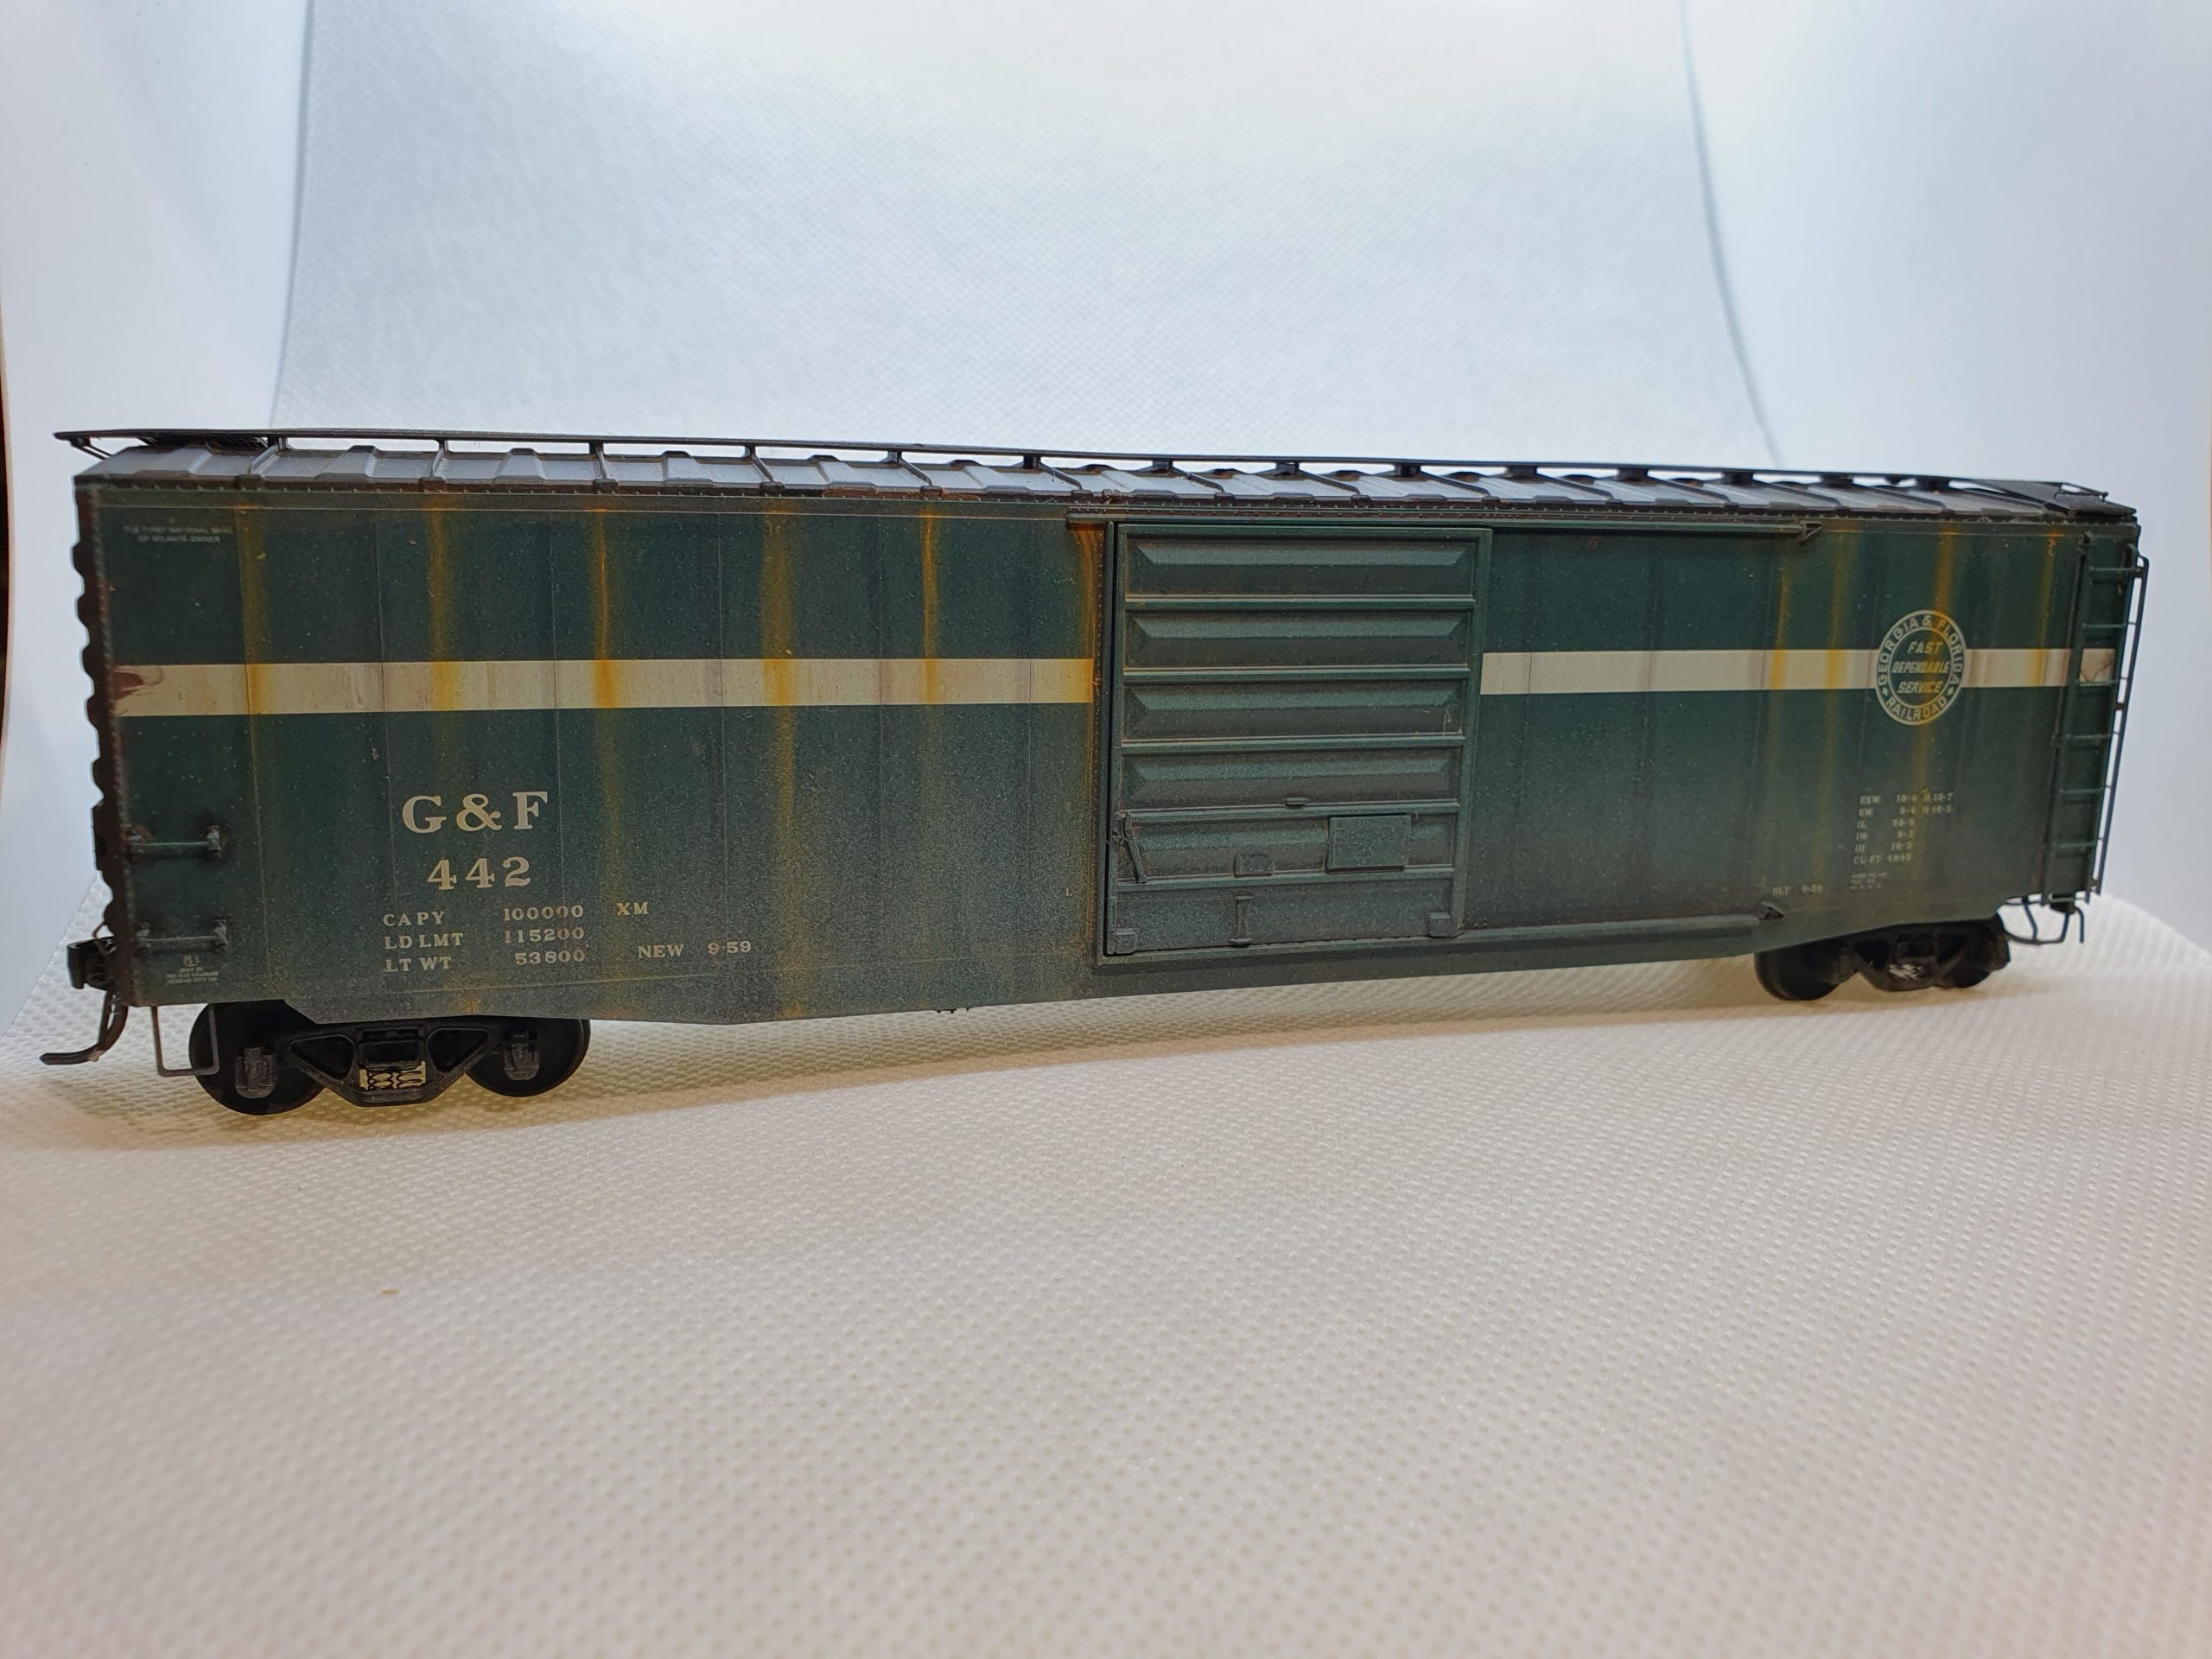
Weathering – G&F442
Kadee 50′ PS-1 car. I bought this second had and poorly weathered. I’m very pleased with what I was able to recover.

Weathering – CNJ-23512
Kadee PS-1 car roof detail
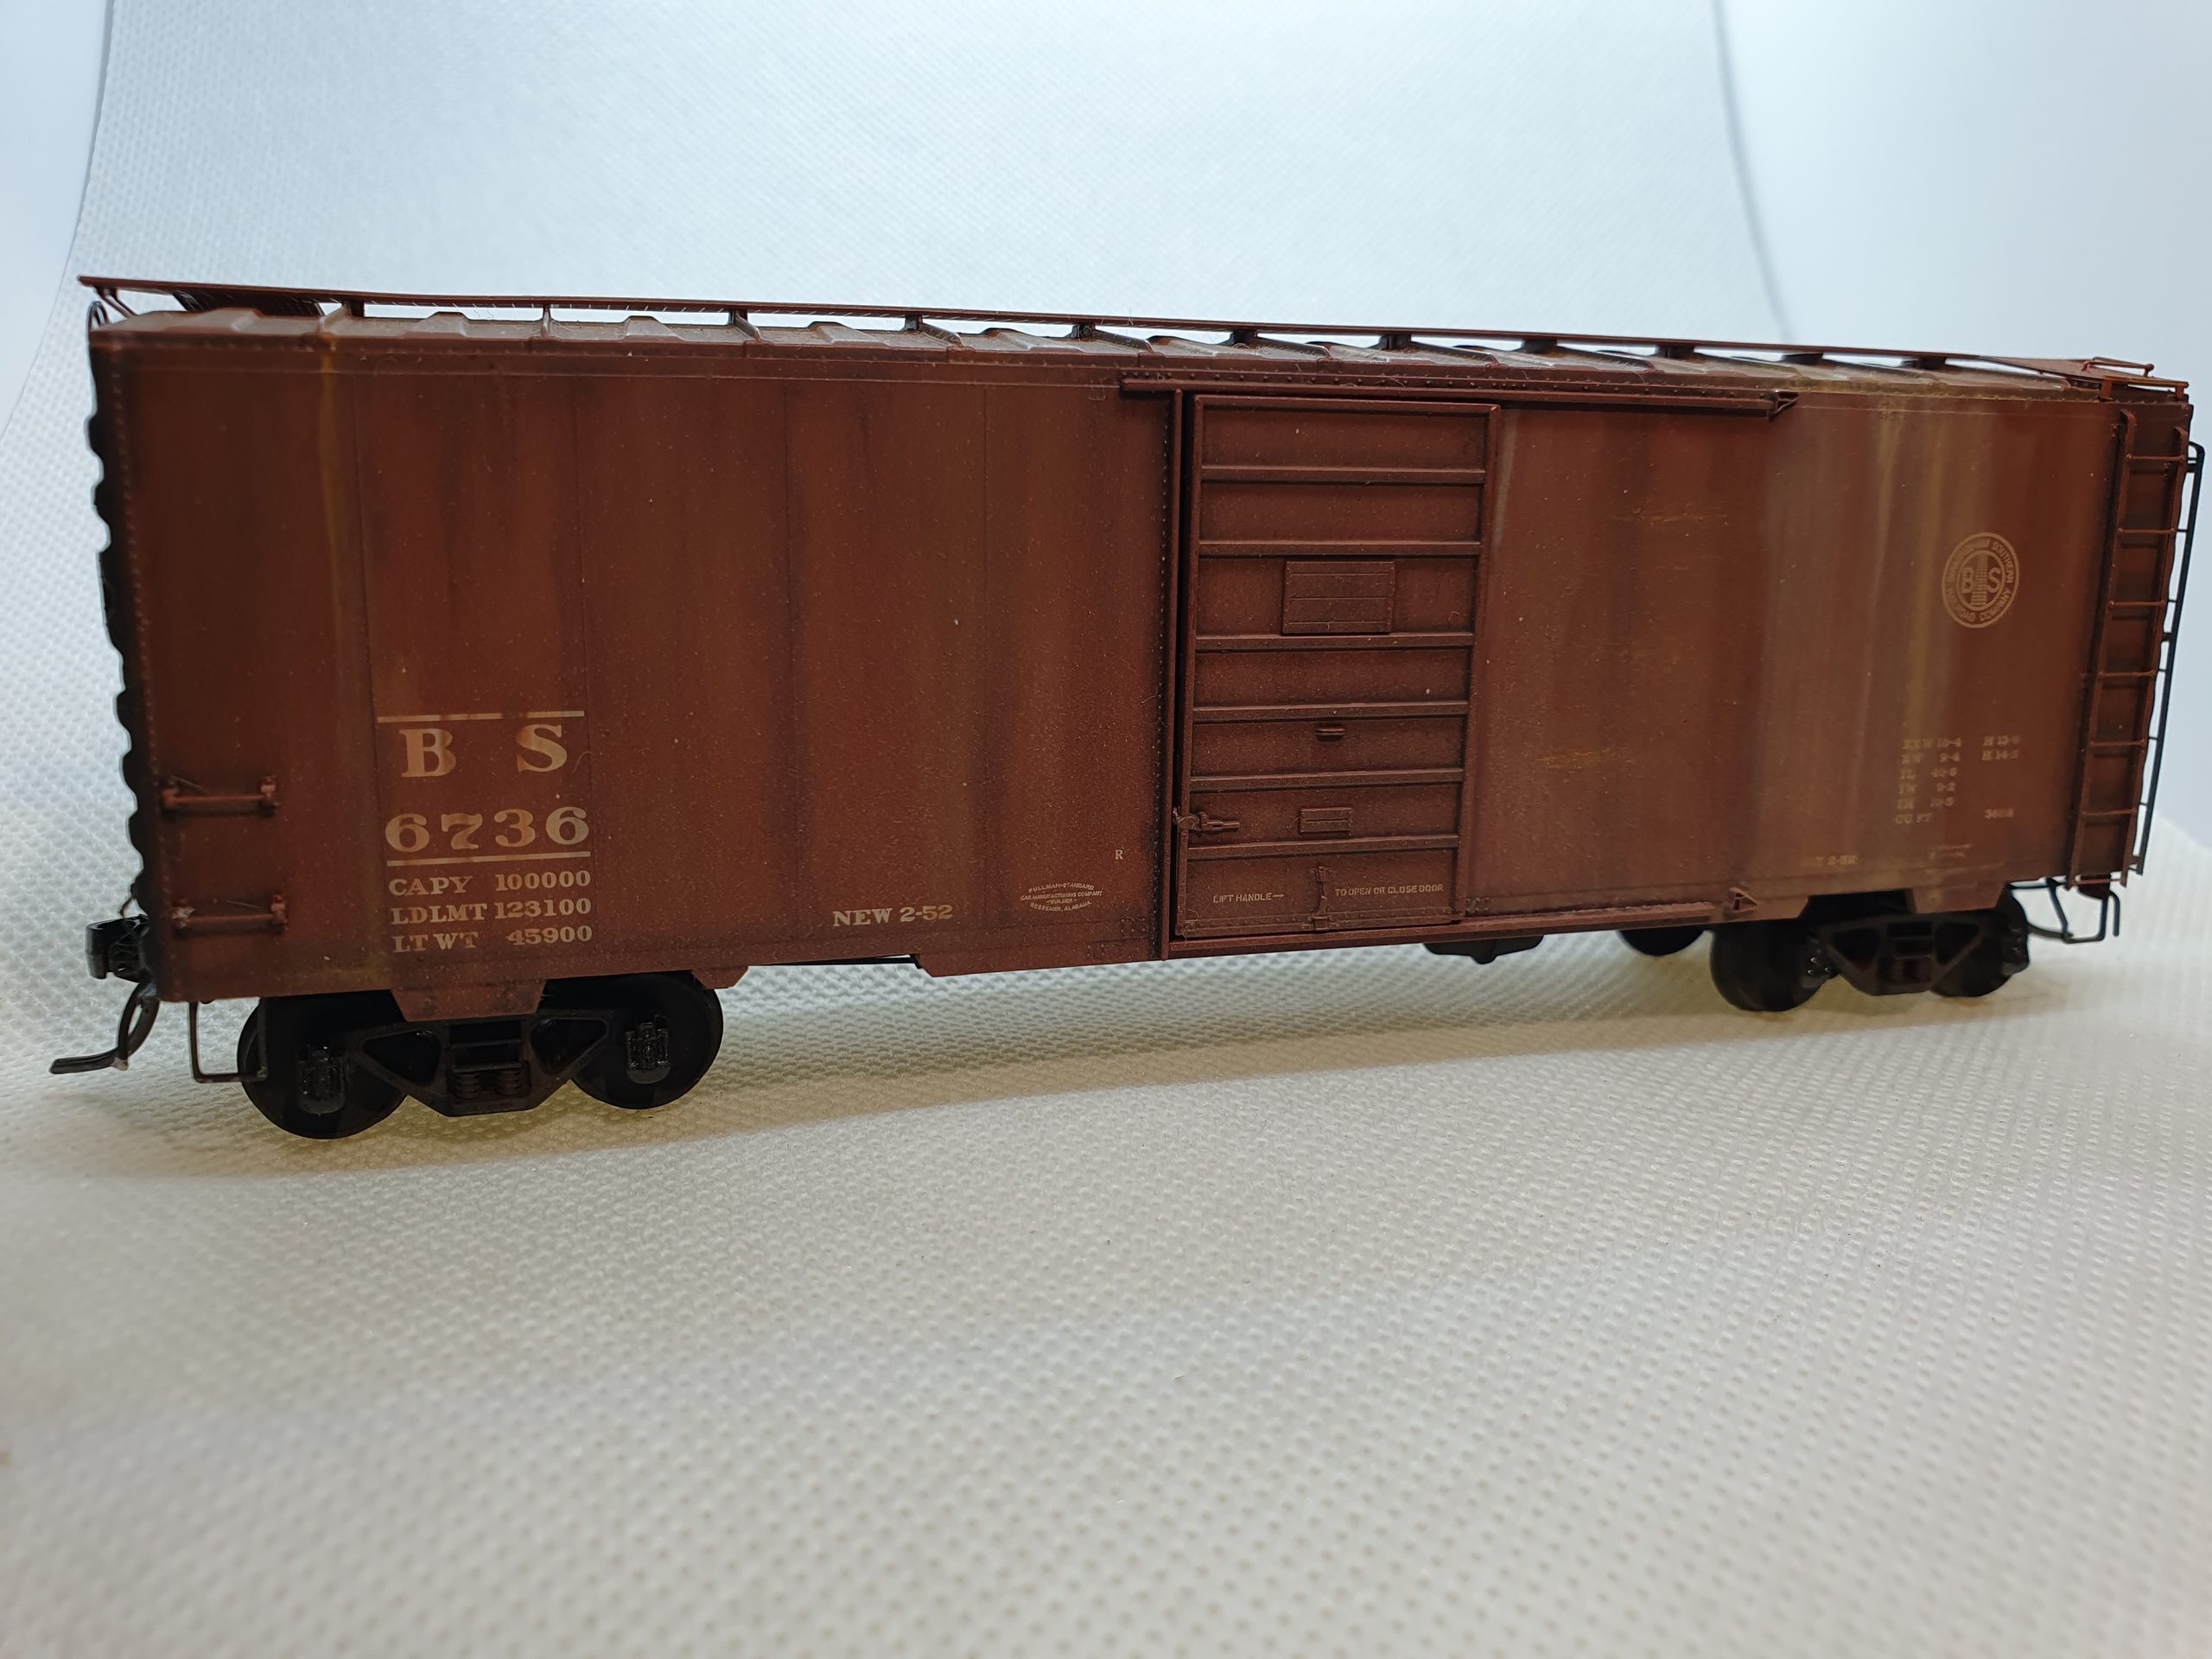
Weathering – BS6736
Kadee PS-1 car
Weathering SOU39974
Athearn BlueBox SOU39974 – Very early example
Weathering
Very early examples

Weathering – CNJ25512
Kadee PS-1 car
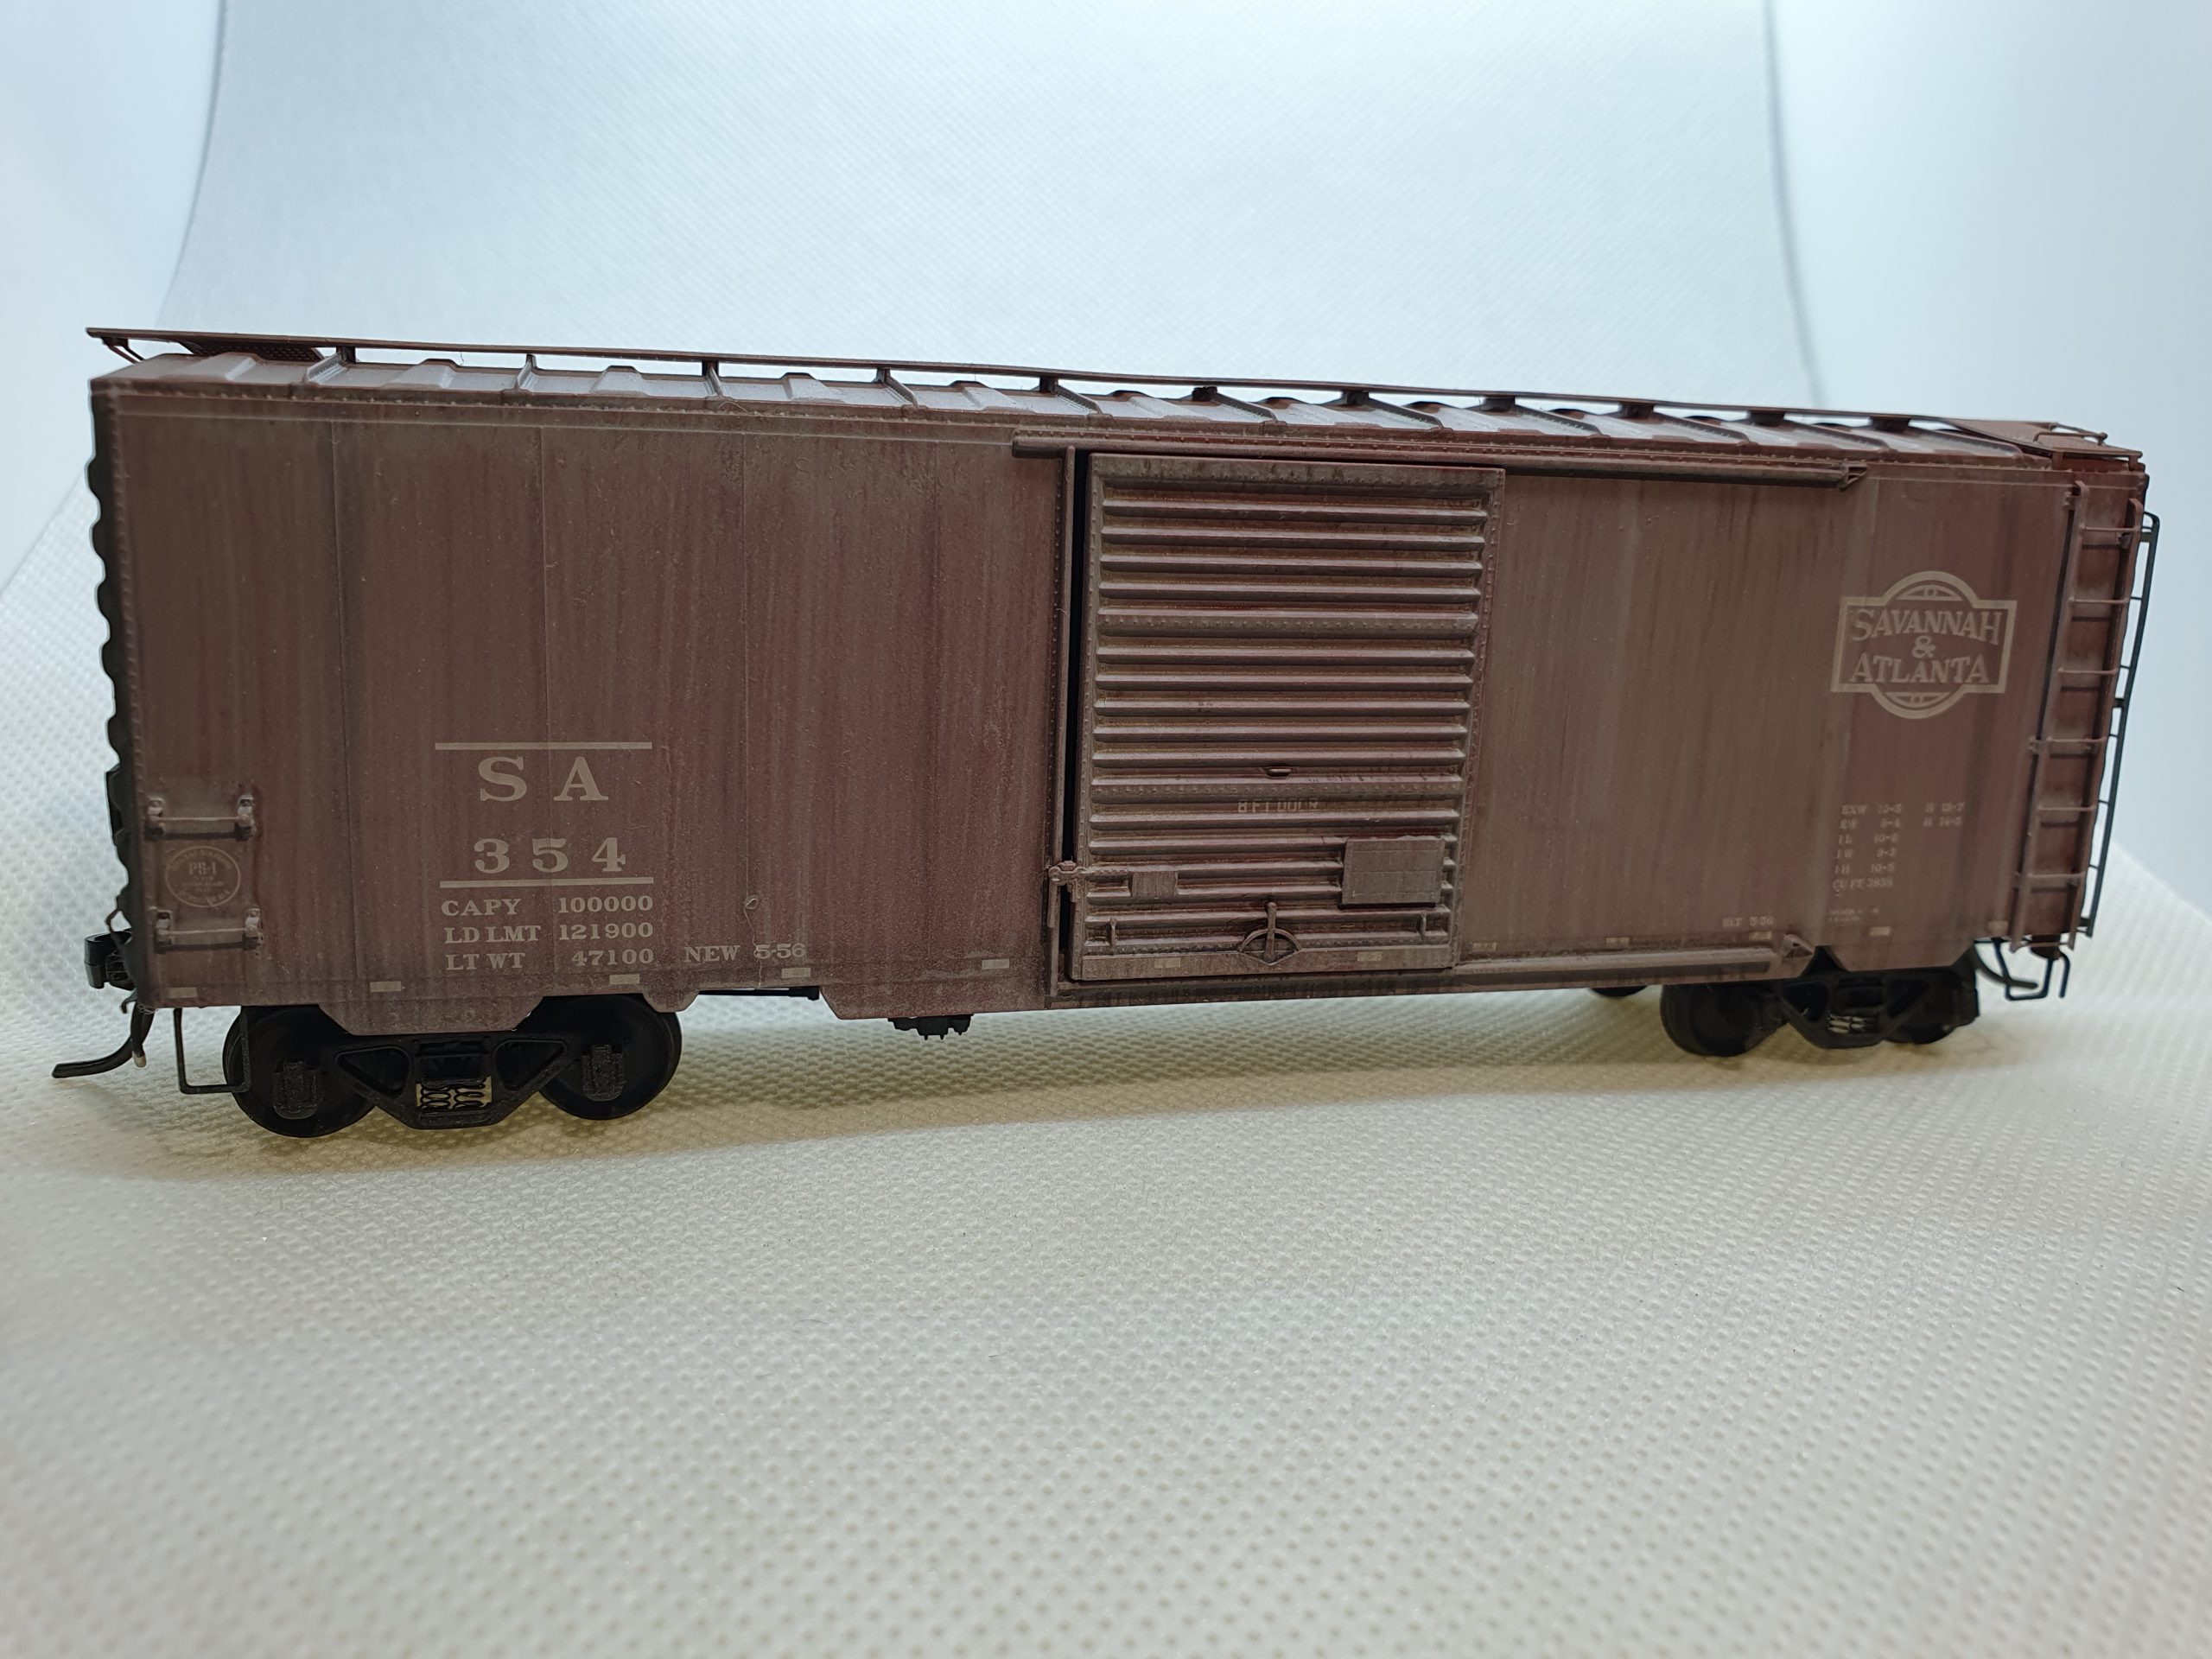
Weathering – SA354
Kadee PS-1 Car, probably in kaolin service
Weathering – SOU39974
Athearn BlueBox SOU39974 – Very early example
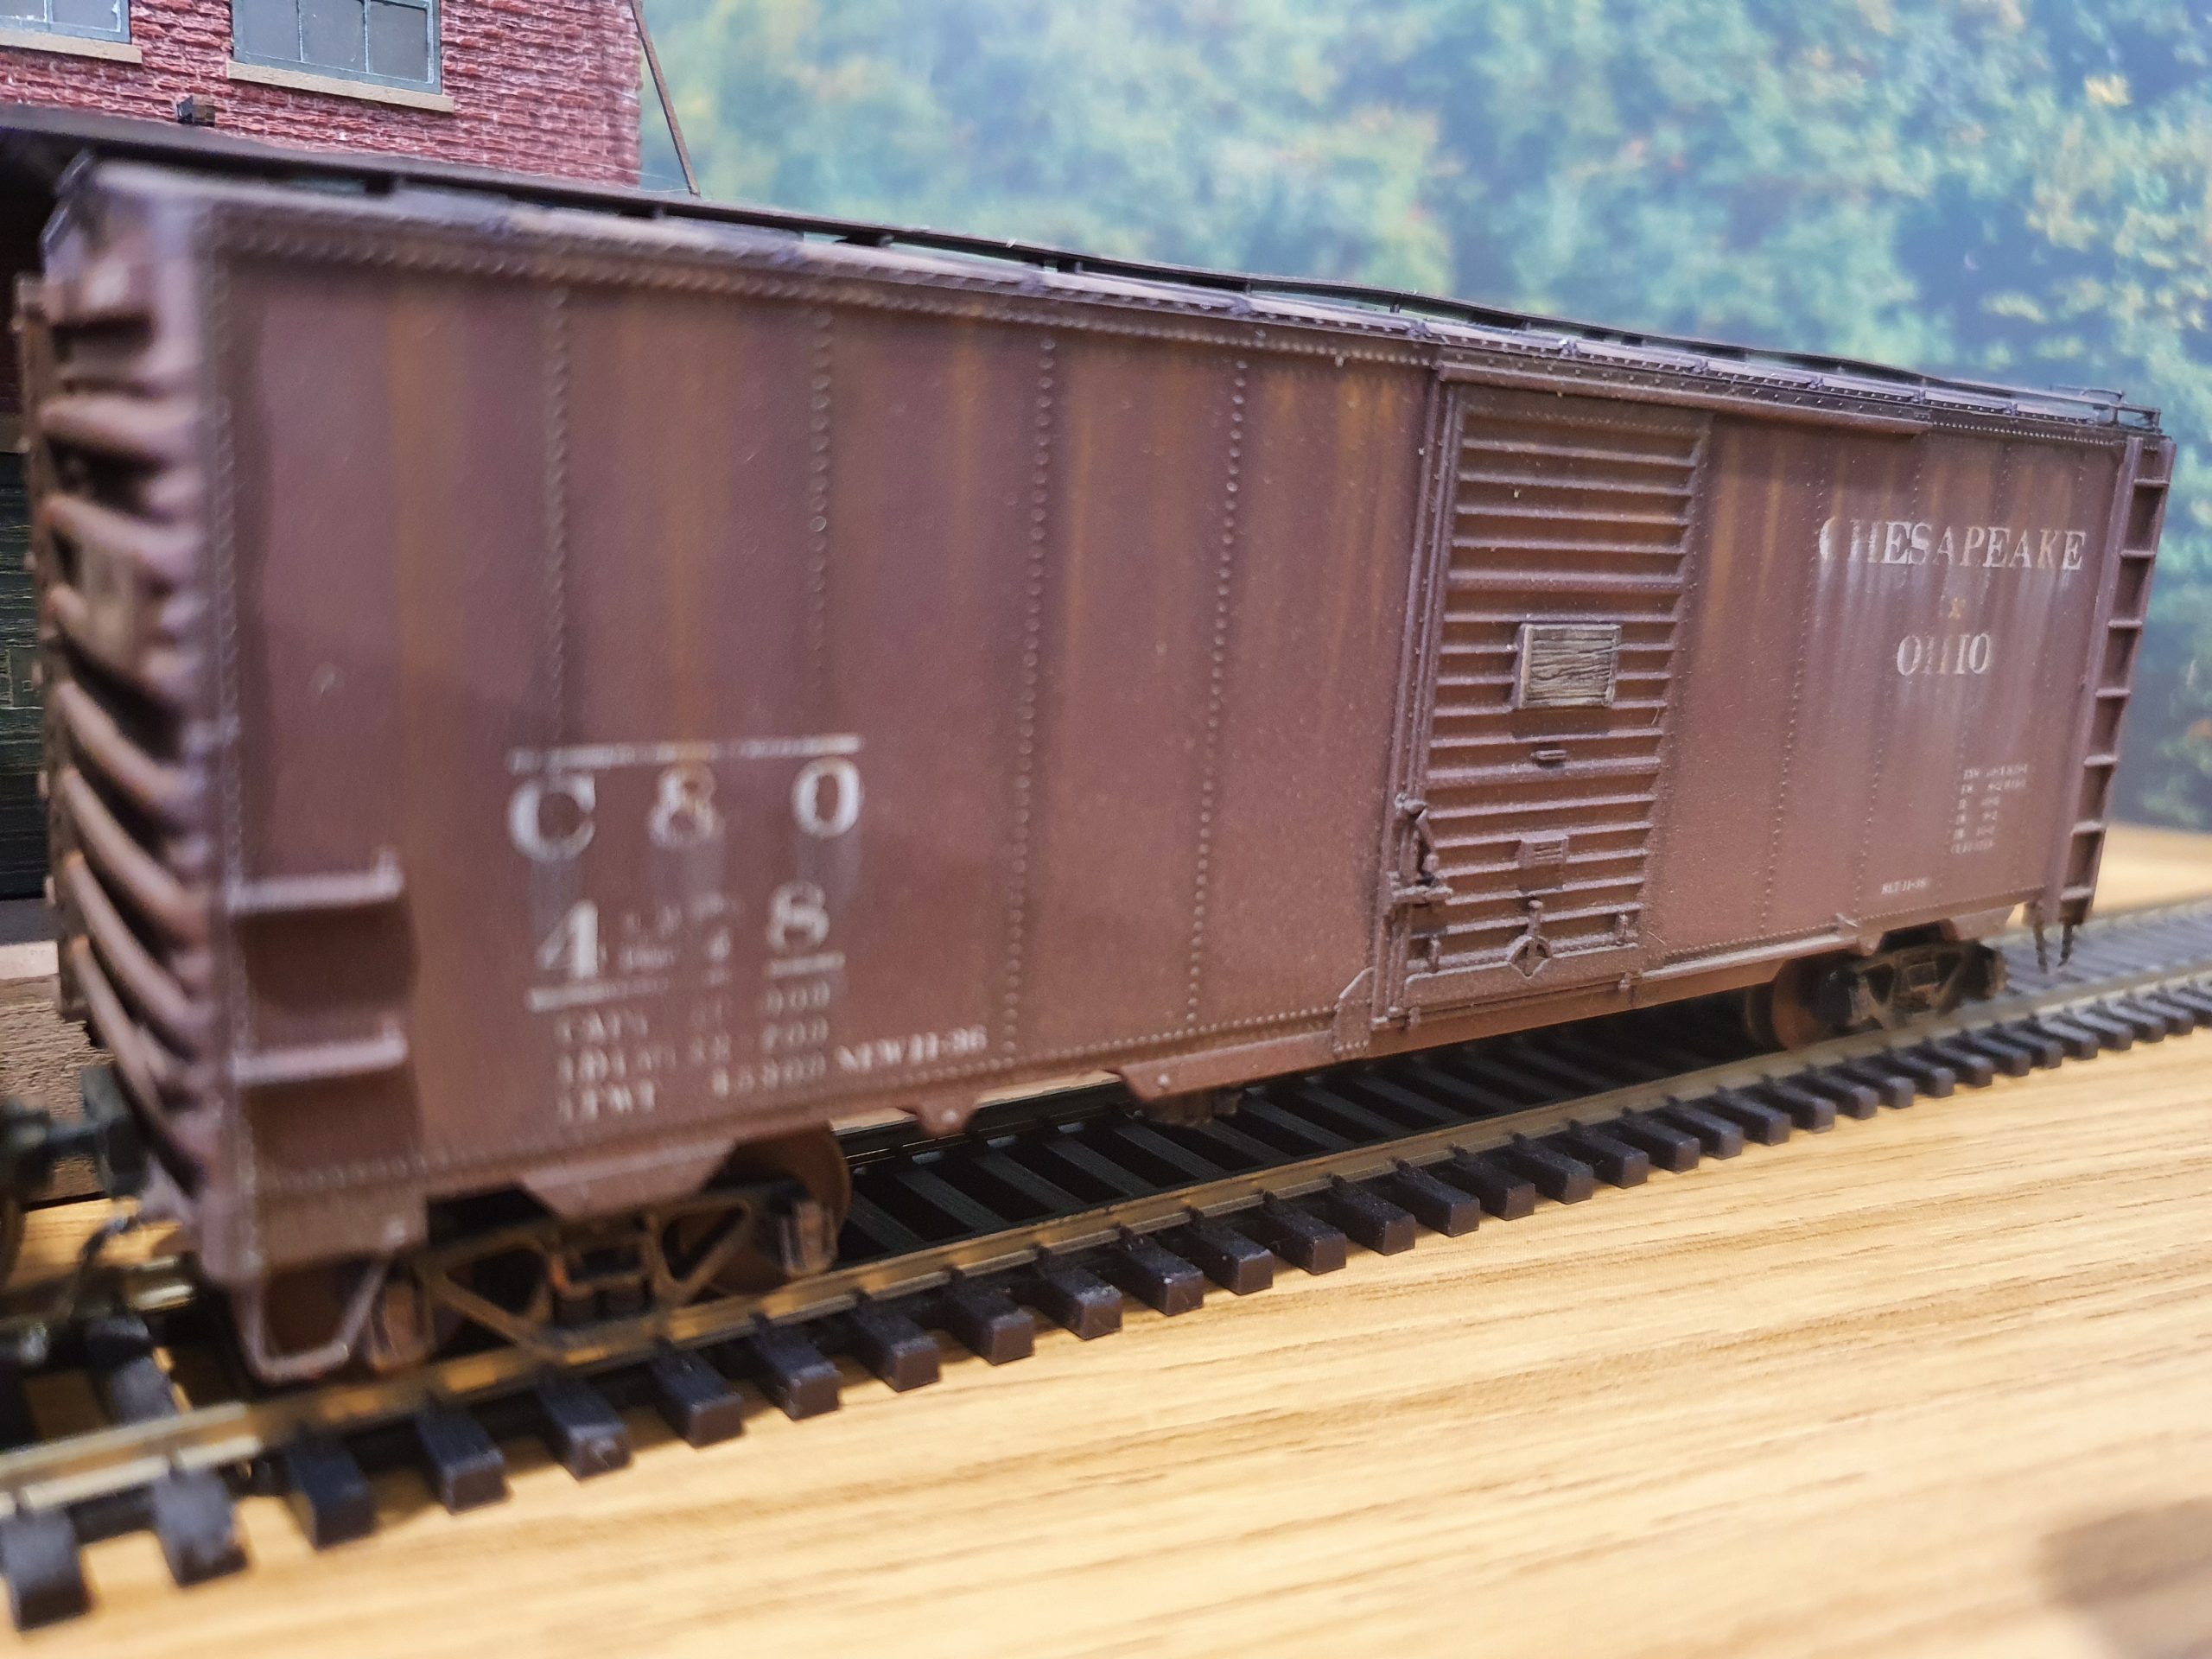
Weathering – C&O4278
Accurail C&O4278 – Very early example
Weathering
Kadee PS-1 freight cars
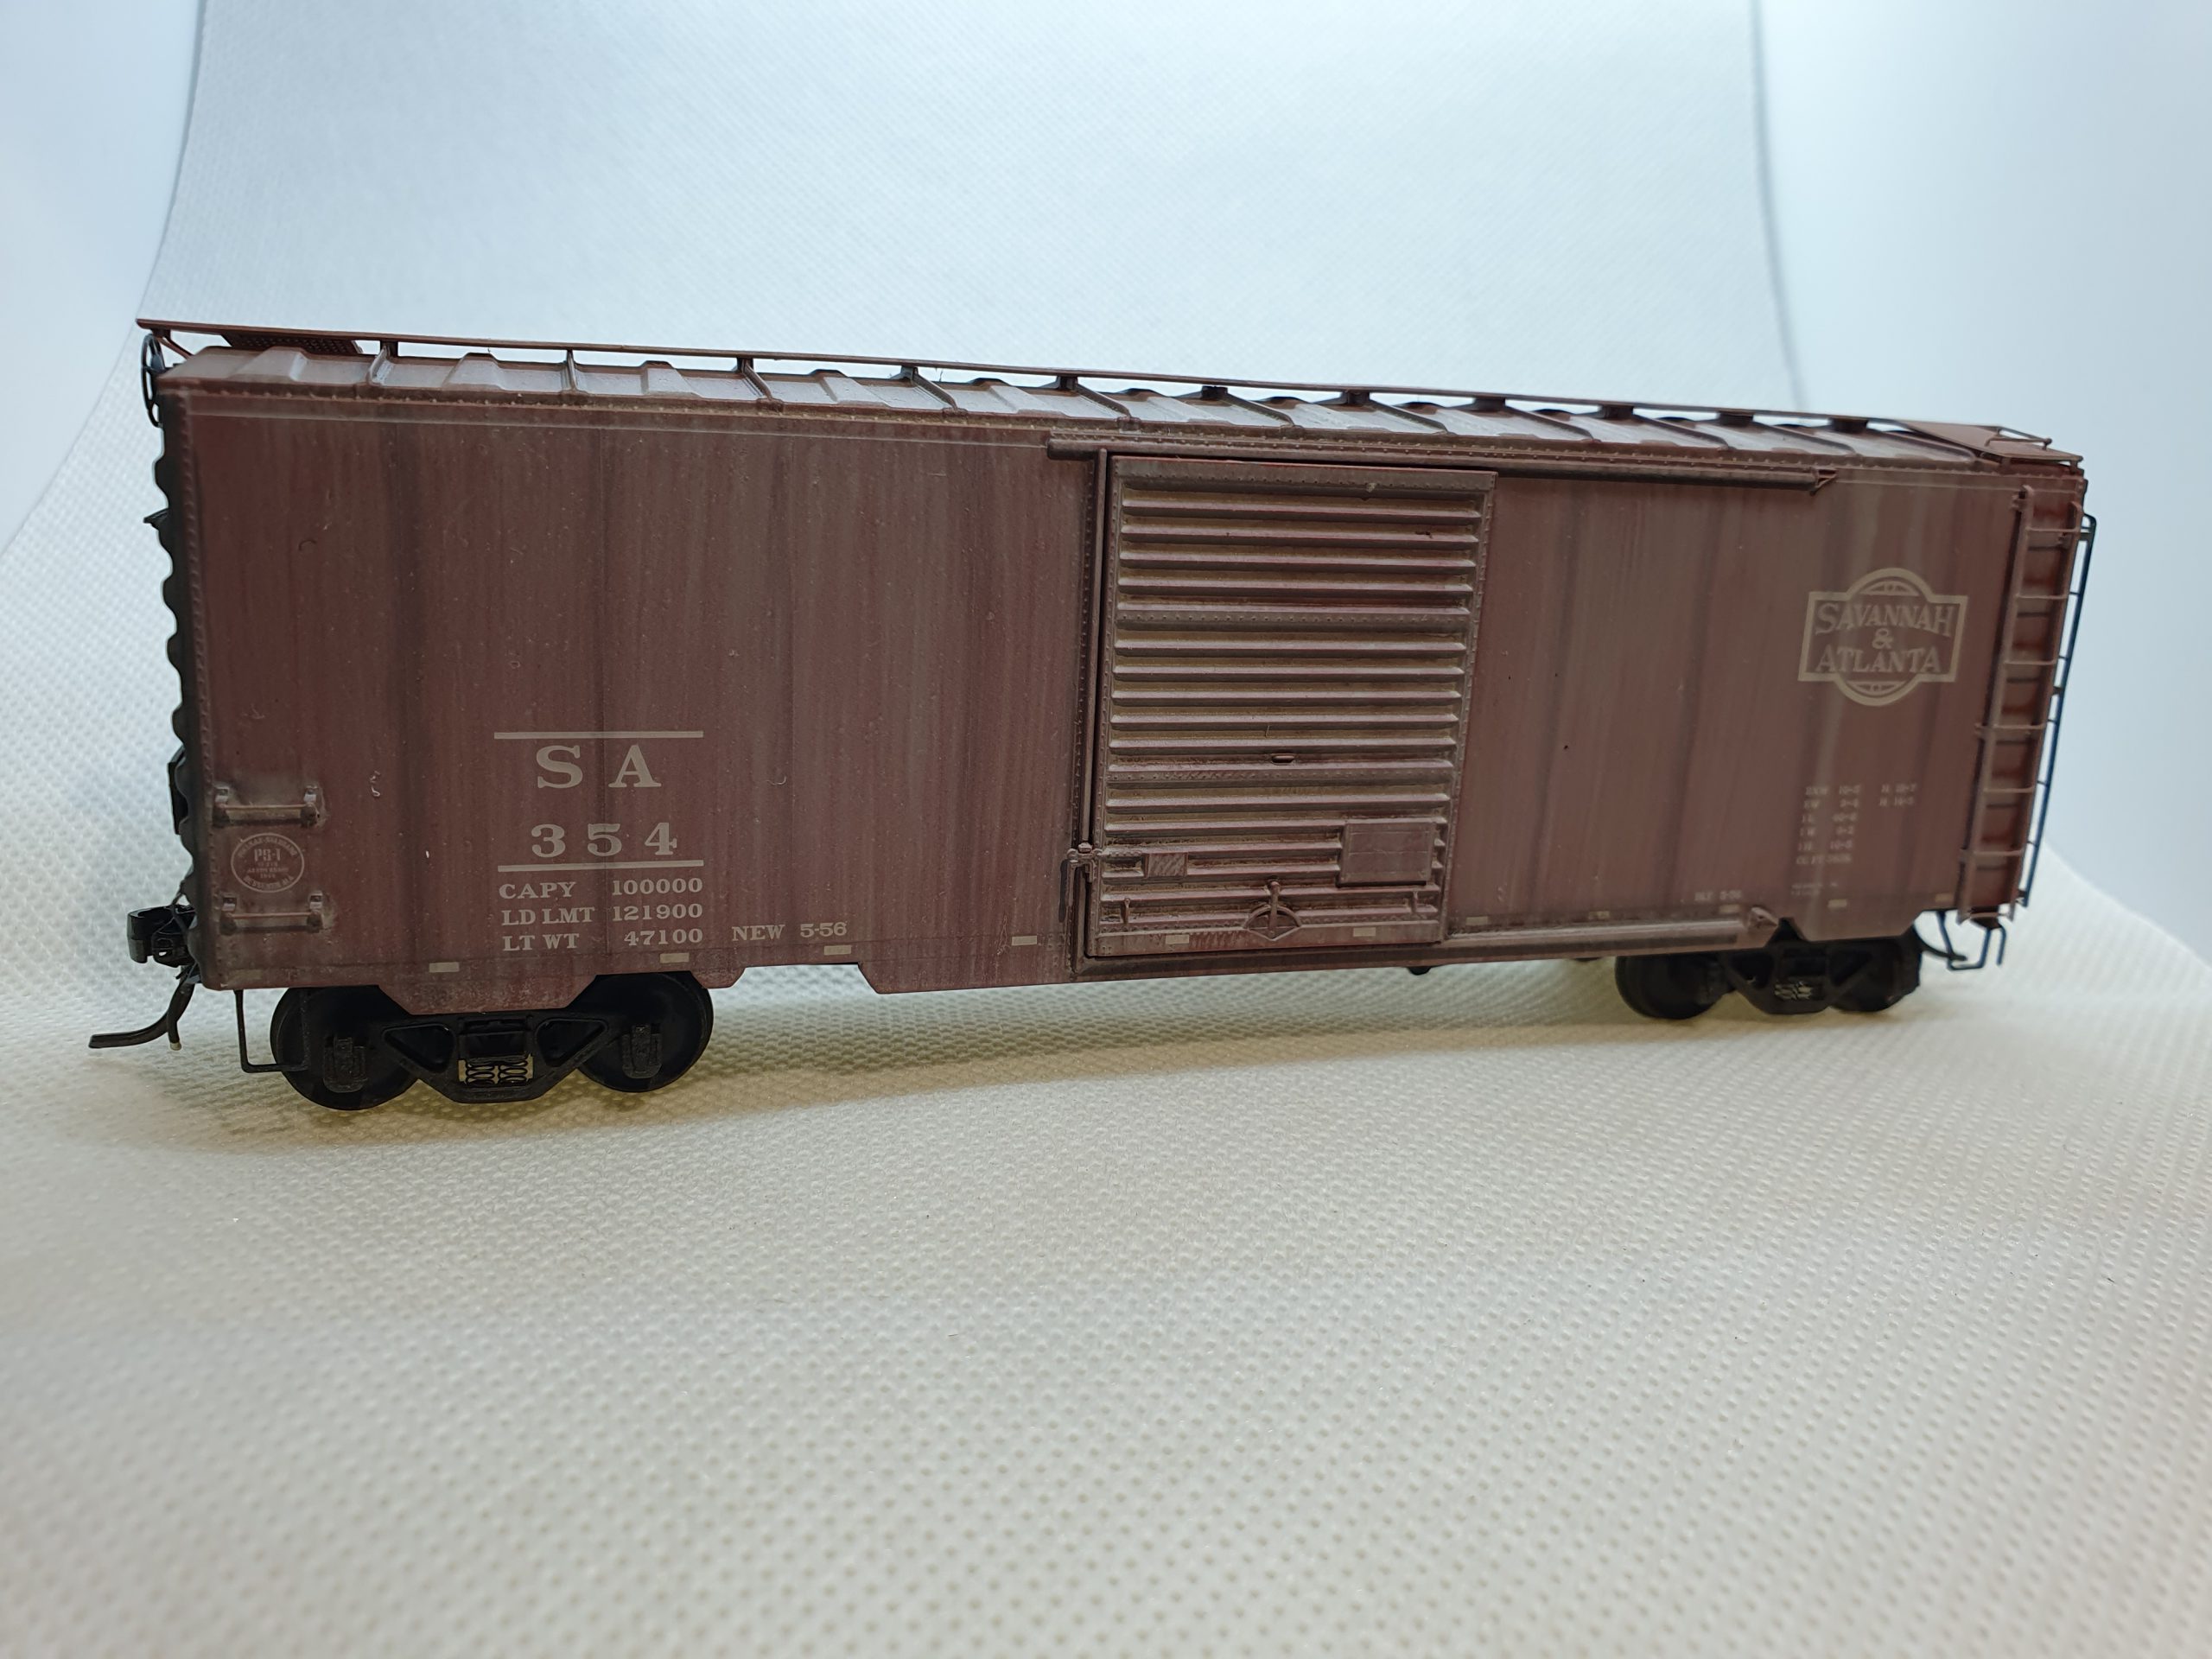
Weathering – SA354
Kadee PS-1 car, probably in kaolin service
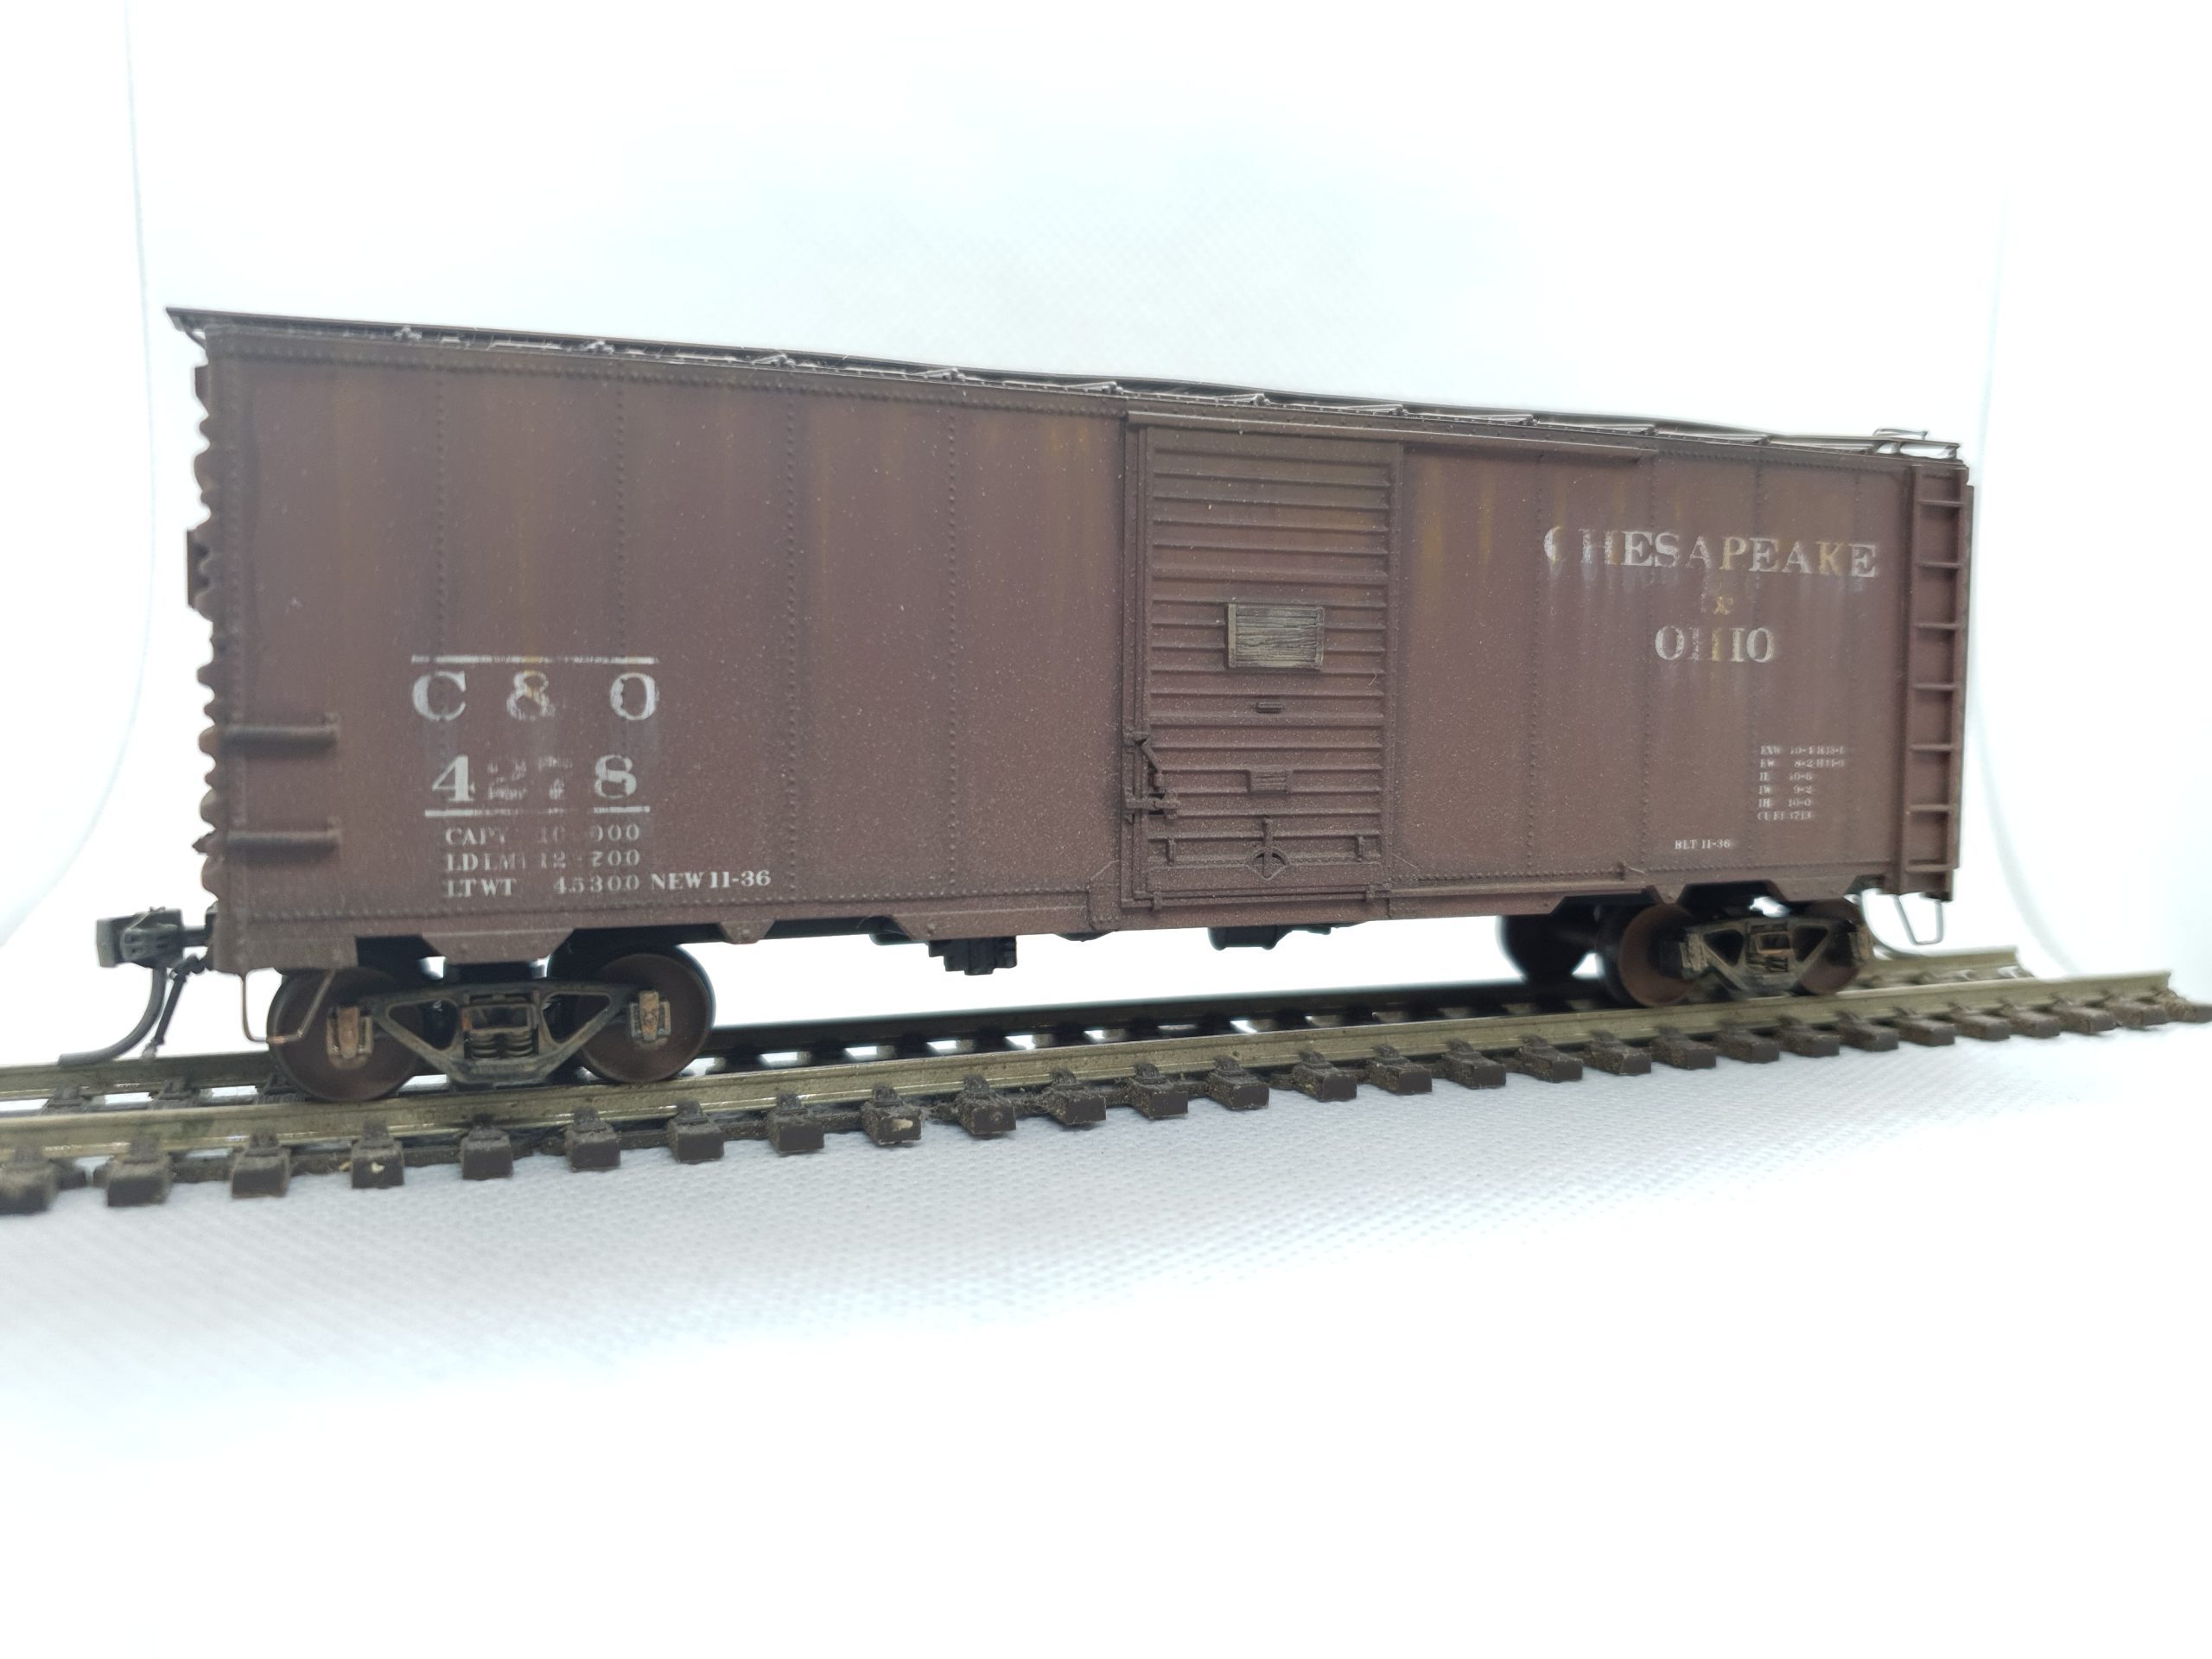
Weathering – C&O4278
Accurail – replaced stirrups, brake wheel and rook walk
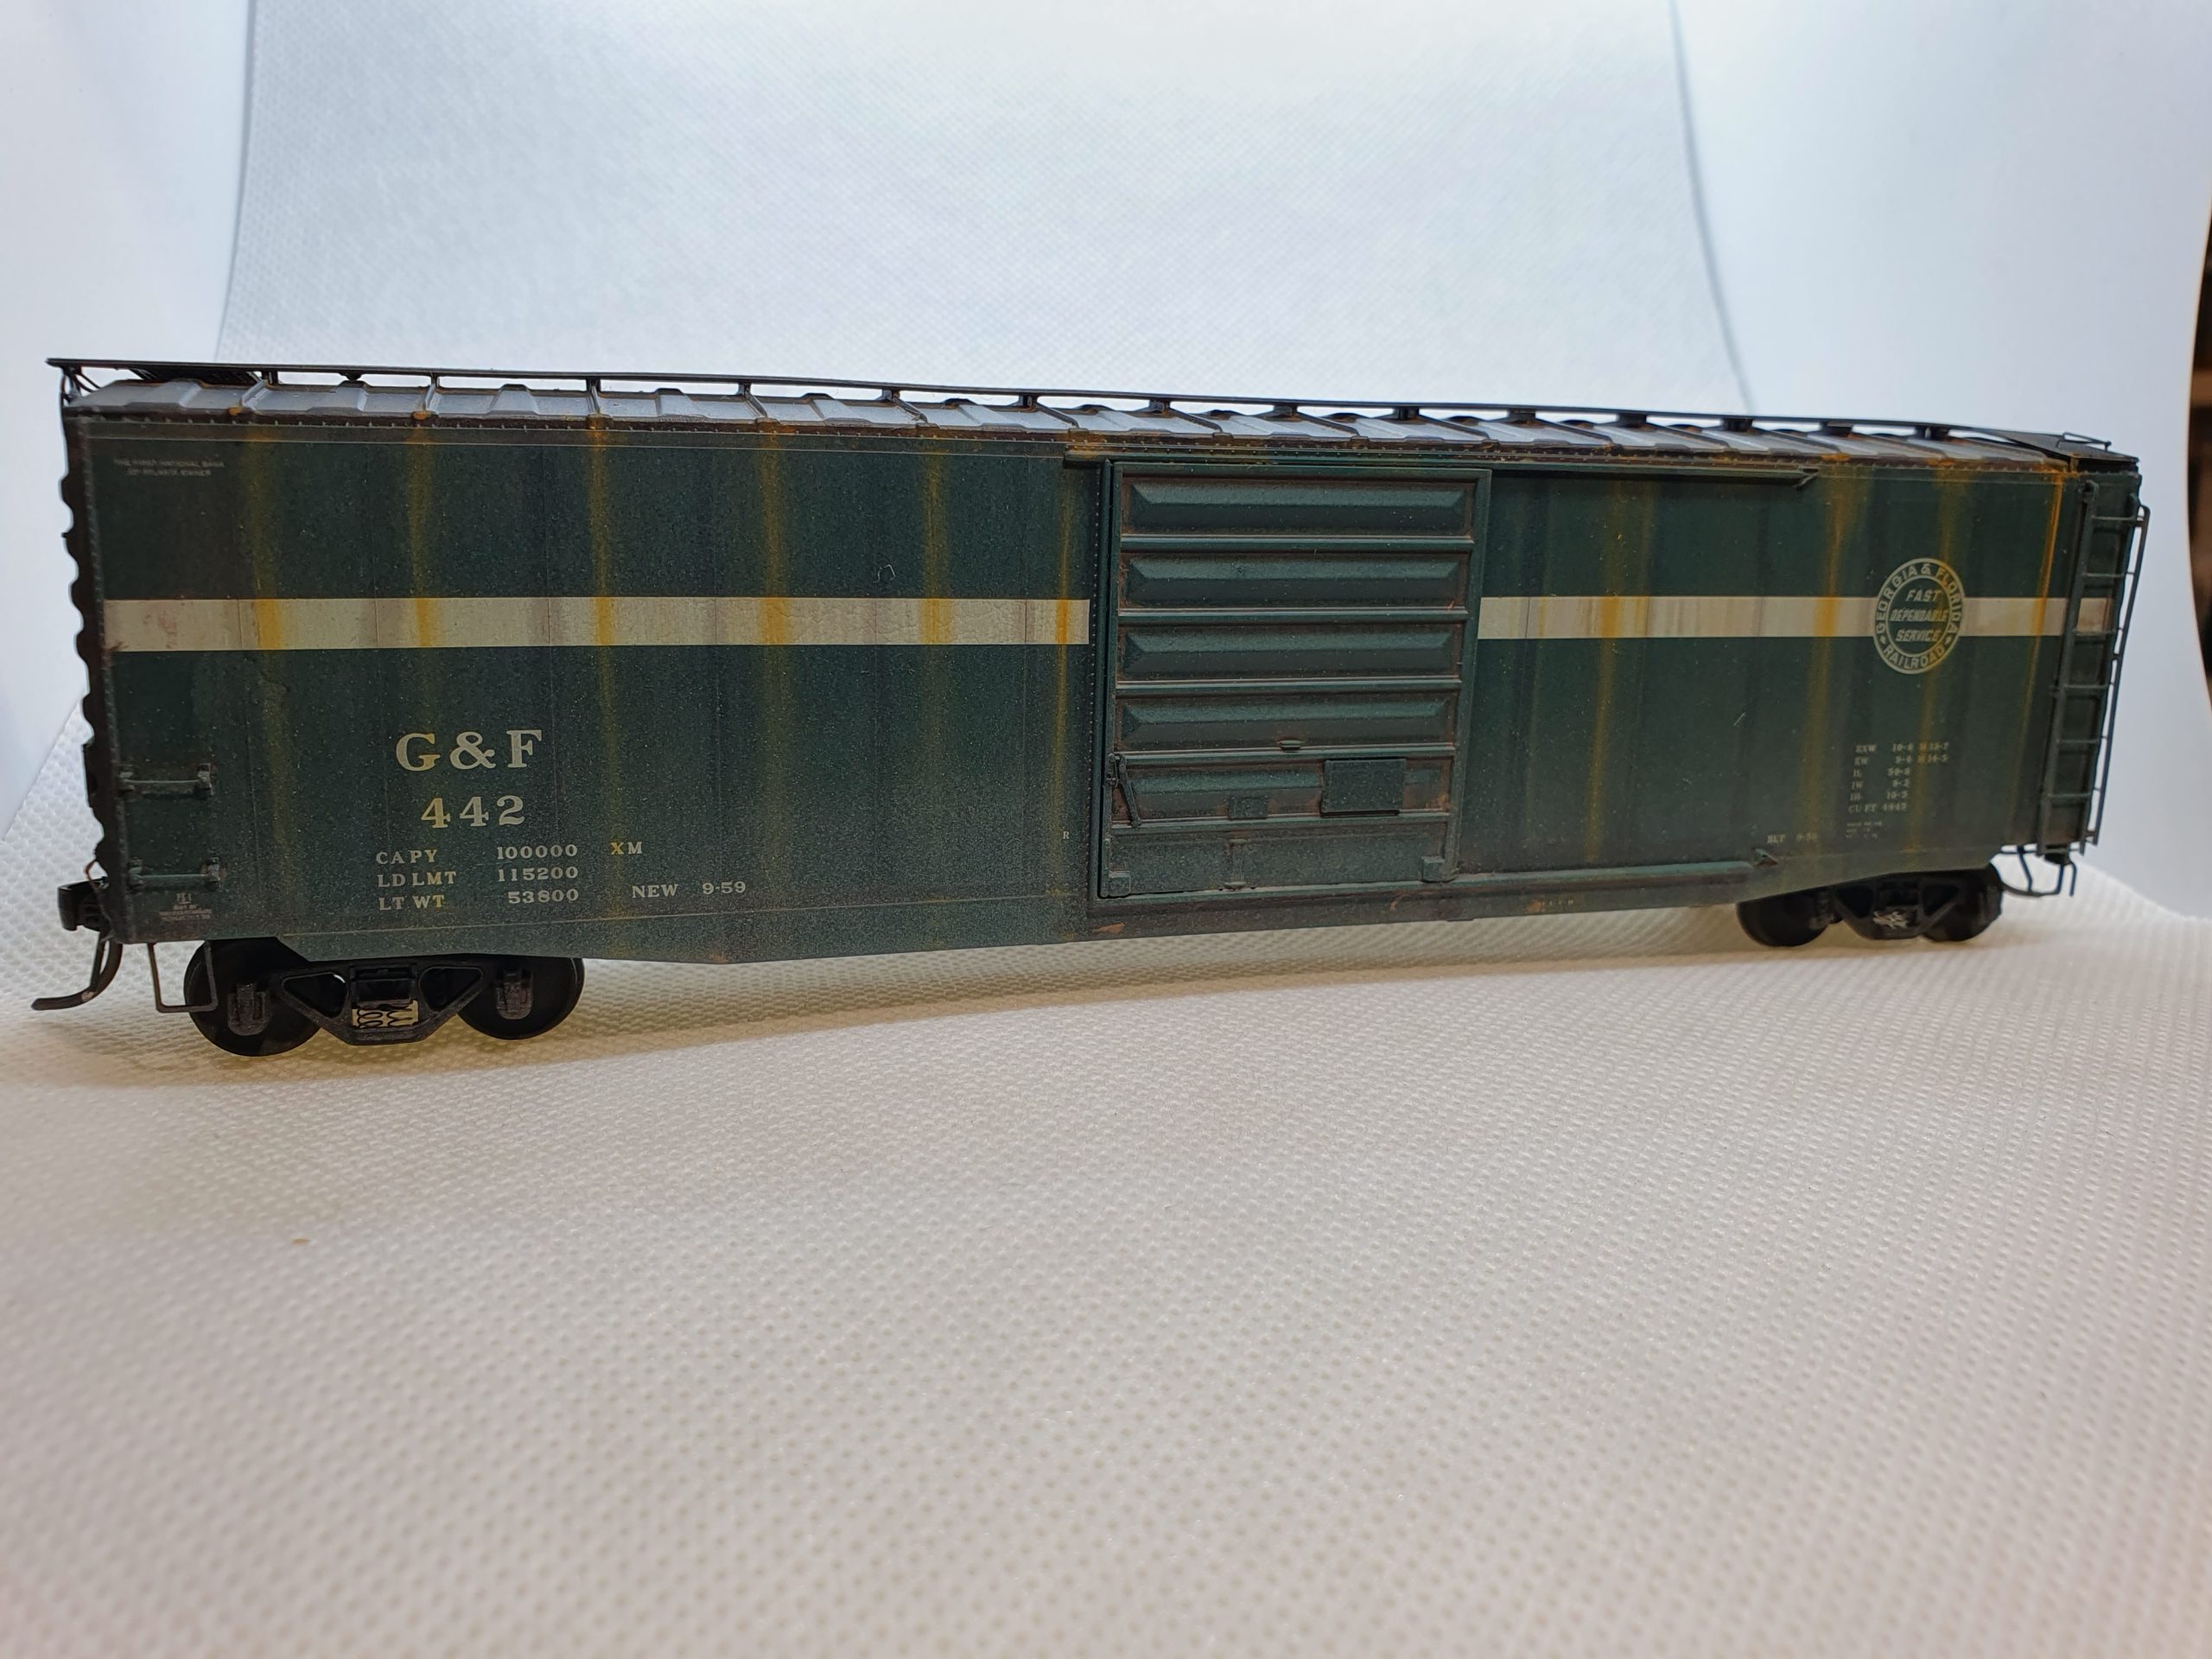
Weathering – G&F442
Kadee 50′ PS-1 car. I bought this second had and poorly weathered. I’m very pleased with what I was able to recover.
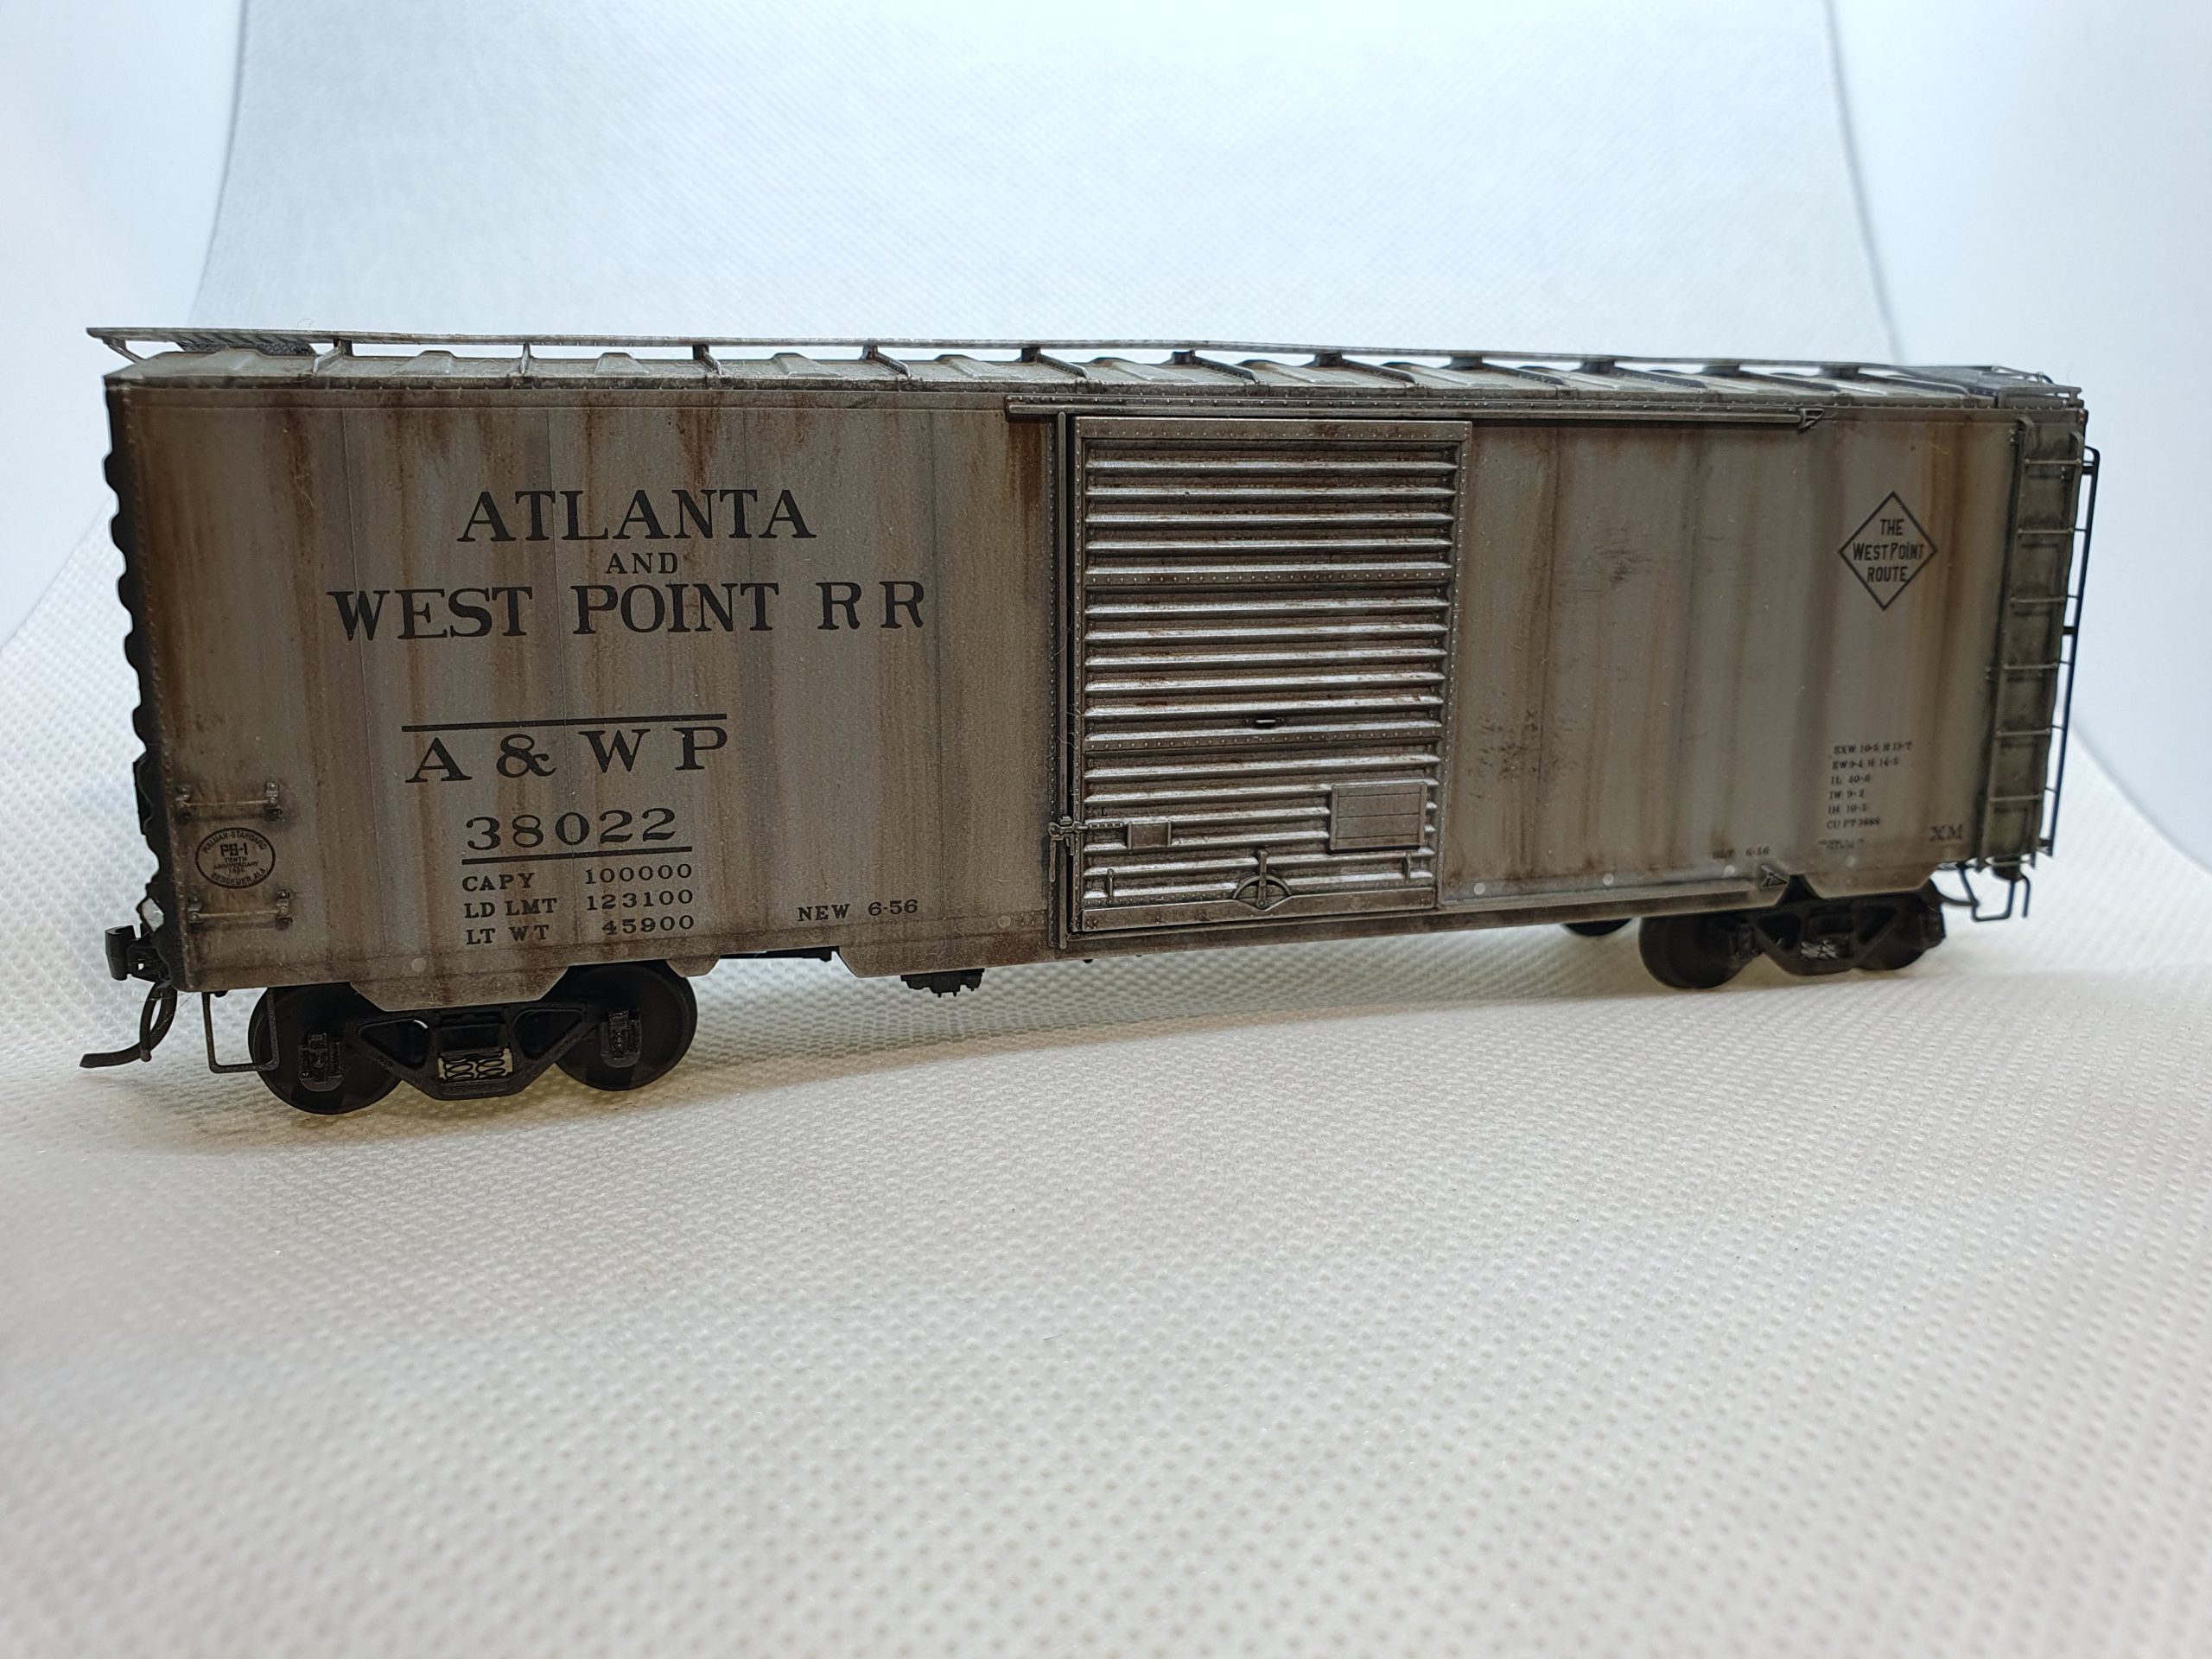
Weathering – A&WP38022
Kadee PS-1 car. This was not faded as it’s an aluminium-clad car