Ballasting
The art of ballasting track can make or break a layout in two ways: It can interfere with good running; it can simply not look ‘right’. I’ll share my approach which has worked well for me in recent times.
Ballasting track
Ballasting can have a significant impact on the look and operation of a model railroad. Getting it ‘right’ takes patience and practice.
The Look
Nothing beats studying prototype photographs to provide insight into the look and feel of the railroad you’re trying to model. From that you can determine what products and materials might work for your situation. The below image was used to inform my Southern Railway 1966 layout. Of note:
- Ballast below the ties
- Use of relatively fine grade ballast
- A bend of grey and buff tones in the stone used.
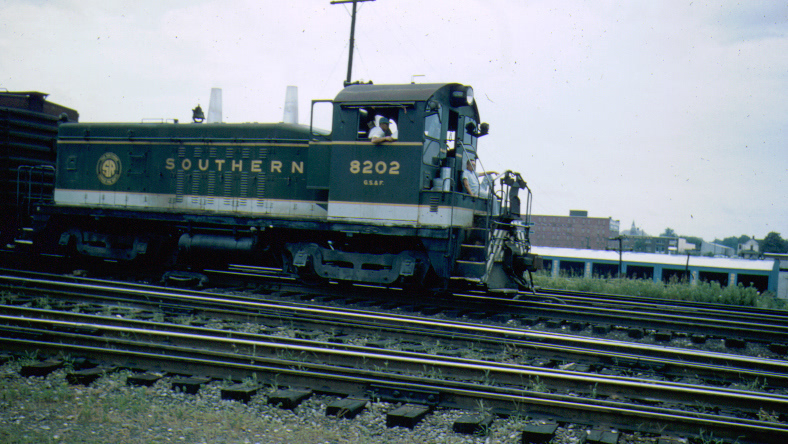
Carefully study the ballast… (Click to Enlarge)
Ballast Selection
Woodland Scenics ballast is available in my region. Other options are generally harder to source. Woodland Scenics offers a good range of colours and grades/sizing, particularly for HO Scale. Temptation is to think ‘medium’ ballast is for HO scale. That is not always the case. For my situation ‘fine’ ballast was a much better fit. This was confirmed when I scaled the ballast in the photograph and compared my findings with Woodland Scenic’s technical data (below).
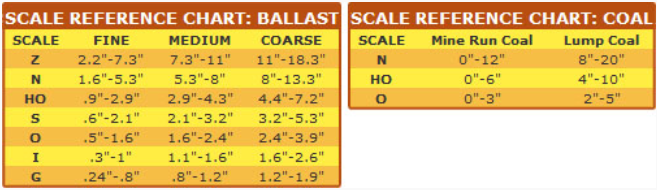
Woodland Scenics – Ballast Grading (Click to Enlarge)
Colour Selection
Ballast, being a naturally occurring material, is rarely a single colour. What’s more, colour (and size) can vary depending upon location and the state of maintenance on the line being modelled. Mainline ballast tends to be larger and often in better condition than passing and industrial sidings. I did not vary the size of ballast I used. I did though blend colours and even some ‘dirt’ to gain texture and colour variation.
Southern Railway 1966 - Ballast Blending Ratios
|
Track Type |
Mix |
Mainline |
2 parts Woodland Scenics Light Gray Fine 1 Part Medium Greywacke – My own local source 1 Part Fine Greywacke – my own local source |
Passing Sidings |
10 Parts Woodland Scenics Gray Fine 3 Past Woodland Scenics Light Gray Fine 5 Parts Woodland Scenics Buff Fine 5 Parts Medium Greywacke – my own local source |
Cordele Yard |
2 Parts Woodland Scenics Buff Fine 1 Part Woodland Scenics Light Gray Fine 3 Parts Woodland Scenics Gray Fine 1 Part Scenic Express Dirt |
Other Sidings |
2 Part Woodland Scenics Buff Fine 2 Parts Scenic Express Soil 1 Part Woodland Scenics Gray Fine |
When to Apply Ballast
There’s an ongoing debate in the hobby as to when ballast should be applied. I’m a firm believer in ballast nearly first i.e. after basic terraforming and soil basing layering/colouring but before any green textures are applied.
Applying Ballast
I’ve used various different application devices over the years to apply ballast with only limited success. The simplest method is still the best in my opinion:
- A teaspoon to carefully scoop ballast from the source and apply to the track without spilling it everywhere
- A very soft-bristled brush to carefully spread the ballast. I use a ‘fan’ brush for my last detailed brush
- A significant modicum of patience to carefully brush ballast from ties (if that’s your desired effect) frogs and rails. If you’re not happy, start again. Nothing too much lost.
For my switches, because I mount them on 6mm plywood before installation, I can ballast them at my workbench before installation giving me total control over where ballast is applied.
Gluing Ballast
Another area of contention in the hobby. Basic principle: ‘wet’ the ballast and carefully apply dilute glue.
‘Wetting’: There are a number of wetting products/processes available. The best solution I have so far found for ballast, is spraying a fine mist of isopropyl alcohol (IPA, 90%+ concentration). NOTE: IPA is highly flammable and therefore remove all possible ignition sources and ventilate well. The spray mist needs to be fine and you need to start from 600-900mm back to avoid blowing the ballast, working inwards until the ballast is soaked.
Gluing: Immediately afterwards, whilst the ballast is still ‘wet’, applying dilute glue. The best glue I have found so far is Artists Binder Medium, diluted 50-75% with demineralised water and a drop of dishwashing detergent. This is applied with a 10ml dropper on to the tops of ties by resting the tip of the dropper on, or very close to, each tie and gently squeezing the bulb. Great care needs to be taken not to squirt the glue with any pressure. Drizzle is the closest word I can think of. The glue should be applied until it floods the ballast a milky white – no more. Tiny pieces of ballast may rise to the top and float on the surface. This is unavoidable. Do not be tempted to work the ballast during this process. It will end in disaster. You can clean up any mistakes later.
There are three distinct advantages of using Artists Binder Medium:
1. It’s flexible, rubbery almost. This offers significant sound-deadening properties.
2. It’s generally cheaper than Artists Matt Medium and just as effective.
3. It can be easily ‘released’ i.e. unglued, with warm ‘wet’ water.
Clean up
Once the glue has dried – usually after about 24 hours – there will be unavoidable loose stones adhered to sleepers and the sides of rail. Scrape these away with a small screwdriver or similar.
Weathering
In addition to applying different ballast colours, ballast can also be weathered using powders and chalks to symbolise ash, diesel, spills, brake dust, staining, etc.

Southern – Cordele Runaround
Southern Railway – Adding turnouts to Cordele Yard
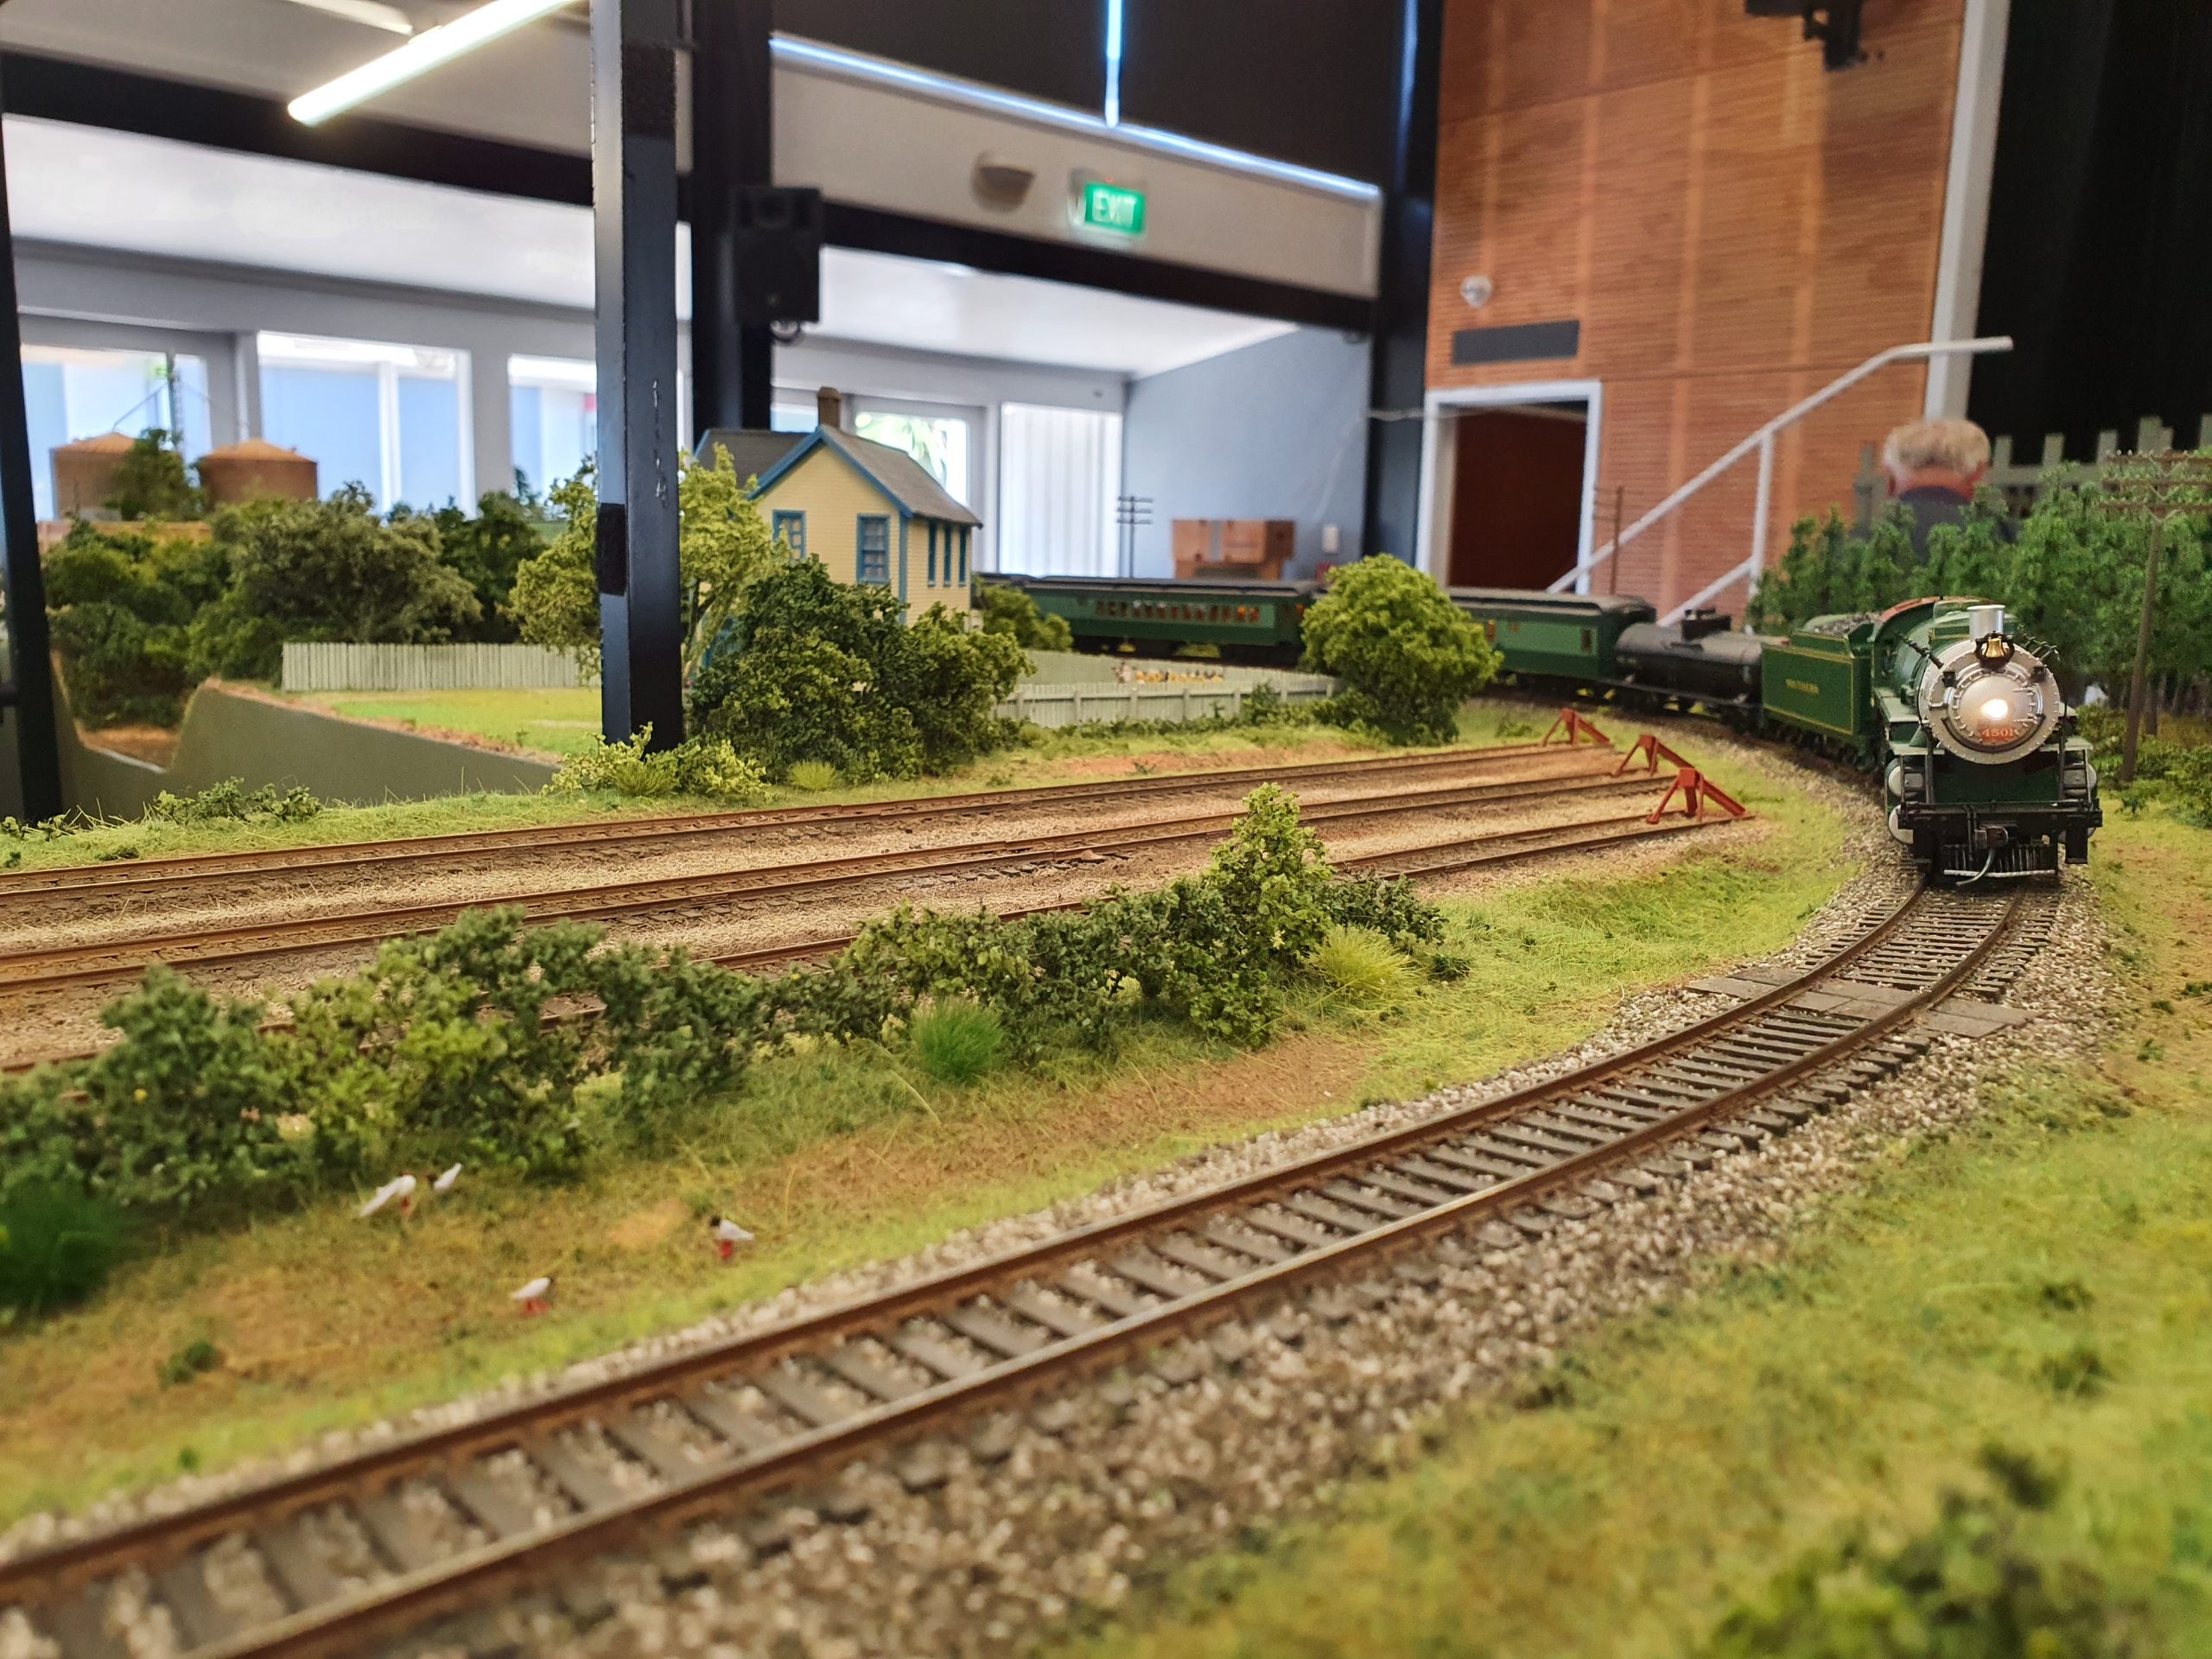
Southern – SOU4501

Southern – Pitt
Southern Railway at Pitt

Southern – SOU8201
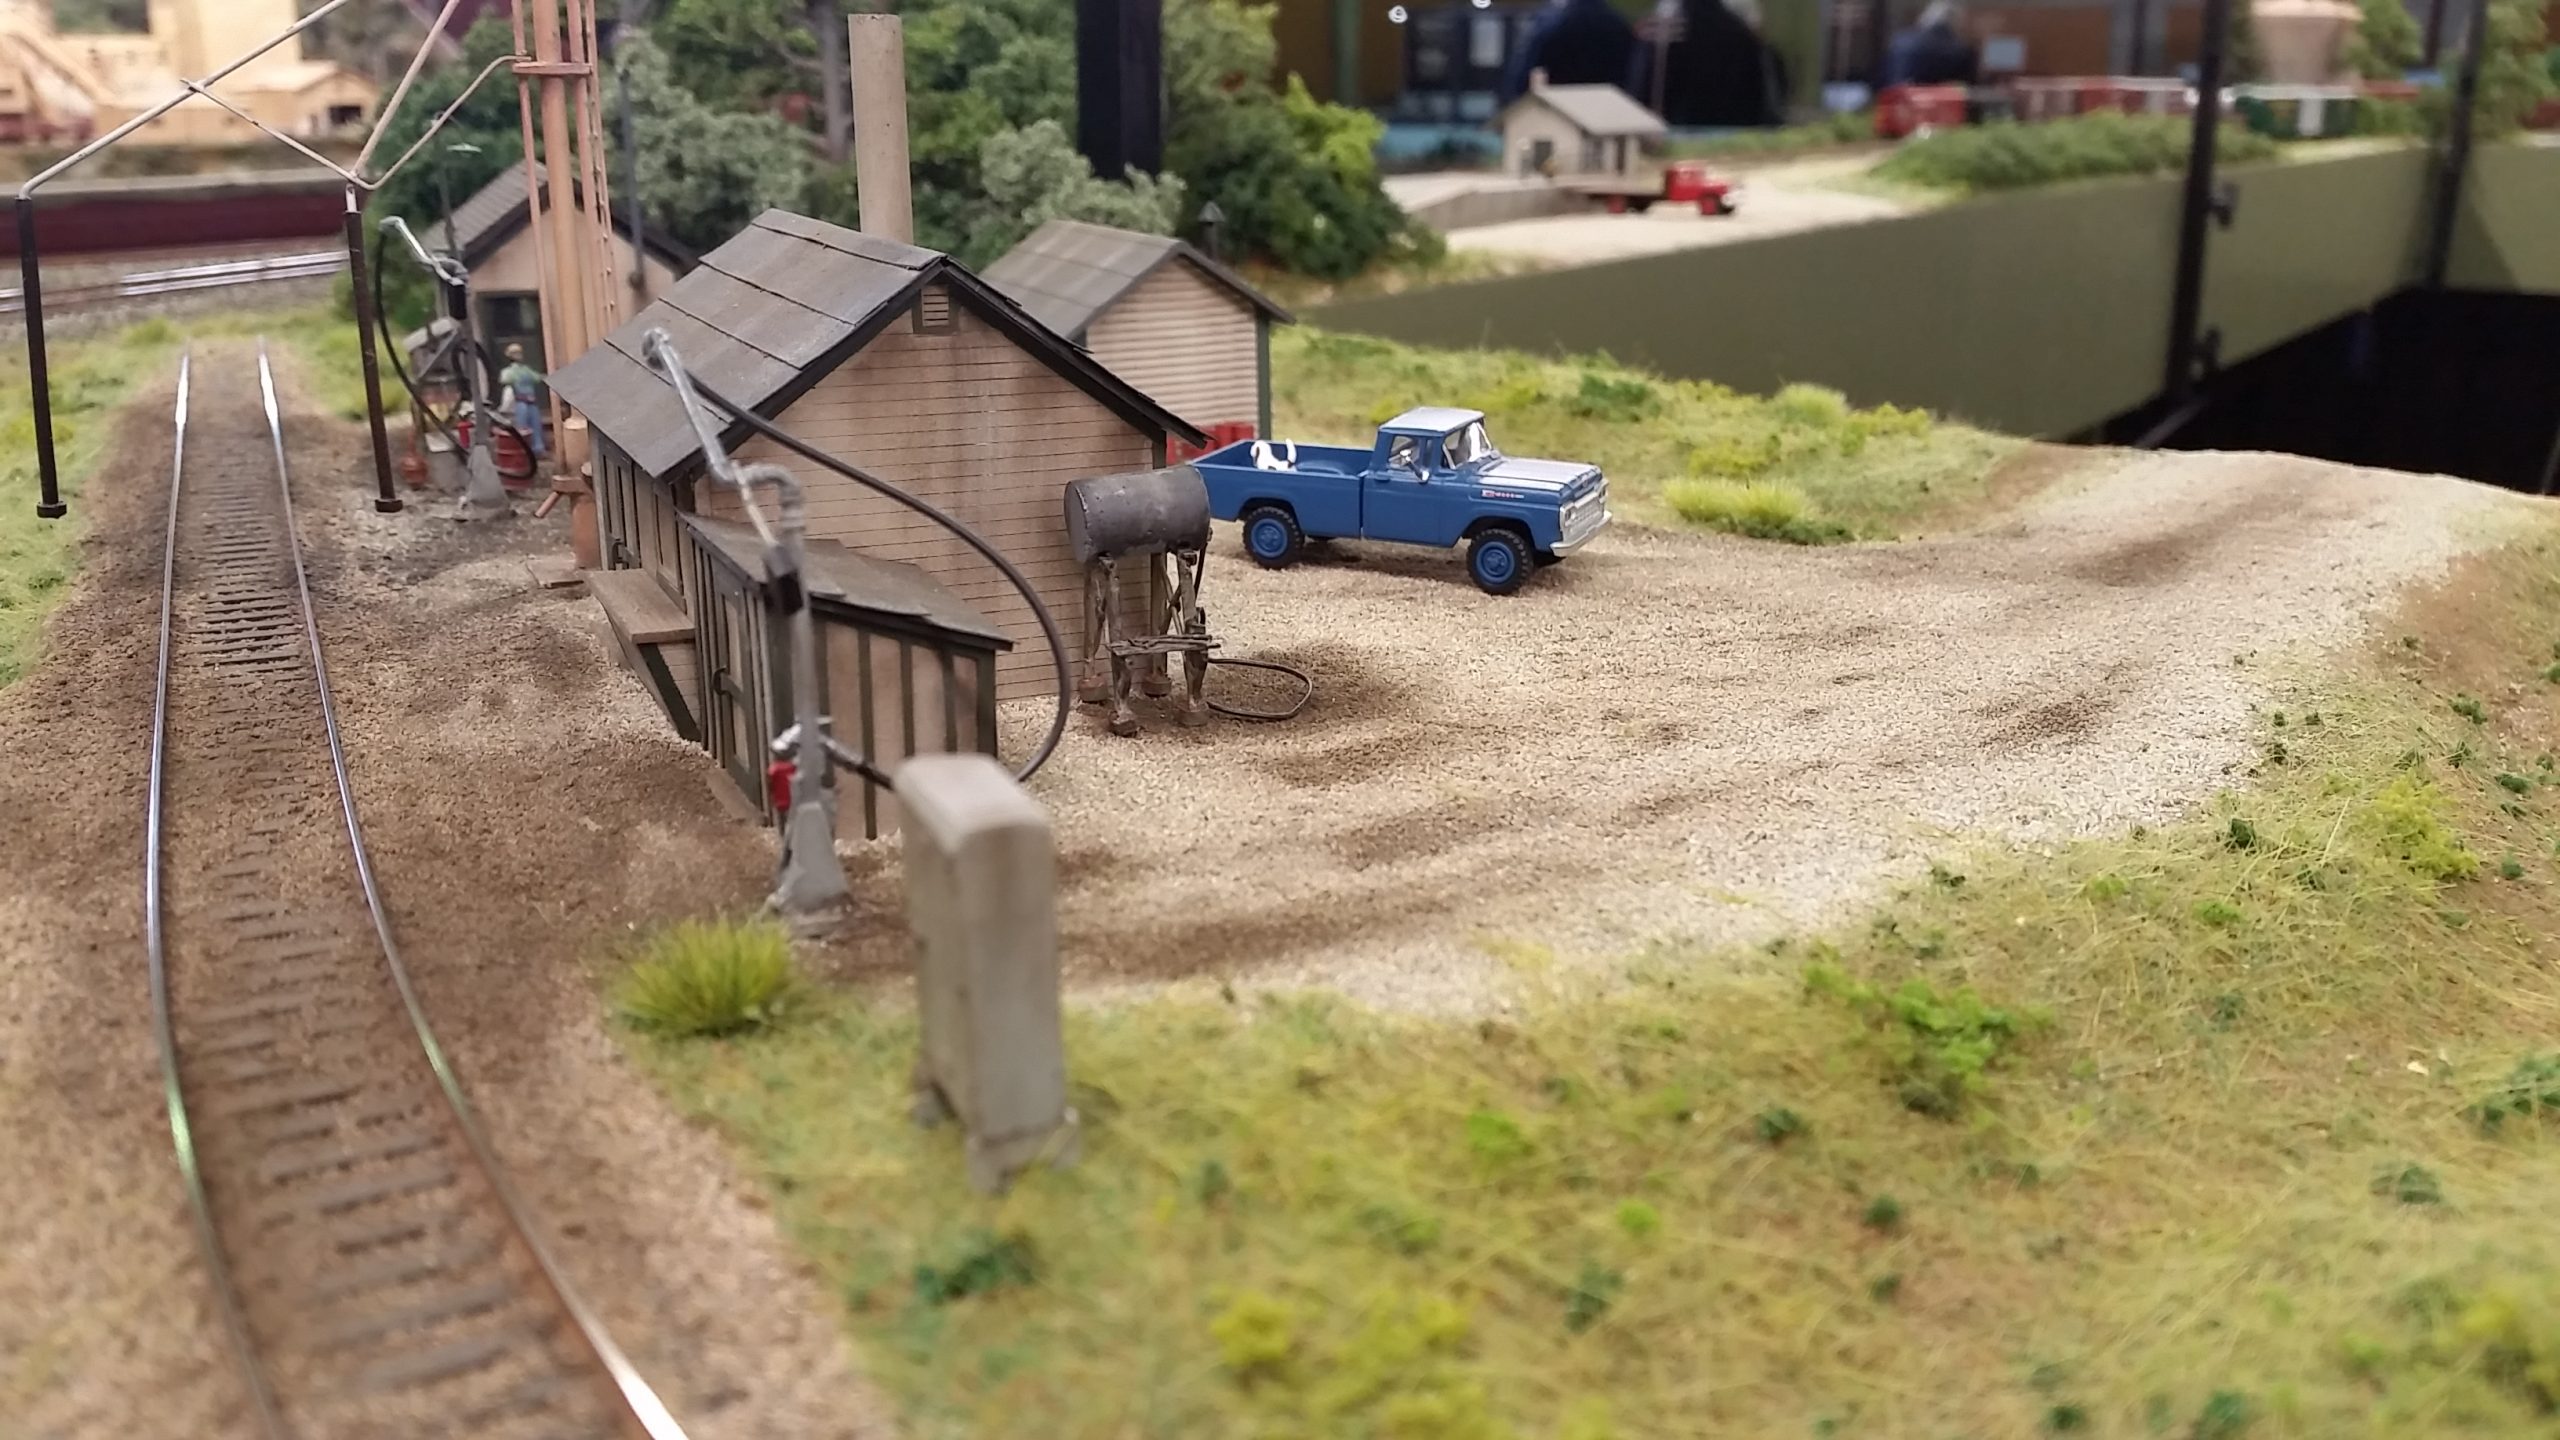
Southern – Engine Terminal

Southern – Freight House

Ballasting a Switch
Switch ready for ballasting
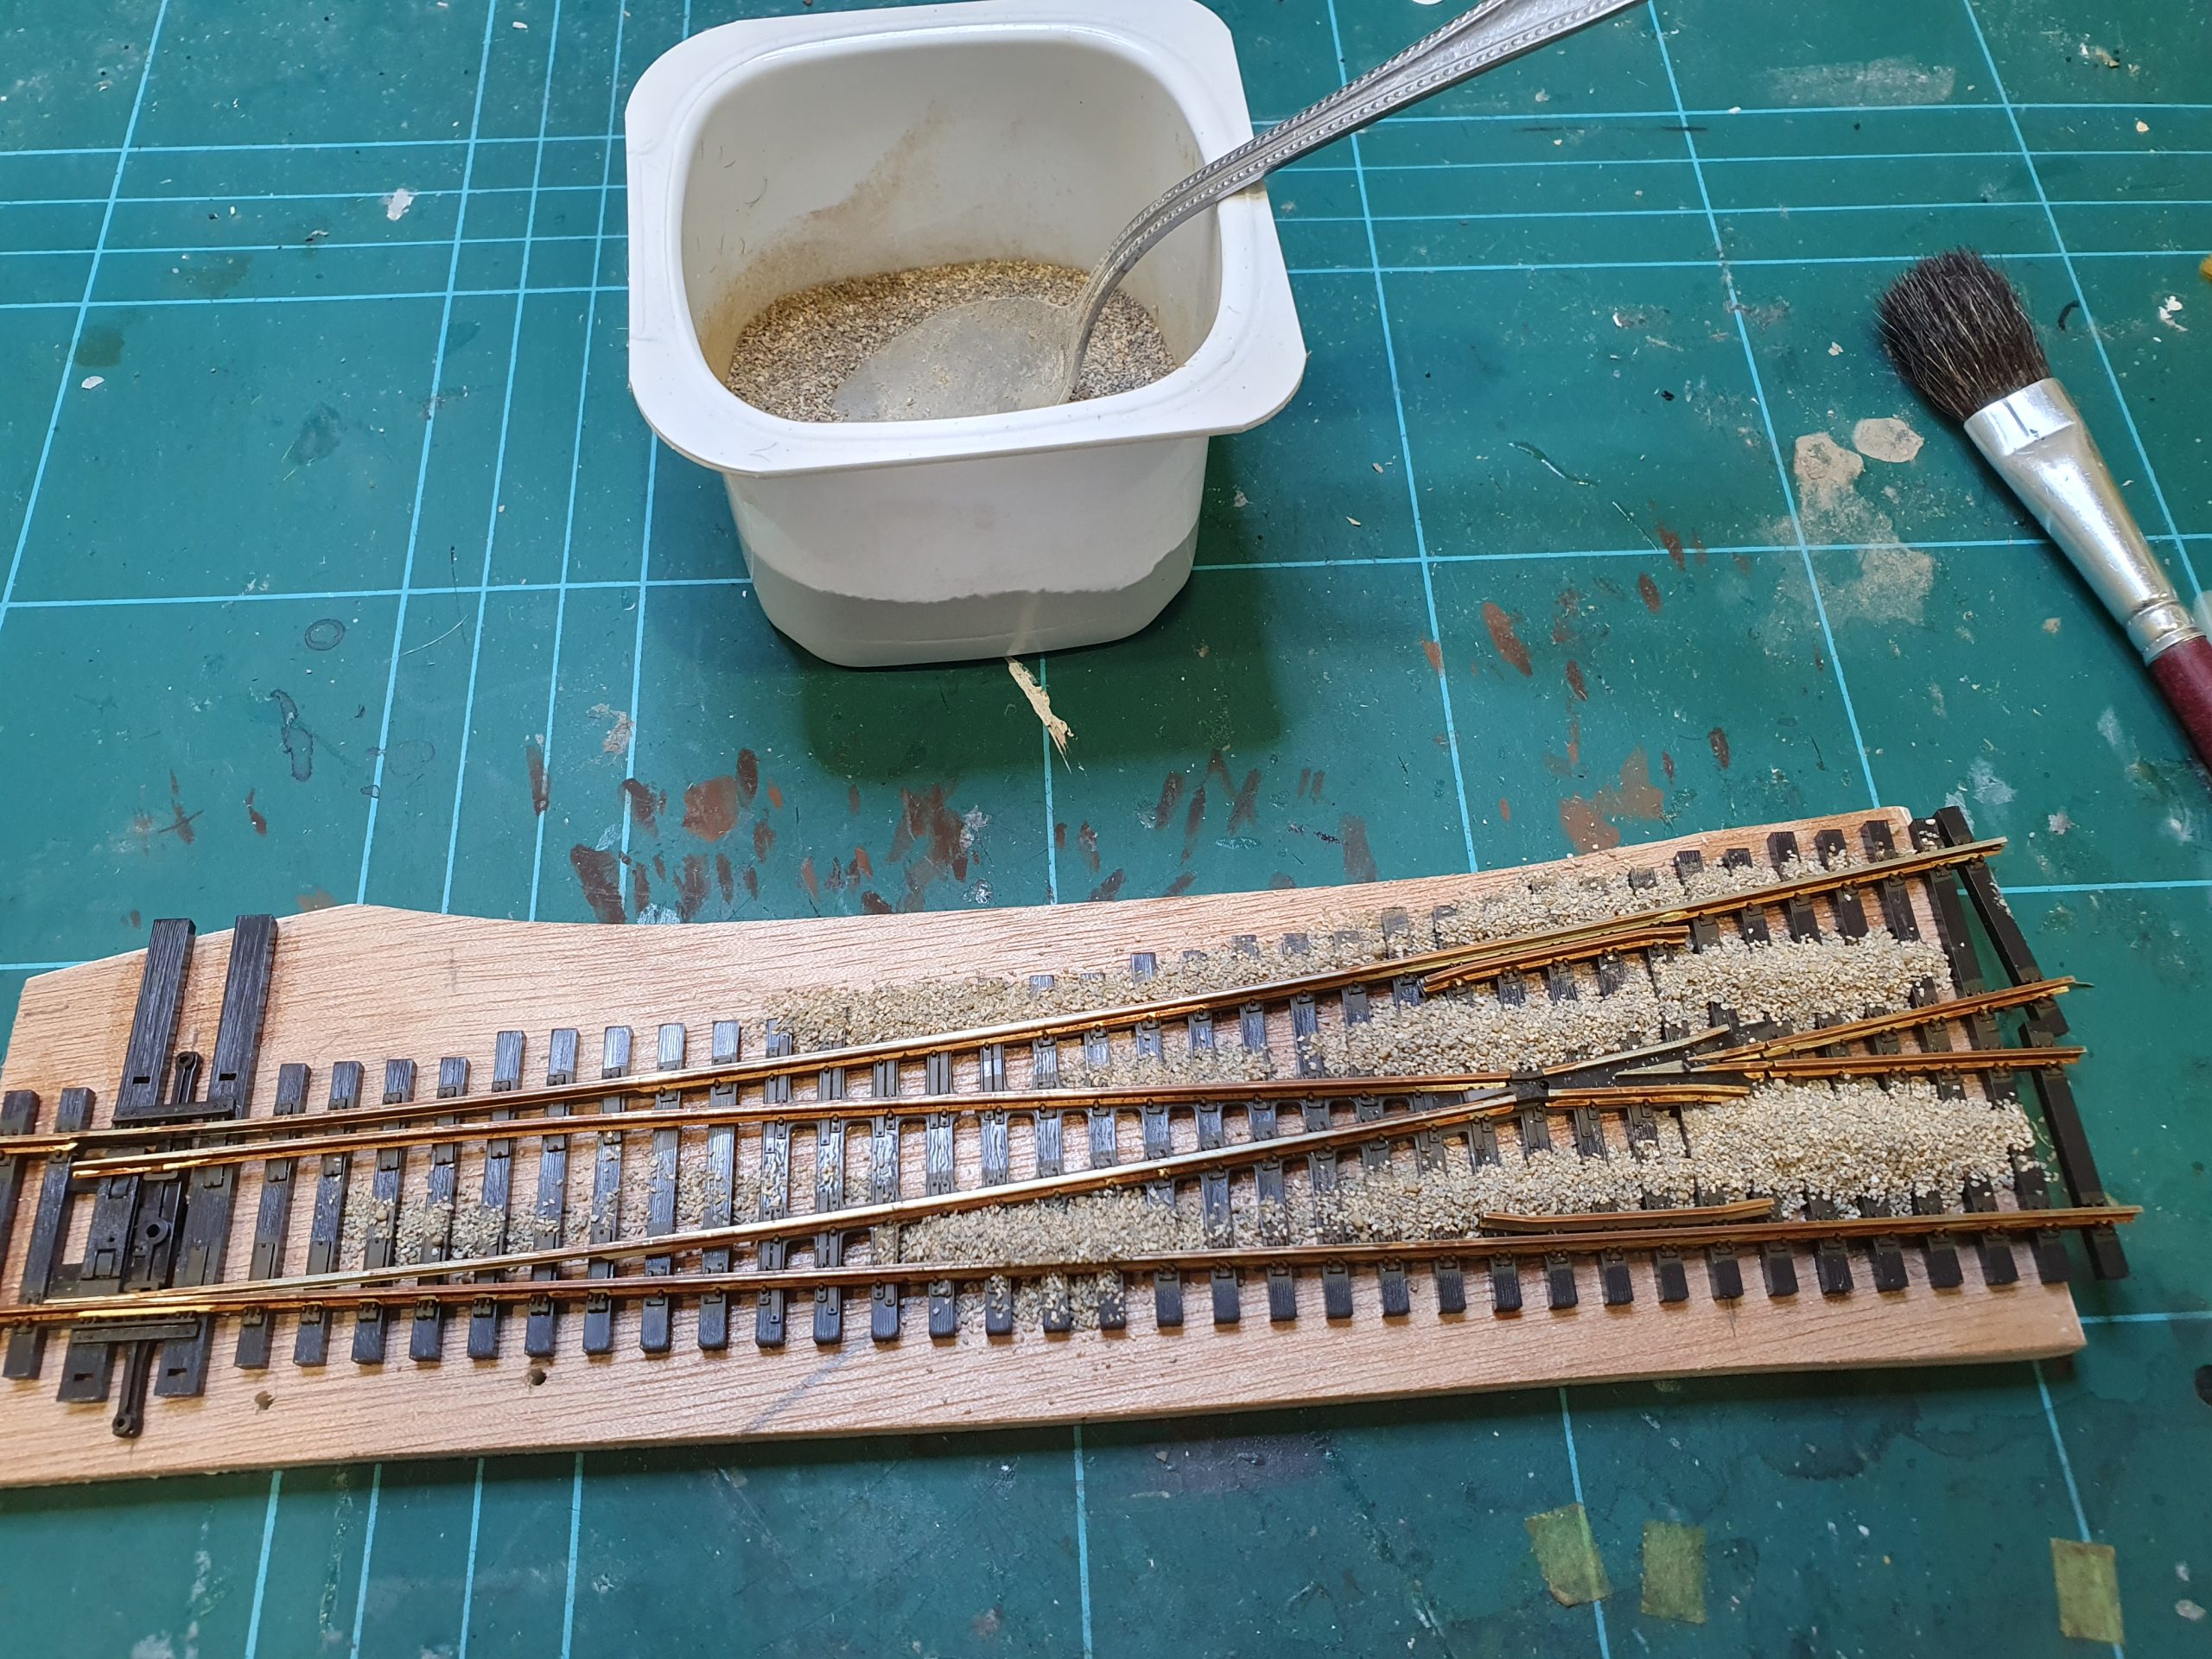
Ballasting a Switch
Applying ballast

Ballasting a Switch
Ballasted and reading for gluing

Ballasting a Switch
Sprayed with a fine mist of isopropyl alcohol

Ballasting a Switch
Flooded with diluted Artists Binder Medium
0 Comments